> ## Documentation Index
> Fetch the complete documentation index at: https://docs.crossmint.com/llms.txt
> Use this file to discover all available pages before exploring further.
# Branding Customization
> Customize the branding and theme presented to your users
 You can customize the branding of several aspects of the Crossmint experience. This includes the branding of the Storefront, Checkout tools, transfer API approval email, and even the purchase receipt email.
## Storefront
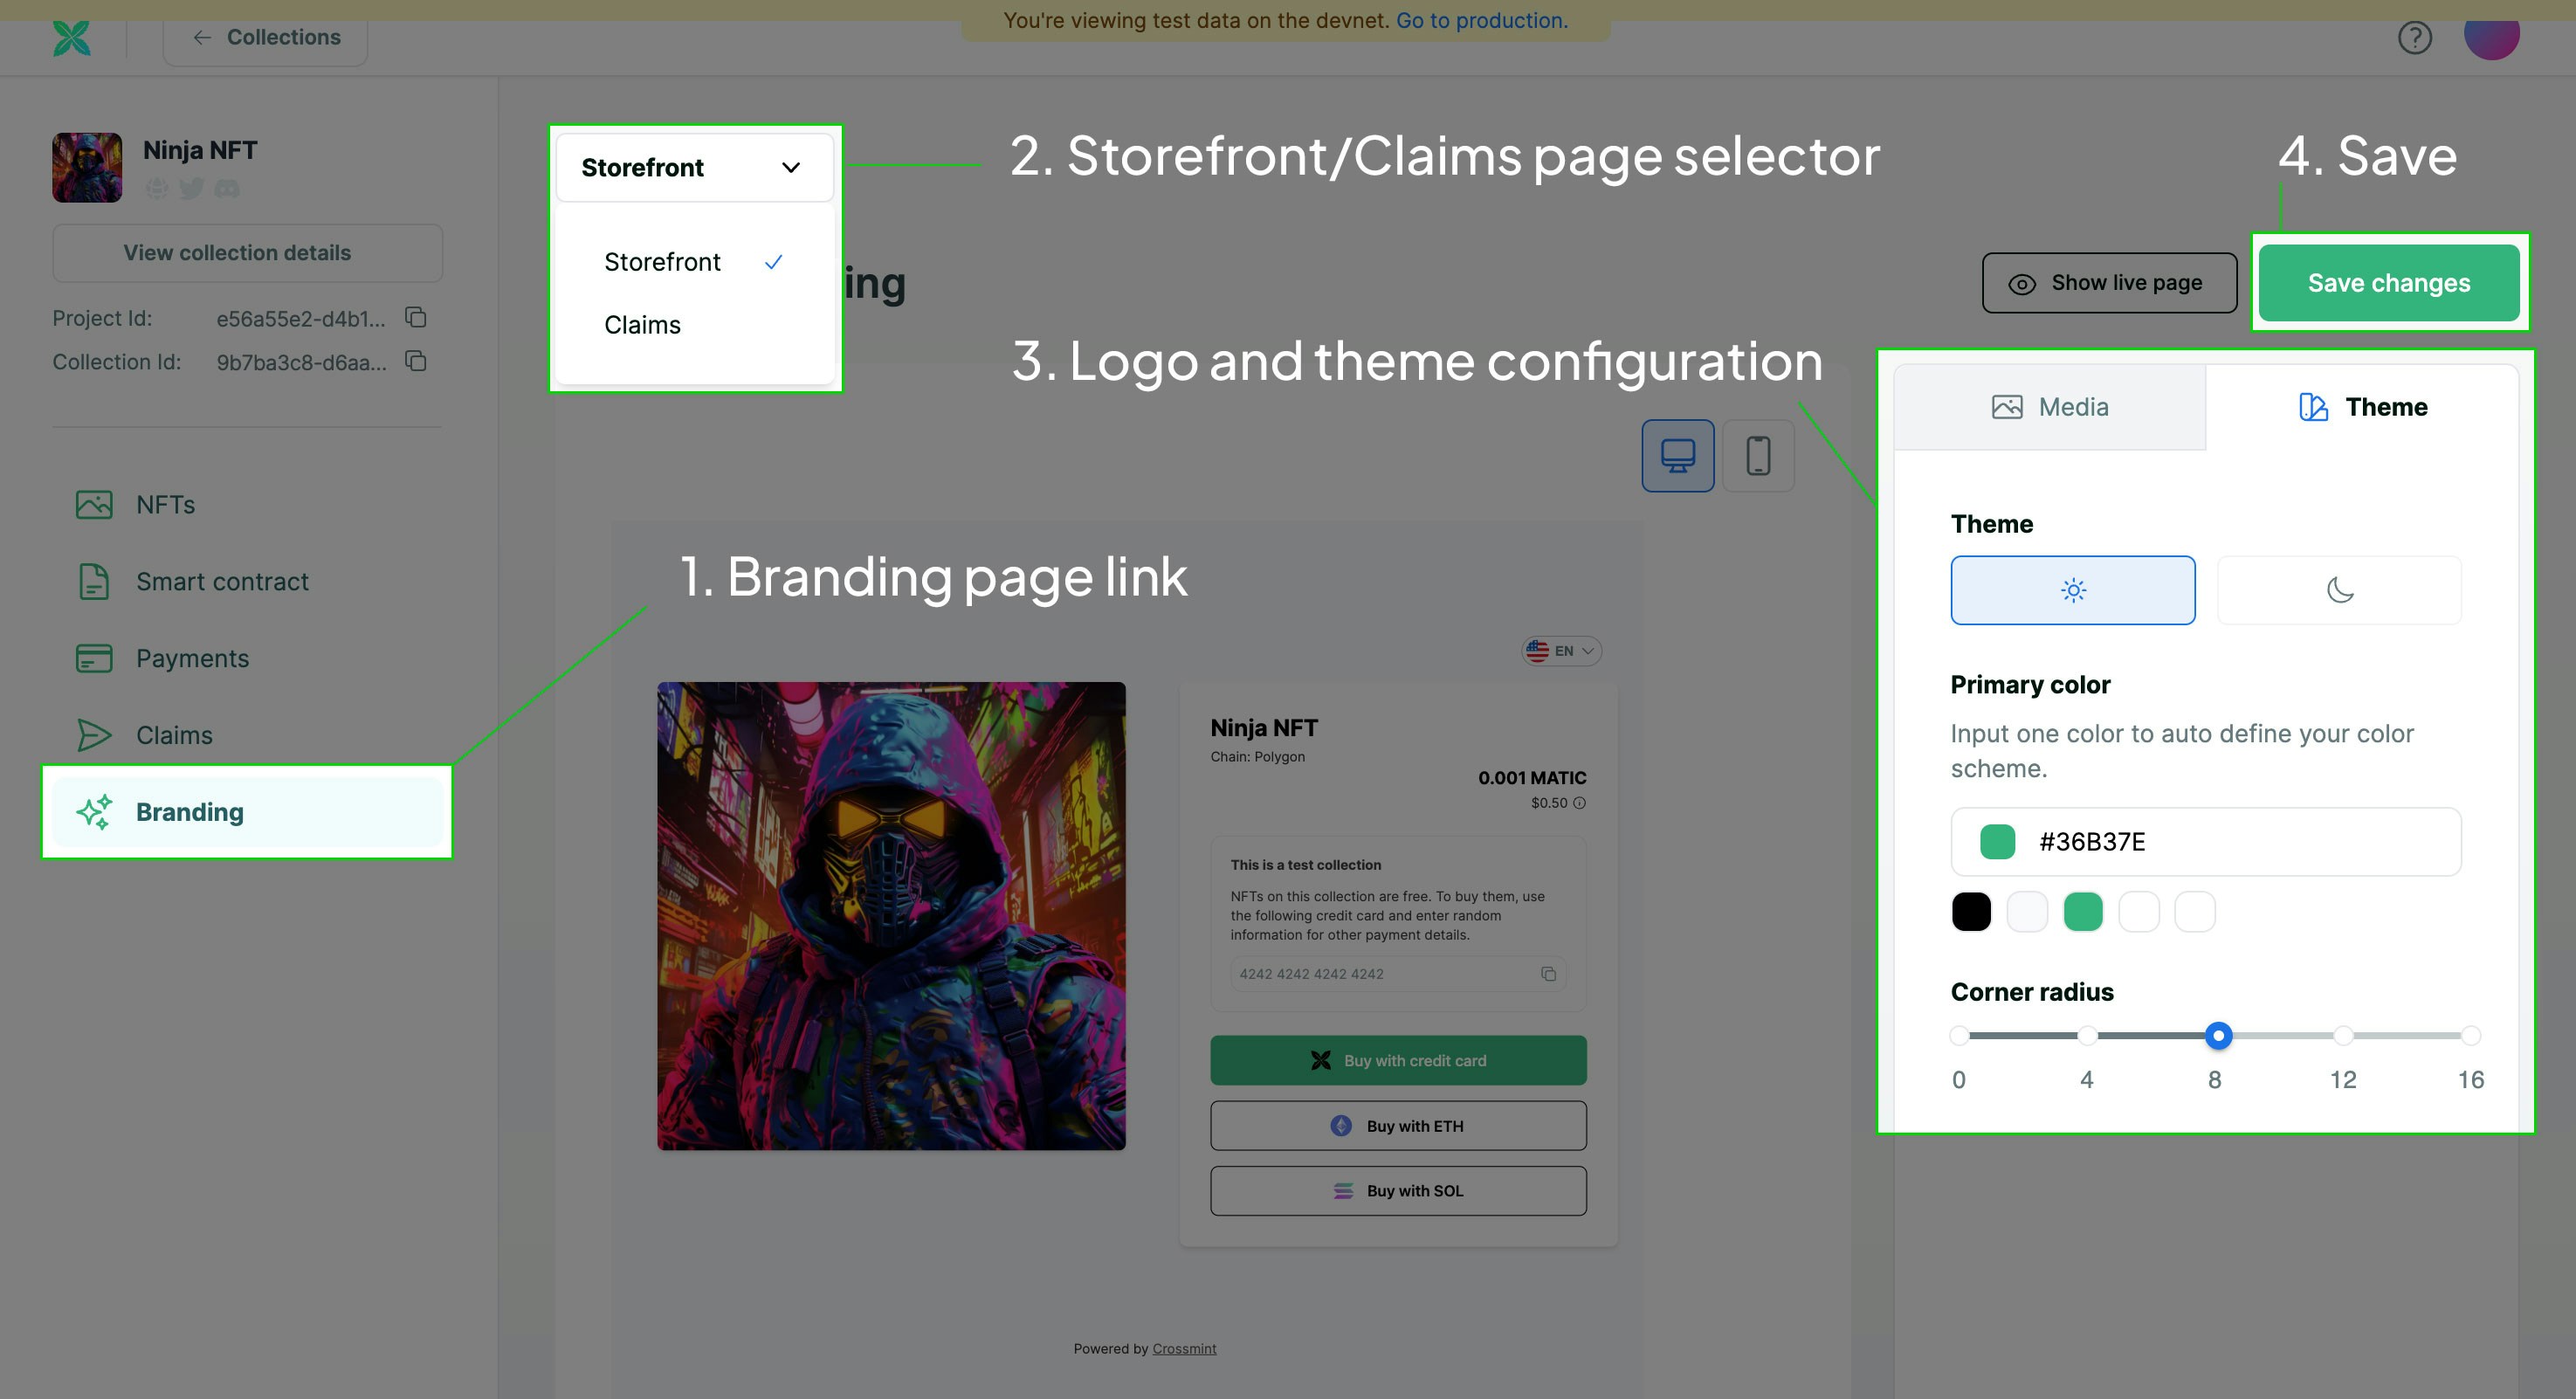
The No Code Storefront is configured within the Collection section of the developer console. To begin make sure you have a collection created that is compatible with the Storefront. You can find more info about collection compatibility in the [Storefront docs](/payments/storefront).
You can customize the following aspects of the Storefront:
* URL slug
* Logo
* Light/dark theme
* Primary color
To make these adjustments, navigate to a collection with the Storefront enabled.
You can customize the branding of several aspects of the Crossmint experience. This includes the branding of the Storefront, Checkout tools, transfer API approval email, and even the purchase receipt email.
## Storefront
The No Code Storefront is configured within the Collection section of the developer console. To begin make sure you have a collection created that is compatible with the Storefront. You can find more info about collection compatibility in the [Storefront docs](/payments/storefront).
You can customize the following aspects of the Storefront:
* URL slug
* Logo
* Light/dark theme
* Primary color
To make these adjustments, navigate to a collection with the Storefront enabled.
 ## Transfer API Approval Email
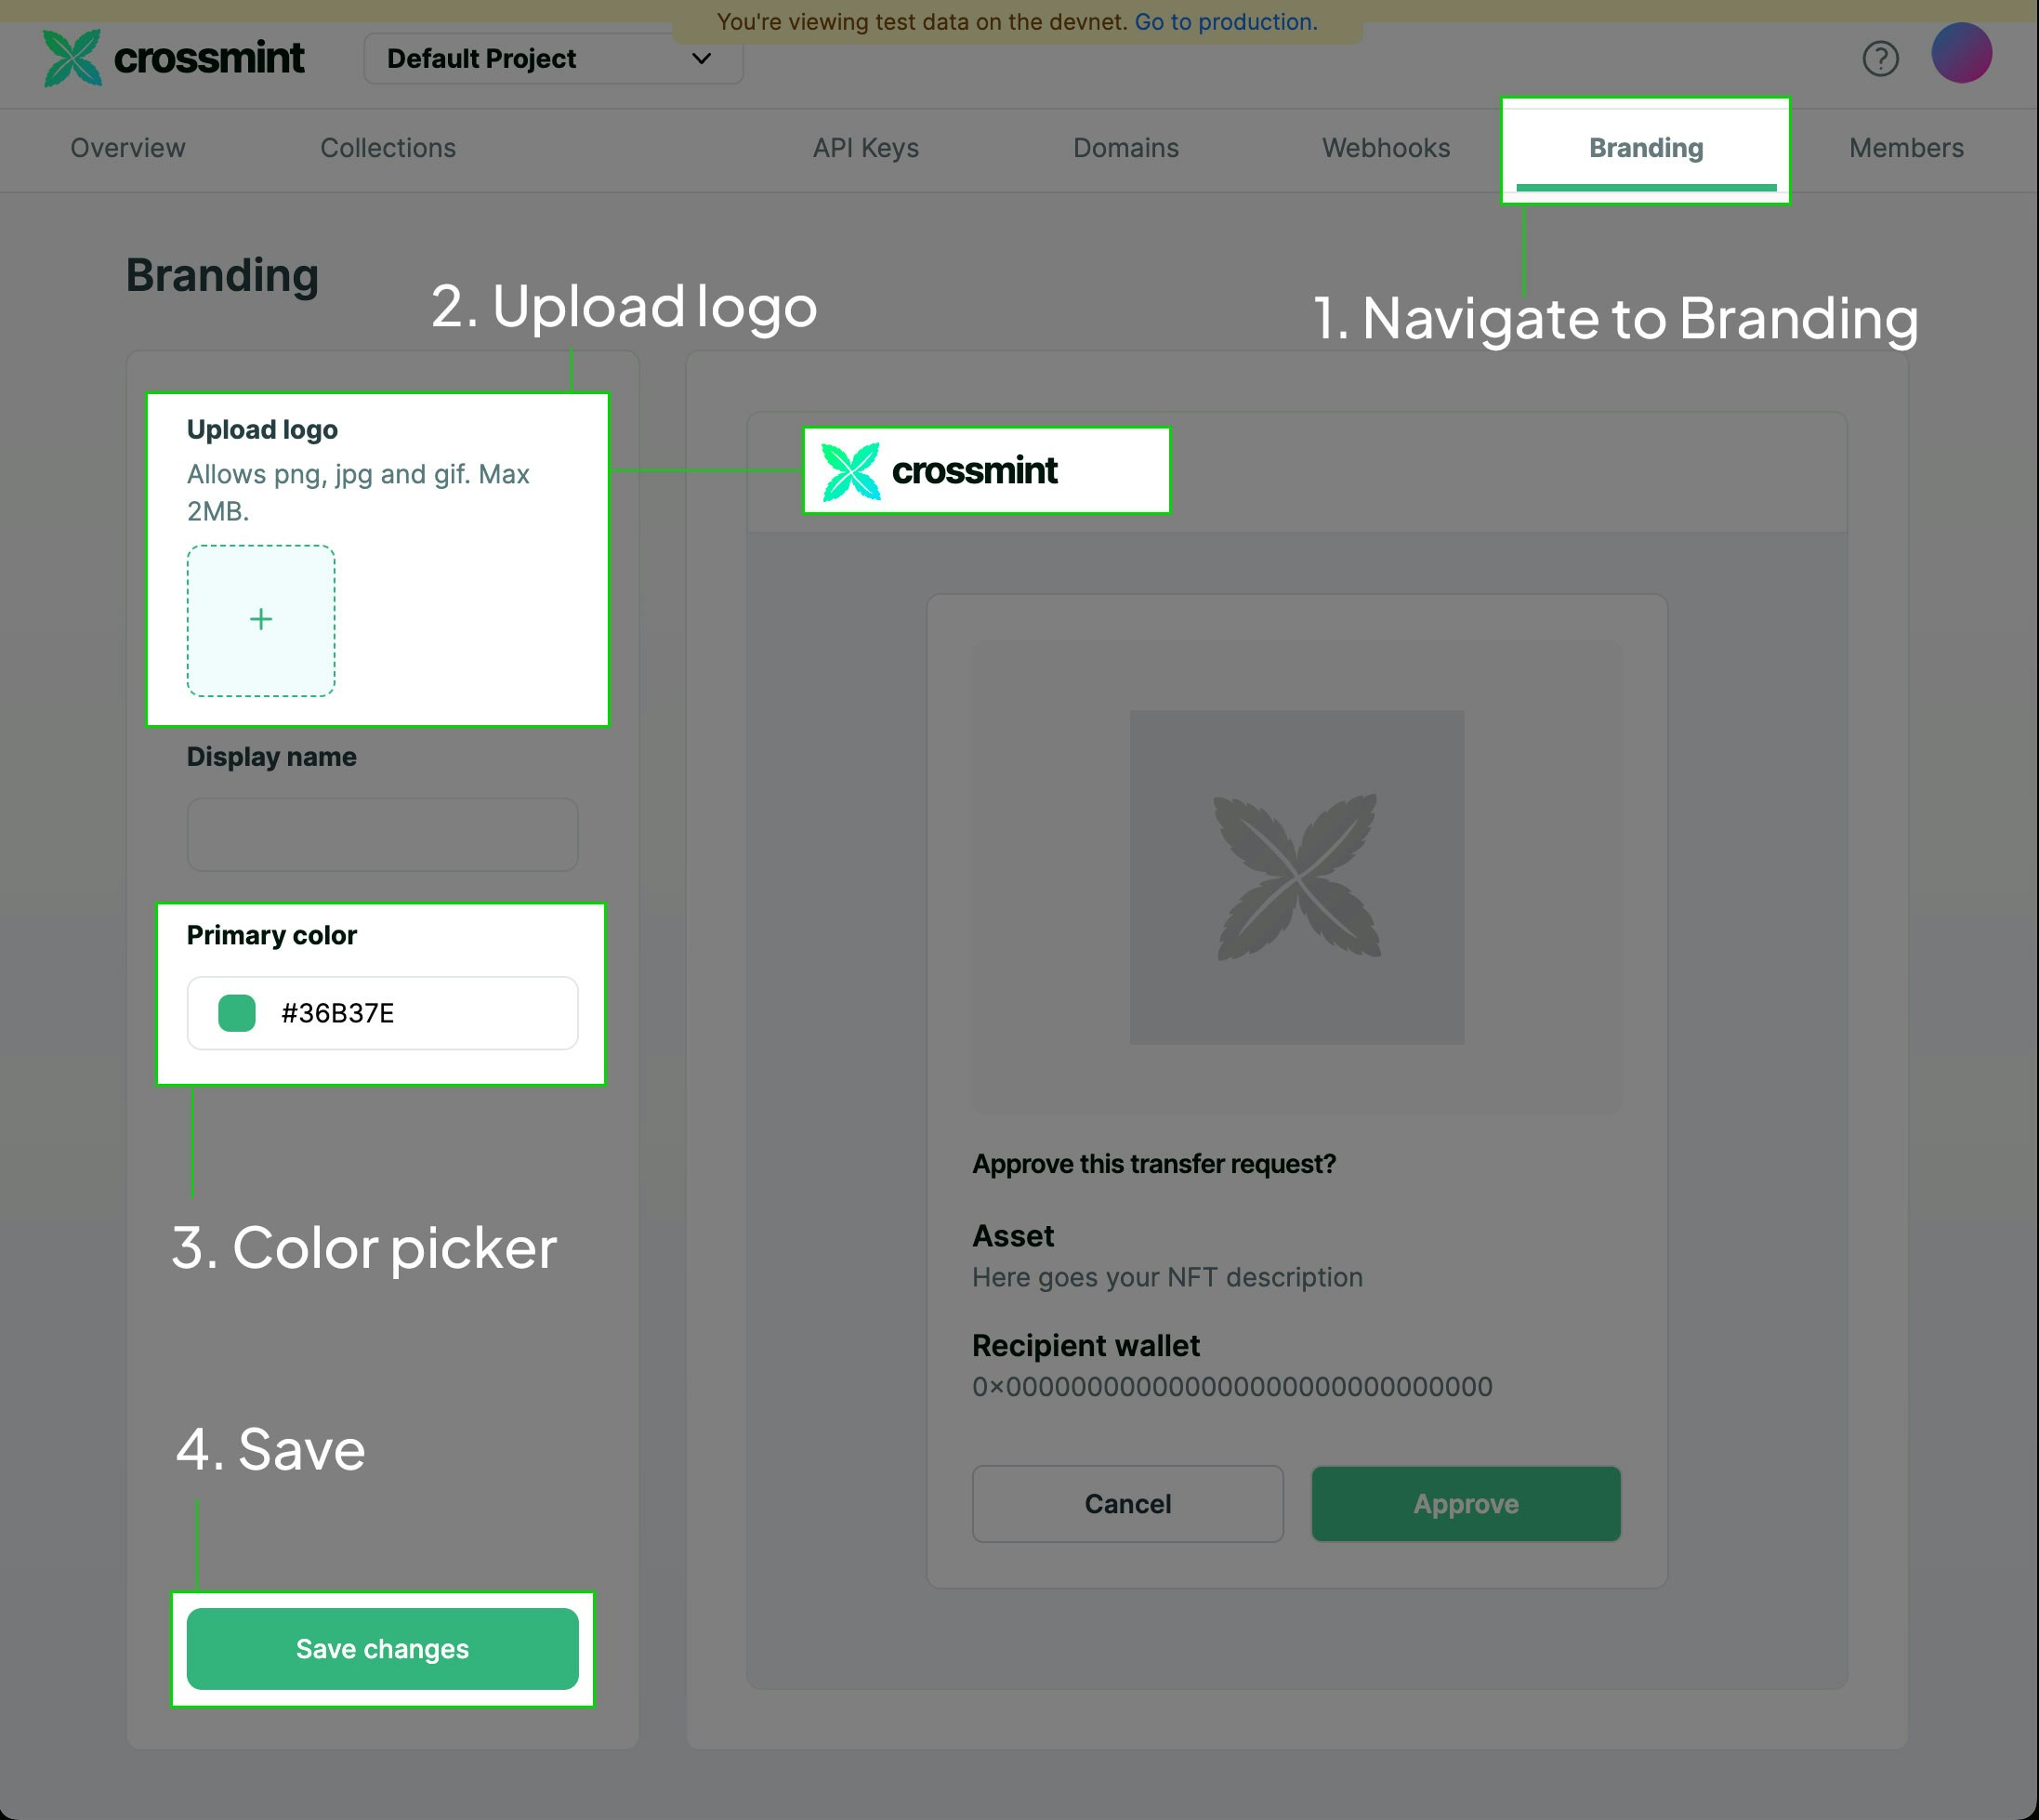
This customization option is available when you use the Custodial [Wallet APIs](/wallets/overview) to create wallets for your users and also have the `wallets:nfts.transfer` scope enabled.
Wallets created by passing `email` as opposed to `userId` are treated differently. This type of wallet enables users to login to Crossmint.com and access the NFTs associated with it. [Transfer](/wallets/guides/transfer-tokens) requests made via the API by your project will need to be approved by the user via email.
You have some options to customize how this approval email will look. When your project is setup this way you'll have a `Branding` tab available in the top Navigation.
## Transfer API Approval Email
This customization option is available when you use the Custodial [Wallet APIs](/wallets/overview) to create wallets for your users and also have the `wallets:nfts.transfer` scope enabled.
Wallets created by passing `email` as opposed to `userId` are treated differently. This type of wallet enables users to login to Crossmint.com and access the NFTs associated with it. [Transfer](/wallets/guides/transfer-tokens) requests made via the API by your project will need to be approved by the user via email.
You have some options to customize how this approval email will look. When your project is setup this way you'll have a `Branding` tab available in the top Navigation.
 ## Purchase Email Receipt
This is an enterprise feature.
Contact us
to learn more.
We are required to send an email purchase receipt for compliance reasons so we cannot disable this email completely. However, you can customize the branding of this email to match your project.
The included customization options are:
* Logo
* Message text
* Link to your project instead of Crossmint.com wallet
## Payments Customization
Please refer to the [Hosted Checkout](/payments/pay-button/guides/ui-customization) and [Embedded Checkout](/payments/embedded/guides/ui-customization) section of the docs for instructions to customize these tools.
## Purchase Email Receipt
This is an enterprise feature.
Contact us
to learn more.
We are required to send an email purchase receipt for compliance reasons so we cannot disable this email completely. However, you can customize the branding of this email to match your project.
The included customization options are:
* Logo
* Message text
* Link to your project instead of Crossmint.com wallet
## Payments Customization
Please refer to the [Hosted Checkout](/payments/pay-button/guides/ui-customization) and [Embedded Checkout](/payments/embedded/guides/ui-customization) section of the docs for instructions to customize these tools.