> ## Documentation Index
> Fetch the complete documentation index at: https://docs.crossmint.com/llms.txt
> Use this file to discover all available pages before exploring further.
# Webhooks
> Track order lifecycle events and payment status with webhooks
# Webhooks Overview
Webhooks allow you to track the status of payments and order lifecycle events in your application. They provide real-time notifications for various events like payment processing, NFT minting, and order fulfillment.
## Webhook Systems by Checkout Version
Crossmint offers different webhook systems for Checkout V2 and V3:
### Checkout V2 Webhooks (Legacy)
The Checkout V2 webhook system provides basic payment tracking with a single event type:
* `purchase.succeeded` - Triggered when an NFT has been successfully purchased and delivered
### Checkout V3 Webhooks (Current)
The Checkout V3 webhook system offers comprehensive order lifecycle tracking with multiple event types:
**Quote Phase**
* `orders.quote.created` - Triggered when a new order is created
* `orders.quote.updated` - Triggered when order details are modified
**Payment Phase**
* `orders.payment.succeeded` - Triggered when payment is successfully processed
* `orders.payment.failed` - Triggered when payment fails
**Delivery Phase**
* `orders.delivery.initiated` - Triggered when delivery begins
* `orders.delivery.completed` - Triggered when delivery succeeds
* `orders.delivery.failed` - Triggered when delivery fails
## Setting Up Webhooks
### 1. Create an endpoint route
Using a standard nodejs API server, create an endpoint.
You can test locally by installing [ngrok](https://ngrok.com/docs/getting-started/) and creating a routed endpoint
to a specified port. > **Note**: Use ngrok only for testing. In production, ensure your endpoint is properly secured
with HTTPS and appropriate access controls.
### 2. Configure the endpoint
Your endpoint should:
* Handle POST requests only
* Parse webhook events from the request body
* Respond with a `200` status code to acknowledge receipt
Your server must return a 2xx HTTP status quickly so the webhook is marked as delivered.
Example handler:
```javascript theme={null}
// endpoint.js
export default function handler(req, res) {
if (req.method === "POST") {
console.log(`[webhook] Event received:`, req.body);
}
res.status(200).json({});
}
```
Don't be strict with payload validations as Crossmint may add new fields to the webhooks as products evolve.
Your server must return a 2xx HTTP status quickly so the webhook is marked as delivered.
### 3. Example Webhook Responses
```json EVM theme={null}
{
"type": "purchase.succeeded",
"status": "success",
"walletAddress": "",
"projectId": "",
"collectionId": "",
"clientId": "",
"txId": "",
"contractAddress": "",
"tokenIds": [], // only present for EVM collections
"passThroughArgs": "" // only if whPassThroughArgs set
}
```
```json Solana theme={null}
{
"type": "purchase.succeeded",
"status": "success",
"walletAddress": "",
"clientId": "",
"txId": "",
"mintAddress": "",
"passThroughArgs": ""
}
```
```json theme={null}
{
"type": "orders.quote.created",
"payload": {
"totalPrice": {
"amount": "0.50",
"currency": "usd"
},
"lineItems": [
{
"metadata": {
"title": "Collection Name",
"description": "Collection Description",
"imageUrl": "https://..."
},
"price": {
"amount": "0.50",
"currency": "usd"
},
"quantity": 1
}
]
}
}
```
```json theme={null}
{
"type": "orders.payment.succeeded",
"payload": {
"orderIdentifier": "7723139d-fba3-474d-8e52-0ac7512d5c7b",
"paymentMethodType": "credit-card",
"totalPrice": {
"amount": "0.50",
"currency": "usd"
}
}
}
```
```json theme={null}
{
"type": "orders.delivery.completed",
"payload": {
"orderIdentifier": "7723139d-fba3-474d-8e52-0ac7512d5c7b",
"lineItems": [
{
"delivery": {
"status": "completed",
"recipient": {
"locator": "email:user@example.com:polygon",
"email": "user@example.com",
"walletAddress": "0x1234..."
},
"txId": "0x2e69f11dae7869b92e3d5eaf4cadd50c48b5c6803d1232815f979d744521ad4c",
"tokens": [
{
"locator": "polygon:0xE04Cf294985282Ddc088E6433c064cfB85eD9EdA:3",
"contractAddress": "0xE04Cf294985282Ddc088E6433c064cfB85eD9EdA",
"tokenId": "3",
"quantity": "1500000",
"symbol": "TOKEN",
"decimals": 6
}
]
}
}
]
}
}
```
The `quantity`, `symbol`, and `decimals` fields are optional and only present when applicable (e.g., for fungible token purchases in exact-in execution mode).
### 4. Pass Custom Arguments (Optional)
Custom arguments (whPassThroughArgs) are only supported in Checkout V2 webhooks. This feature is not available in
Checkout V3 webhooks (orders.\*).
You can pass custom arguments through Checkout V2 webhooks to track additional information:
* User IDs (If you want additional security, sign this ID with a custom key, or send it as a signed JWT, and verify its integrity later on your server)
* Timestamps
* Product SKUs
* Custom metadata
Example of passing arguments:
```jsx theme={null}
function NFTSalePage() {
const whArgs = {
uid: 123424,
sku: 123123123,
metadata: { custom: "data" },
};
const whArgsSerialized = JSON.stringify(whArgs);
return (
);
}
```
Then, extract them on the server:
```javascript theme={null}
export default function handler(req, res) {
const { whPassThroughArgs } = req.body;
if (whPassThroughArgs) {
const whArgsDeserialized = JSON.parse(whPassThroughArgs);
console.log(whArgsDeserialized);
}
res.status(200).json({});
}
```
### 5. Pre & Post Processing
Add your pre and post processing logic when setting up your webhook listener. For example, you can call back to your database when a certain id has succeeded or even use Sendgrid or EmailJS to send an email to a recipient when a mint completes.
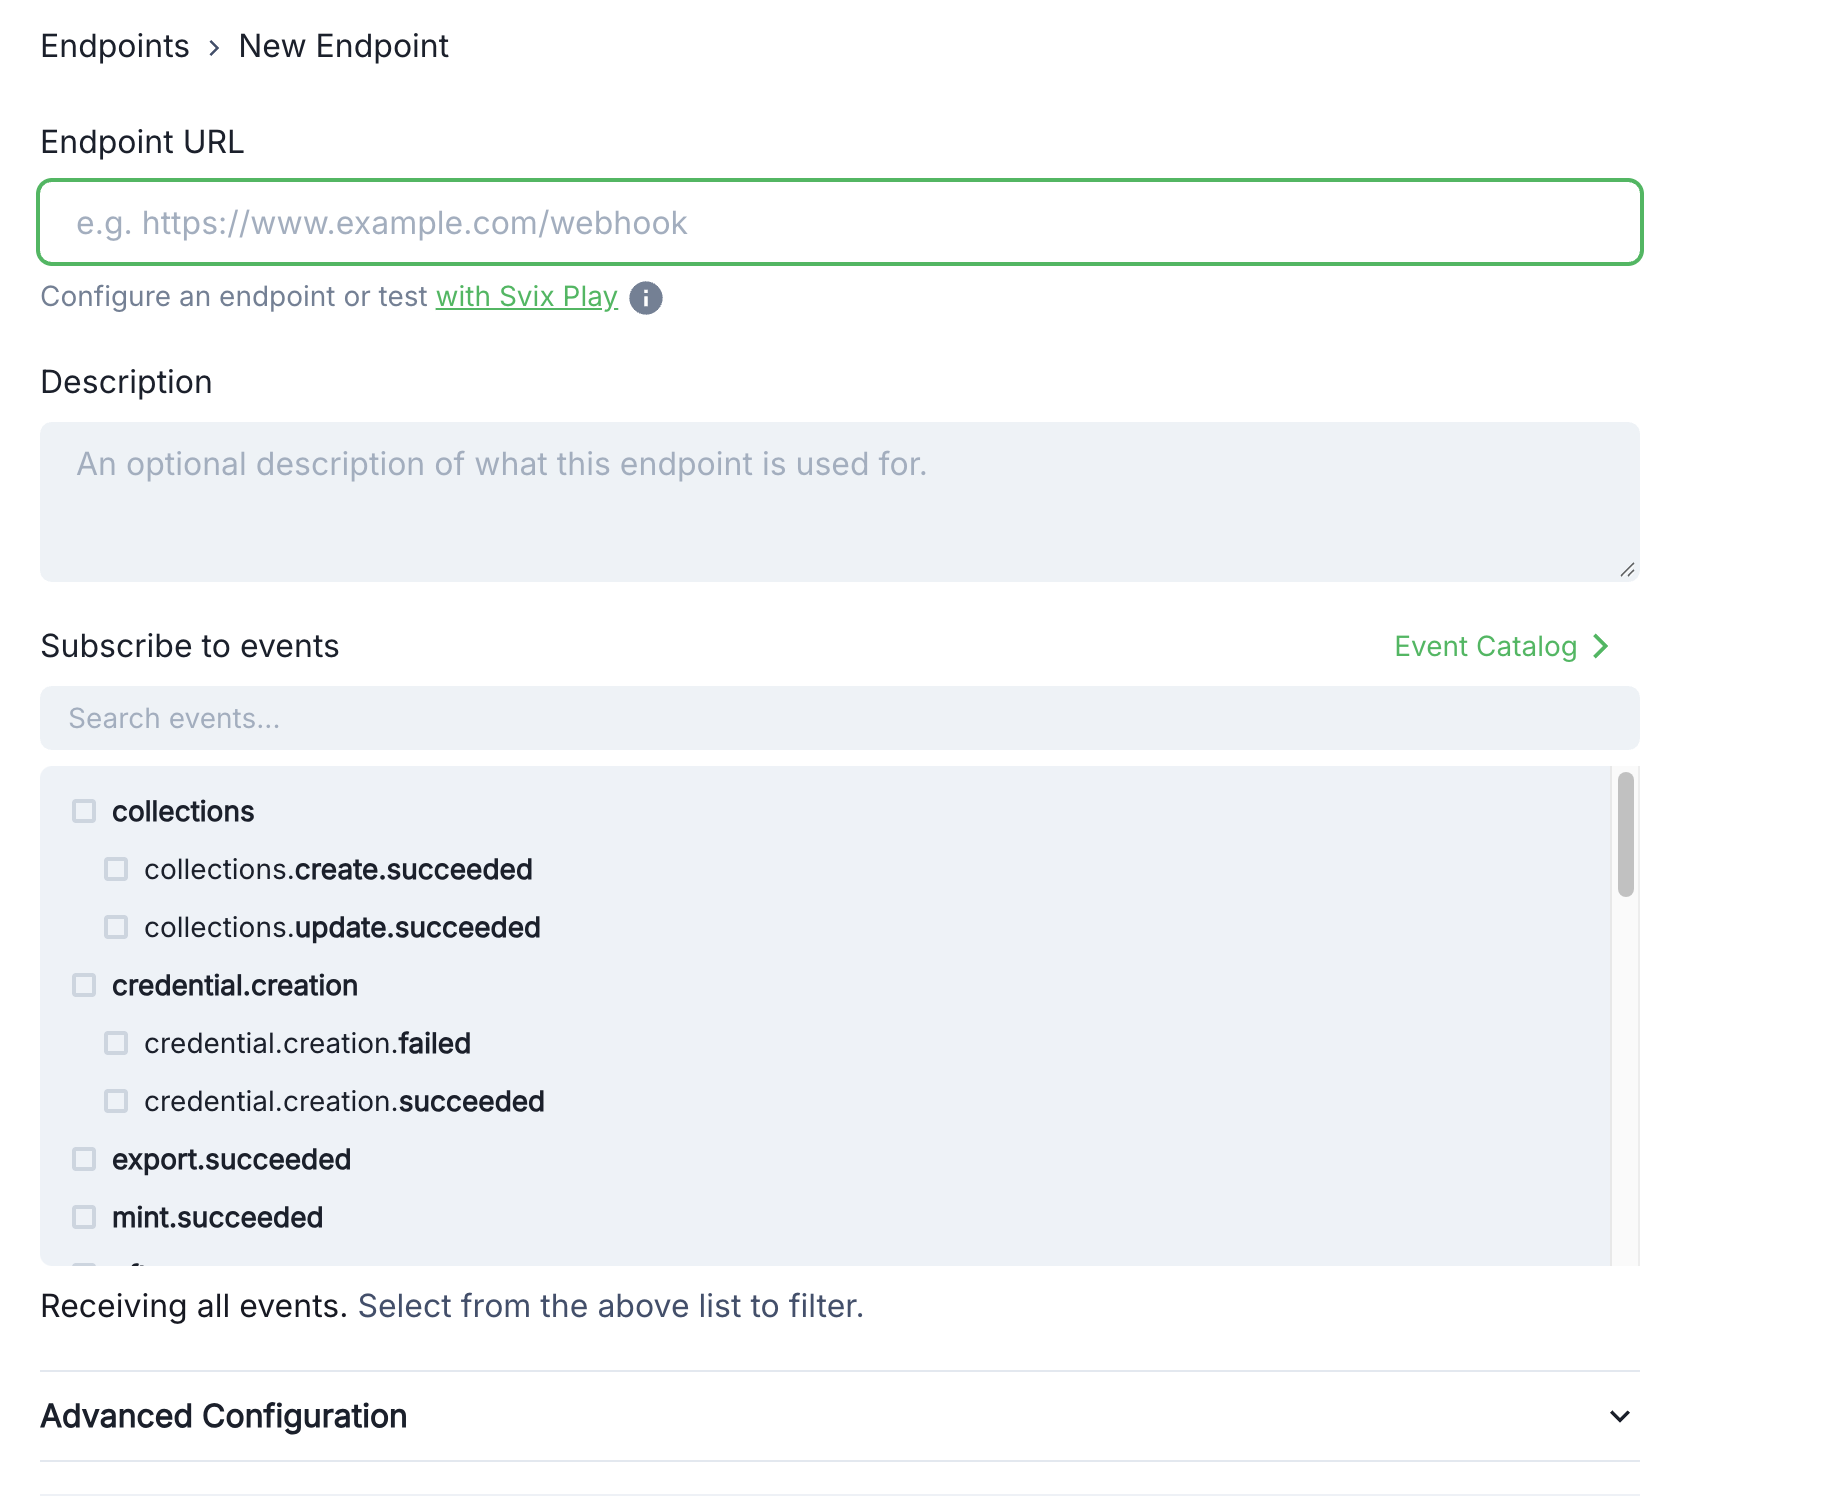
### 6. Configure in Crossmint Console
1. Navigate to the [Webhooks page](https://www.crossmint.com/console/webhooks) in the console
2. Click **Add Endpoint**
3. Enter your endpoint URL
4. Select the webhook events to receive
5. Click **Create**
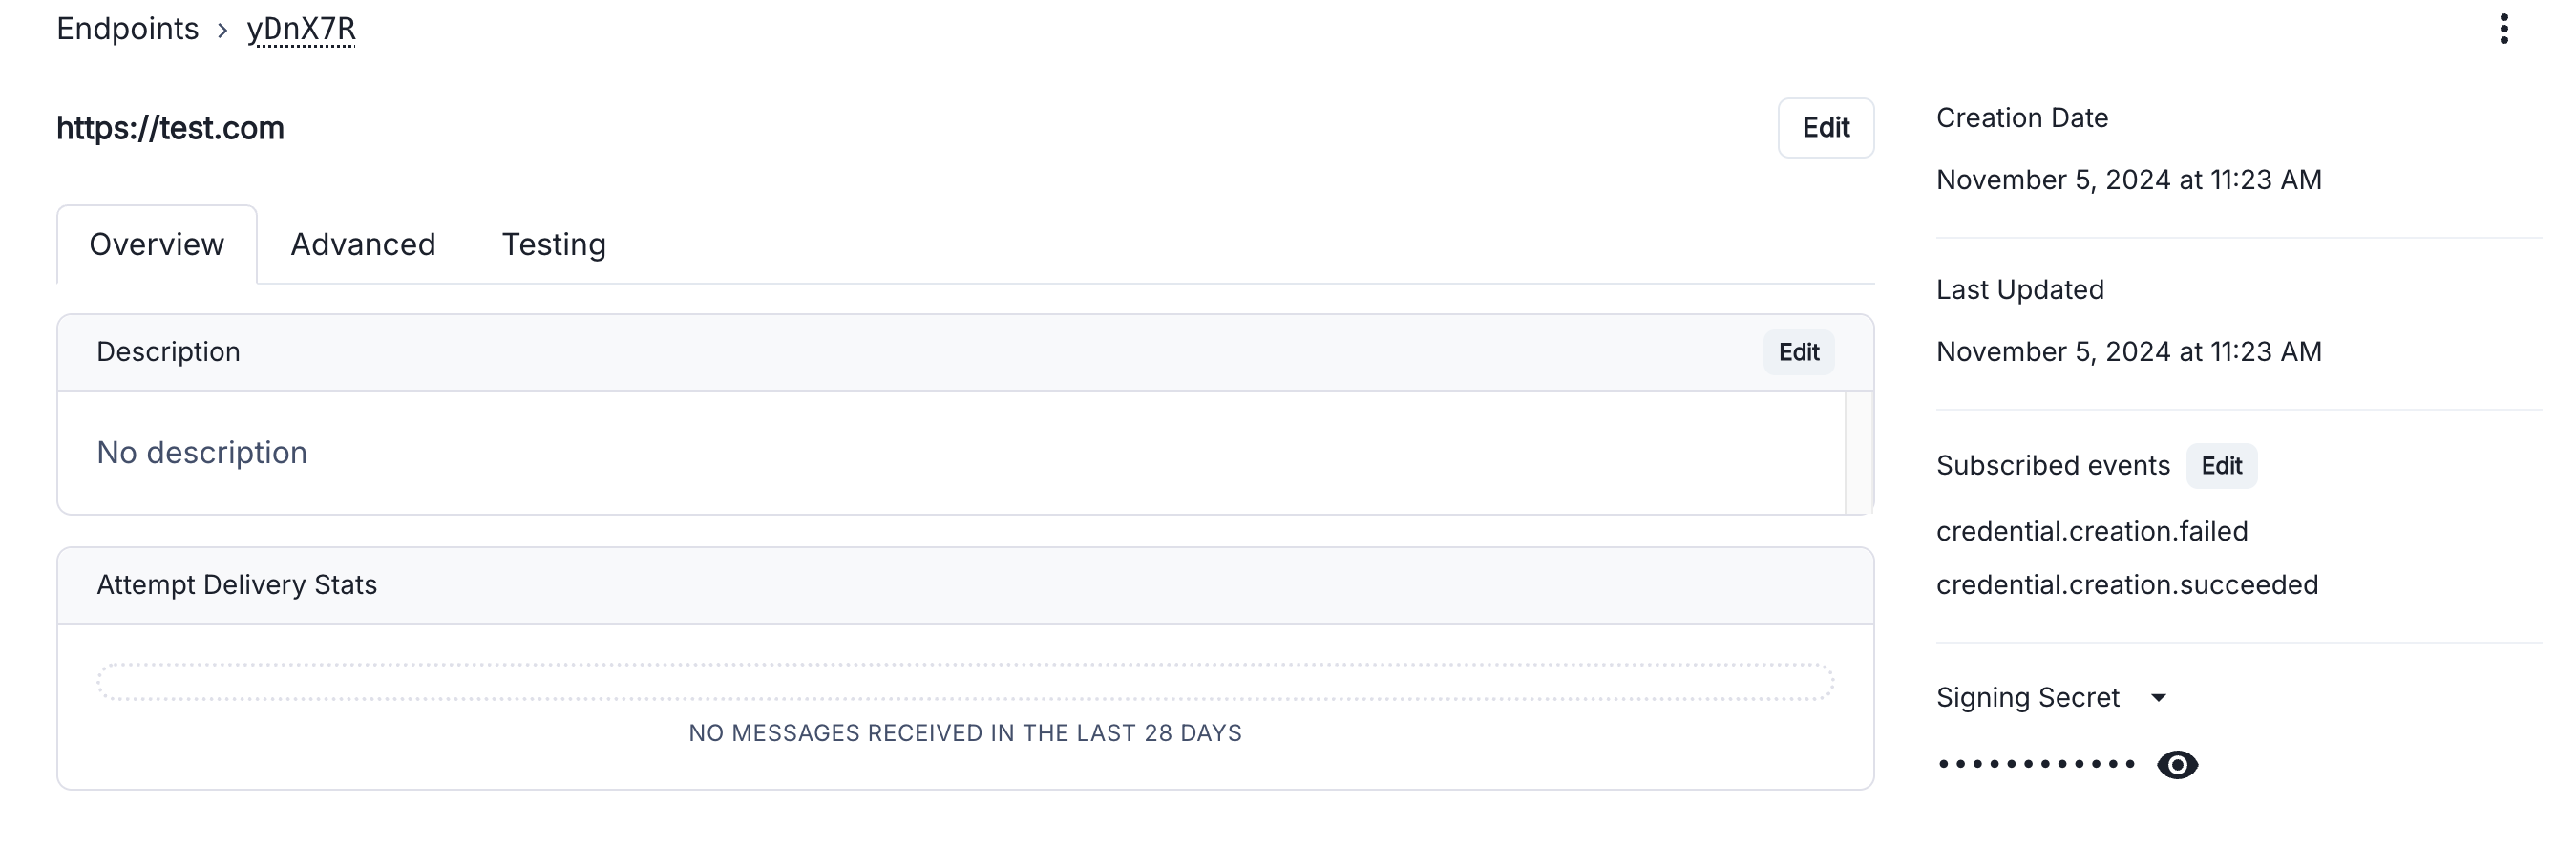
### 6. Security
For security, verify webhook signatures using the signing secret from your endpoint details page:
See the [Verify Webhooks](/introduction/platform/webhooks/verify-webhooks) guide for implementation details.
## Testing Webhooks
1. Use test card number `4242 4242 4242 4242` for successful payments
2. Use `4000 0000 0000 4954` to test payment failures
3. Monitor webhook deliveries in the [Console](https://www.crossmint.com/console/webhooks)
 ### 6. Security
For security, verify webhook signatures using the signing secret from your endpoint details page:
### 6. Security
For security, verify webhook signatures using the signing secret from your endpoint details page:
 See the [Verify Webhooks](/introduction/platform/webhooks/verify-webhooks) guide for implementation details.
## Testing Webhooks
1. Use test card number `4242 4242 4242 4242` for successful payments
2. Use `4000 0000 0000 4954` to test payment failures
3. Monitor webhook deliveries in the [Console](https://www.crossmint.com/console/webhooks)
See the [Verify Webhooks](/introduction/platform/webhooks/verify-webhooks) guide for implementation details.
## Testing Webhooks
1. Use test card number `4242 4242 4242 4242` for successful payments
2. Use `4000 0000 0000 4954` to test payment failures
3. Monitor webhook deliveries in the [Console](https://www.crossmint.com/console/webhooks)