> ## Documentation Index
> Fetch the complete documentation index at: https://docs.crossmint.com/llms.txt
> Use this file to discover all available pages before exploring further.
# Create/Deploy an NFT Collection
> Easily deploy a collection in the console and enable payments
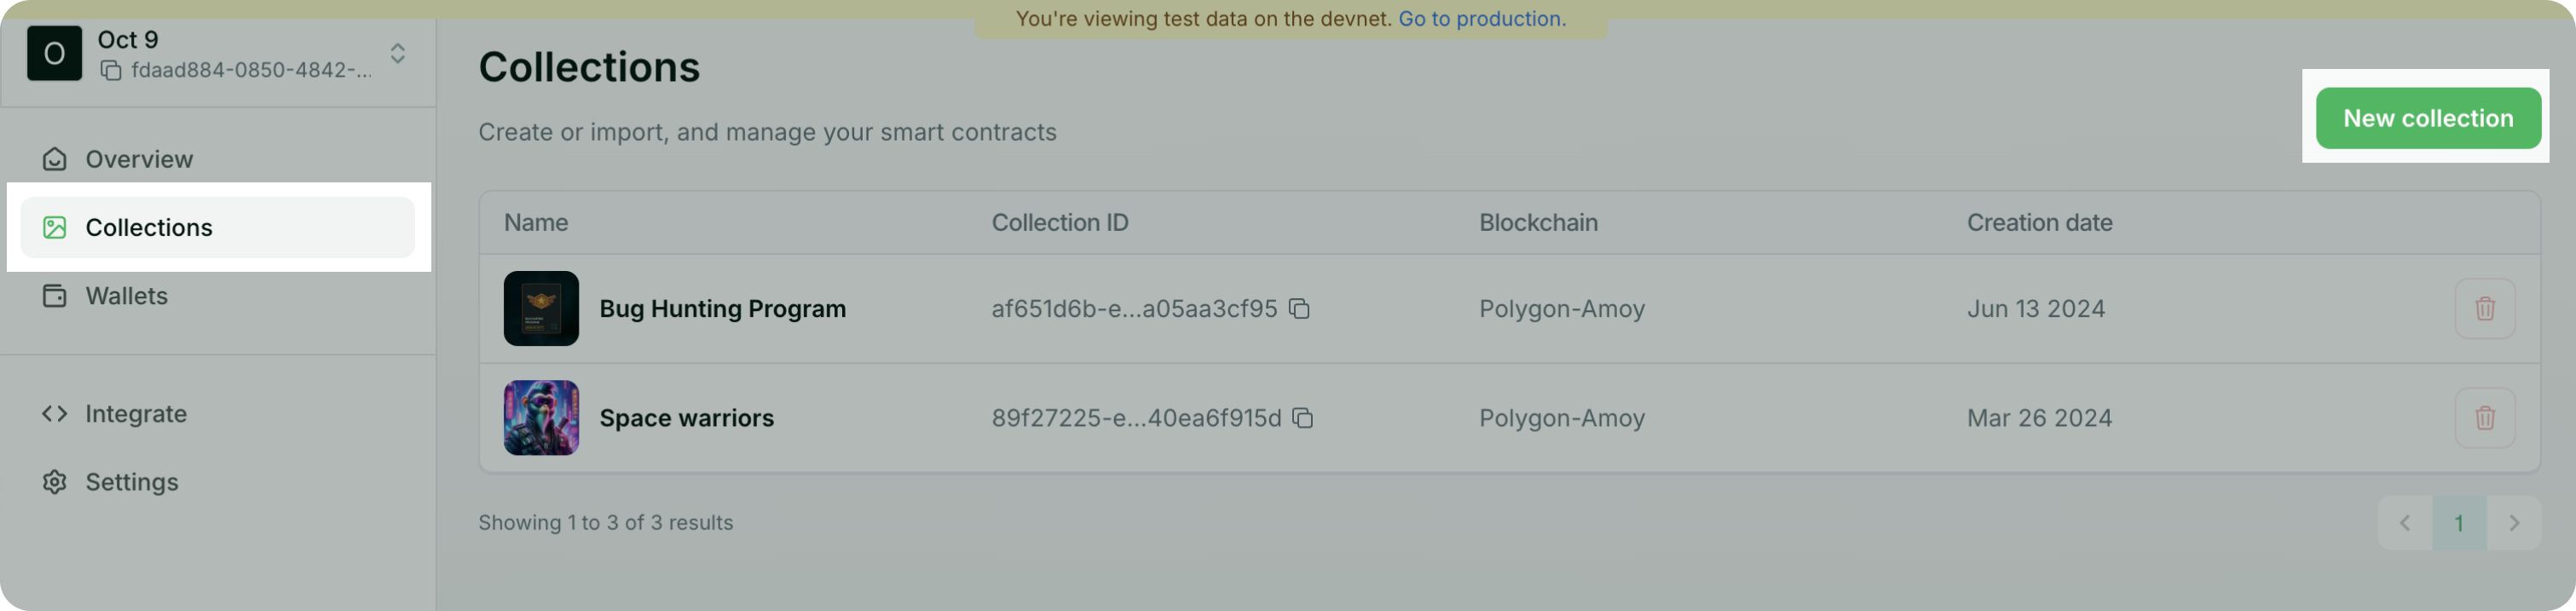
The easiest way to get started with selling or airdropping NFTs is to use the developer console to deploy and manage your NFT contracts.
## Create a Crossmint NFT Collection
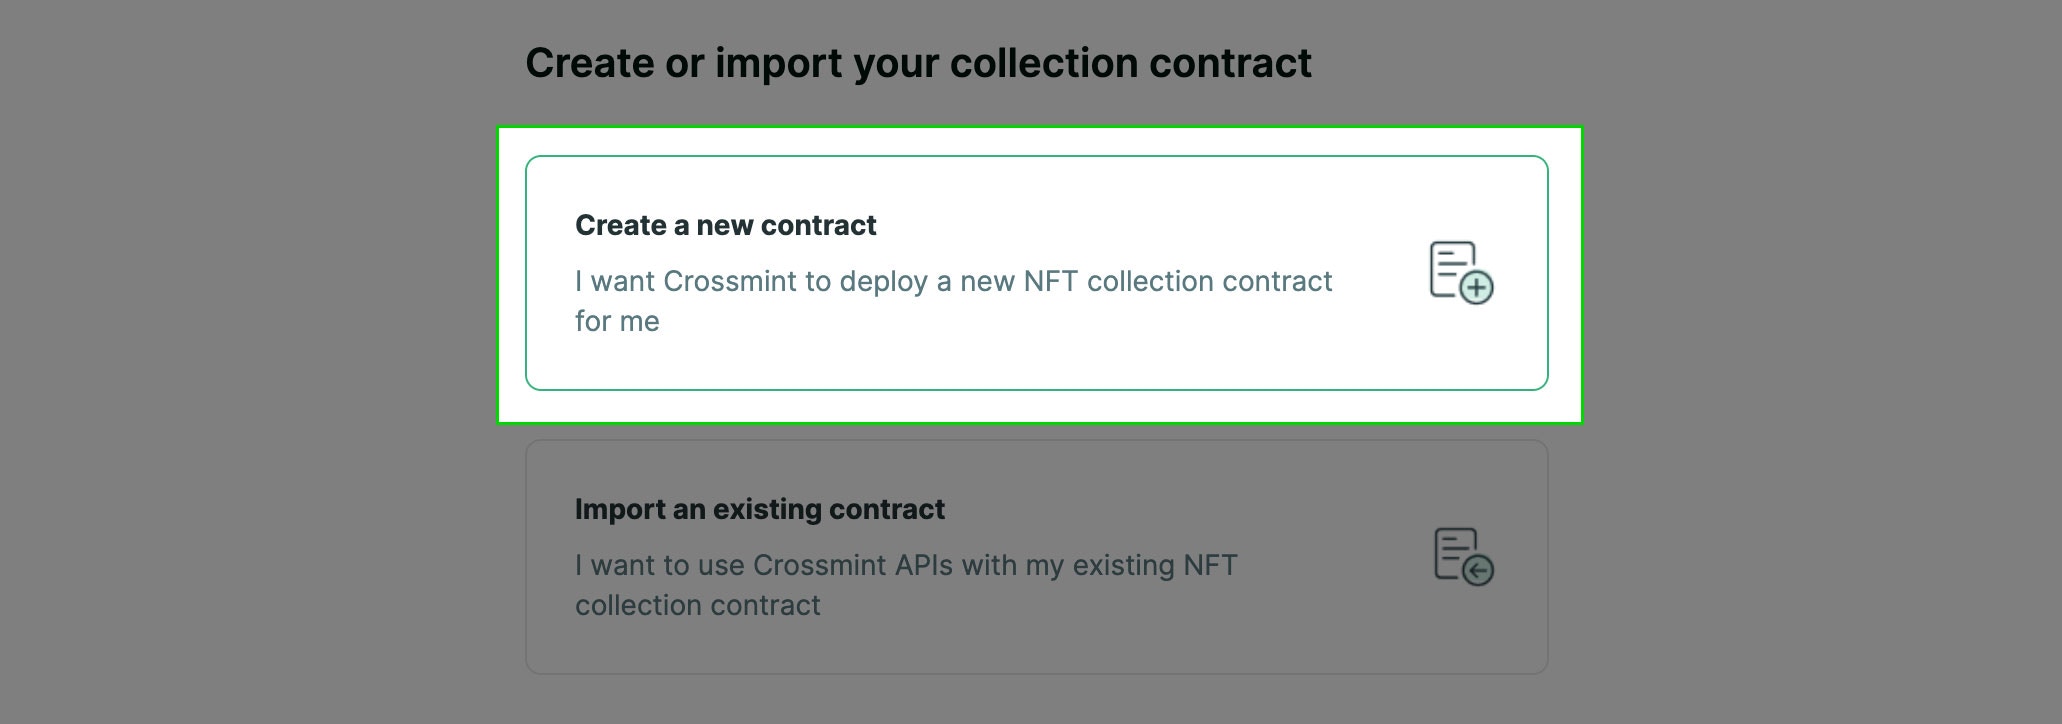
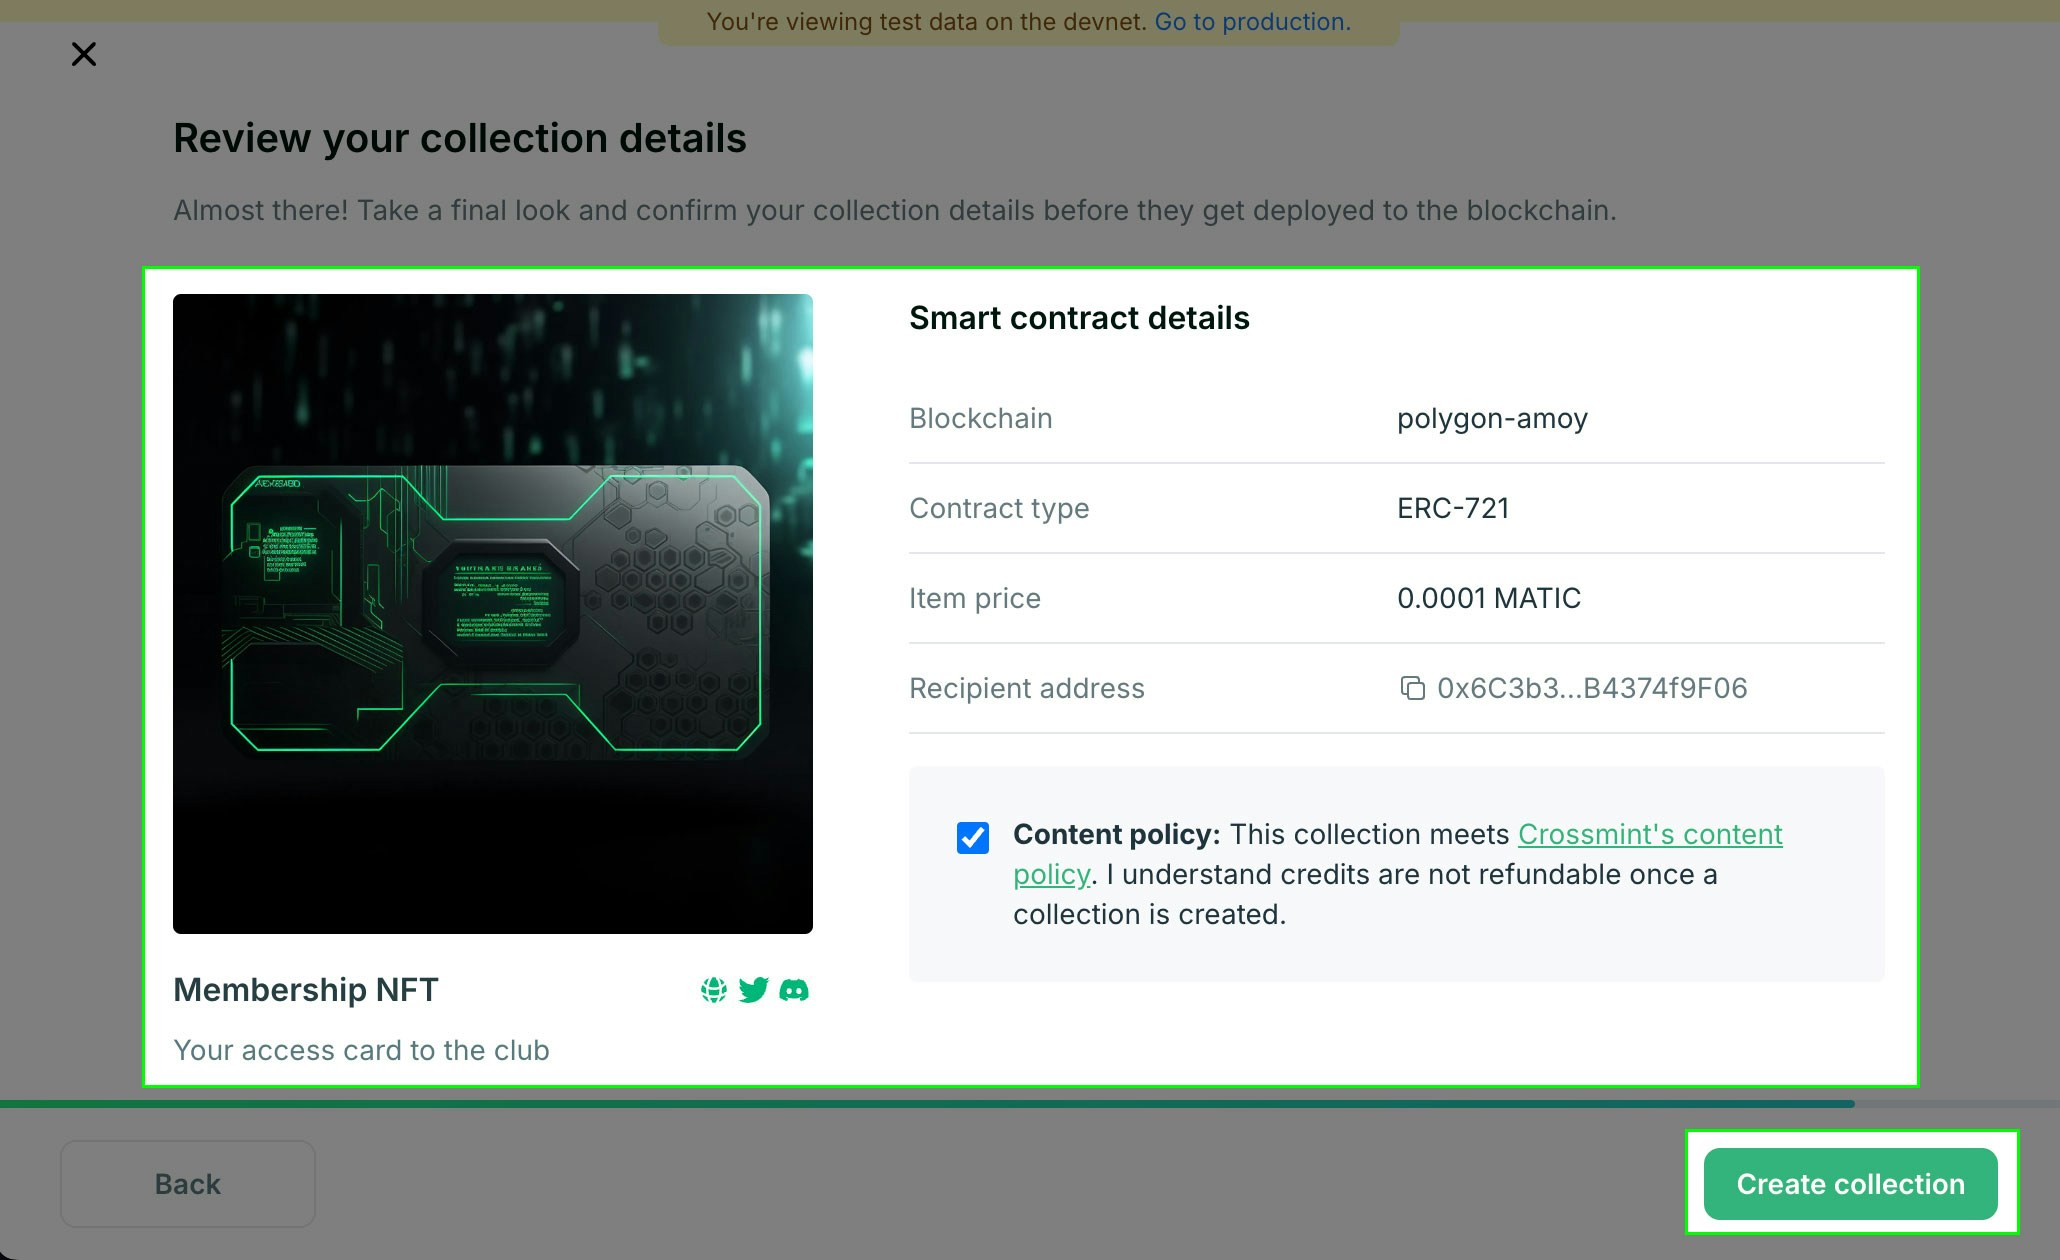
This guide will deploy an ERC-721 contract on the Polygon Amoy testnet. Currently, you can also deploy to the mainnets and testsnets for Polygon, Base, Optimism, and Solana directly from the console. Additional chains are supported when deploying via the [create-collection API](/api-reference/minting/collection/create-collection).
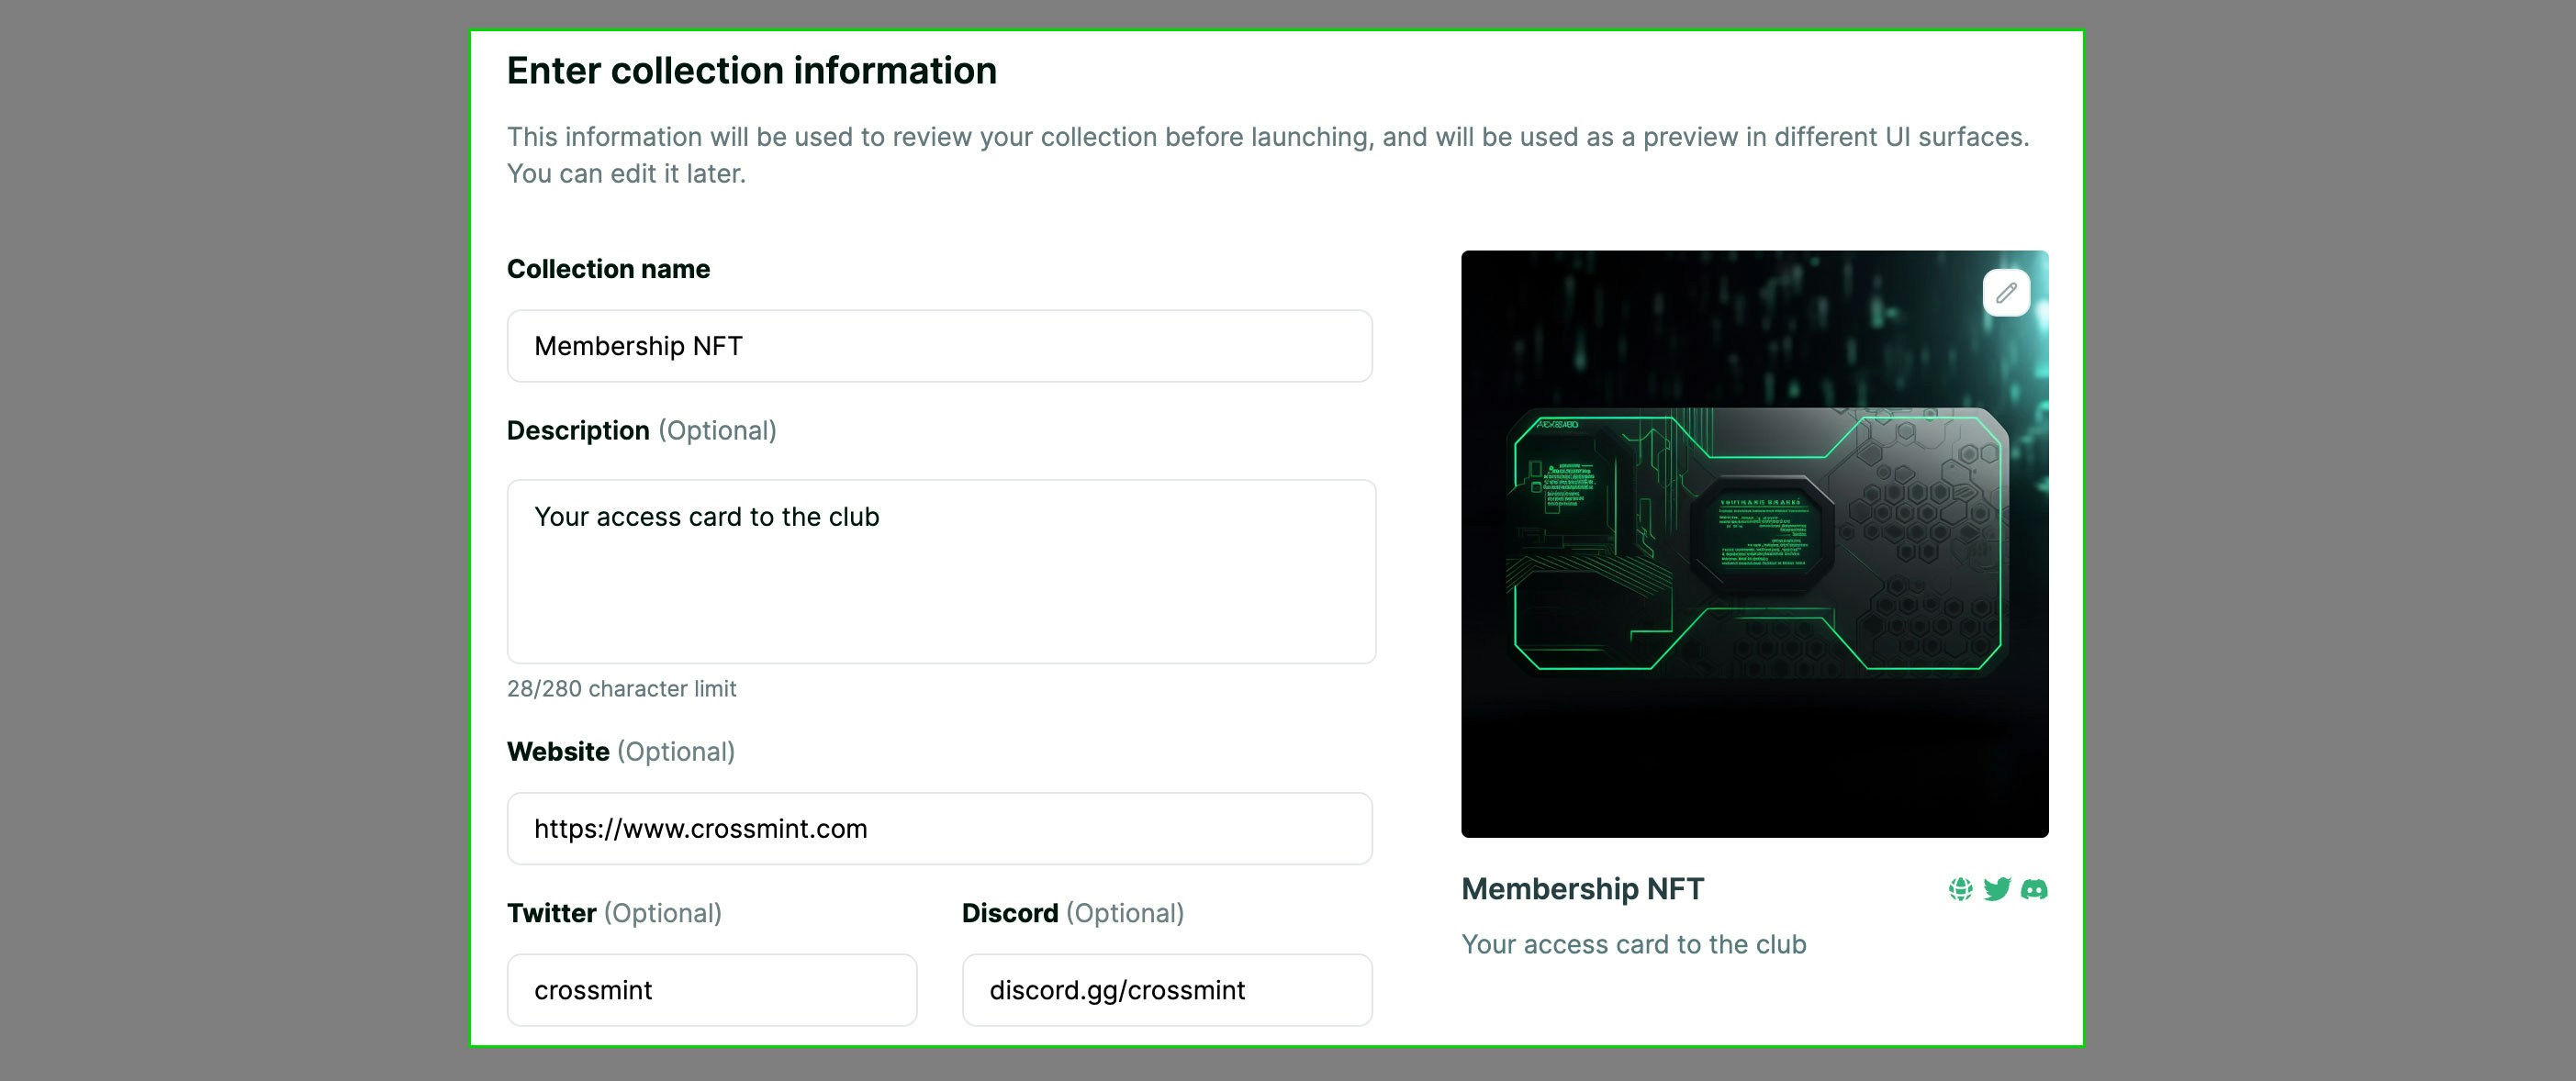
 This information is displayed in the Hosted Checkout and Storefront. You can edit it later.
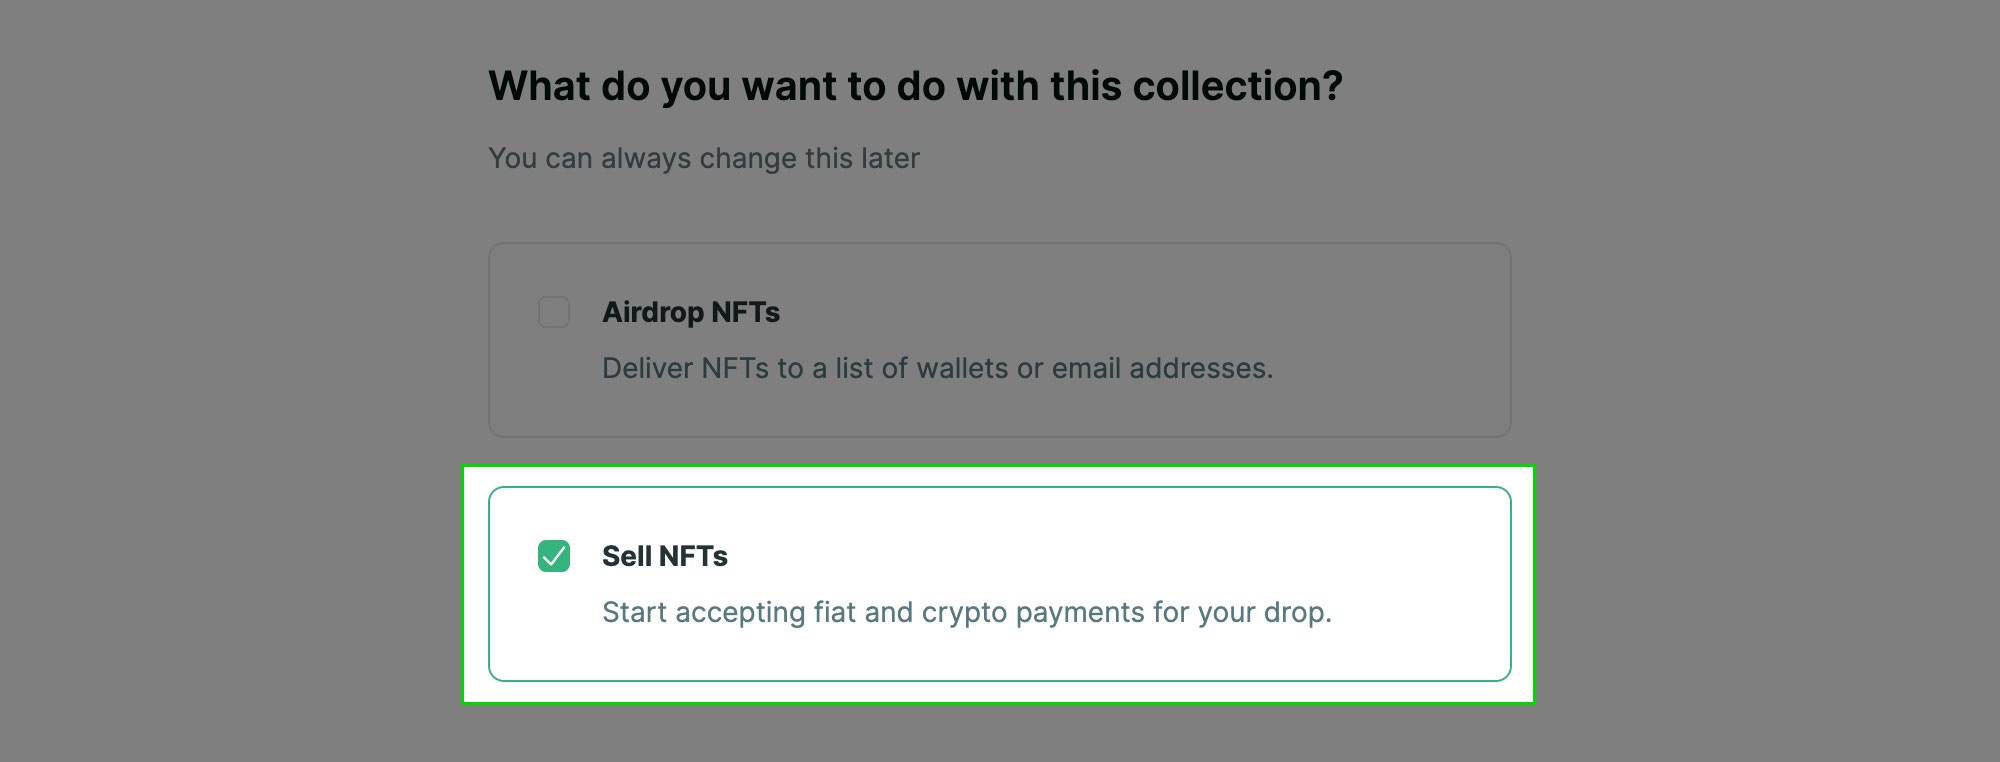
 If you want to use this collection exclusively with the [Minting Tools](/minting/introduction), select the `Airdrop NFTs` option only.
 Crossmint has staging and production [environments](/introduction/platform/staging-vs-production) to facilitate working in testnets or mainnets.
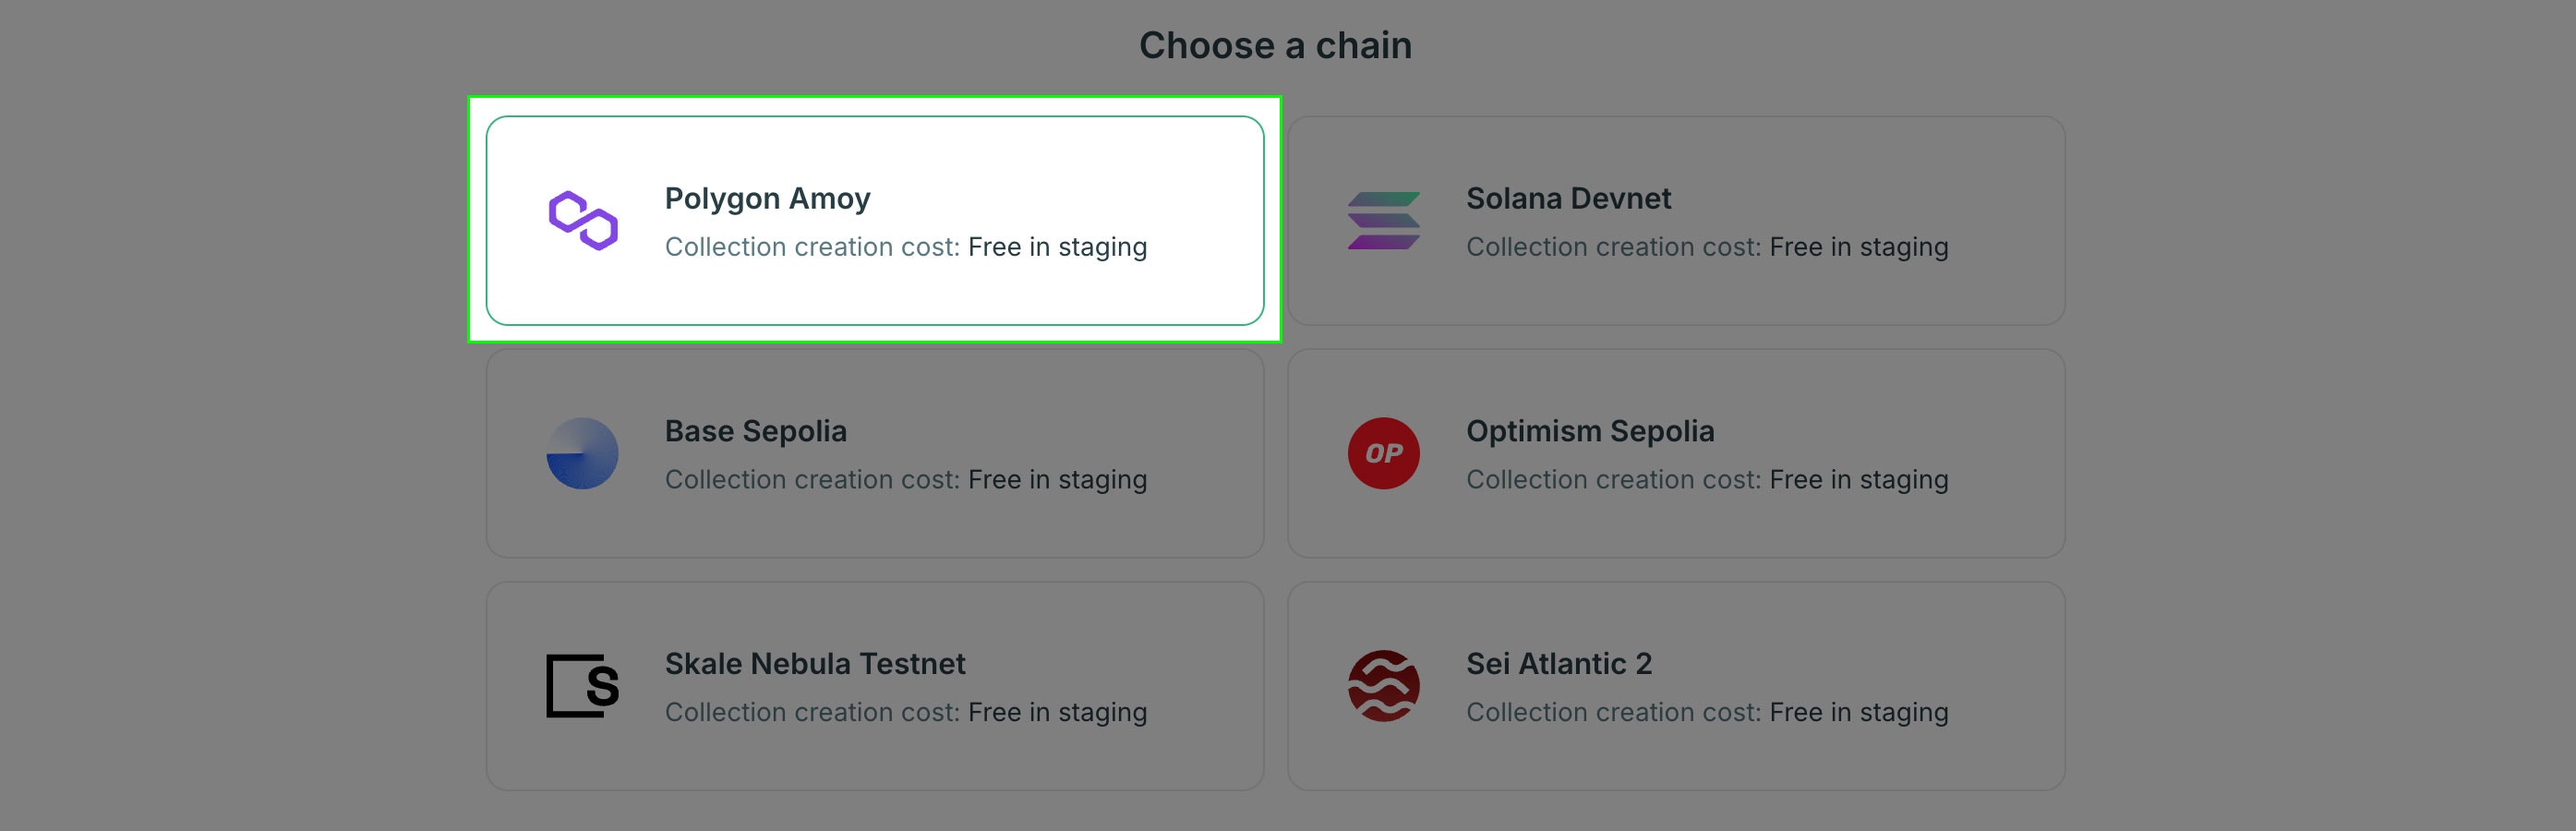
When creating a new collection on production you'll need some API credits to cover the gas cost of contract deployment.
#### NFT Price
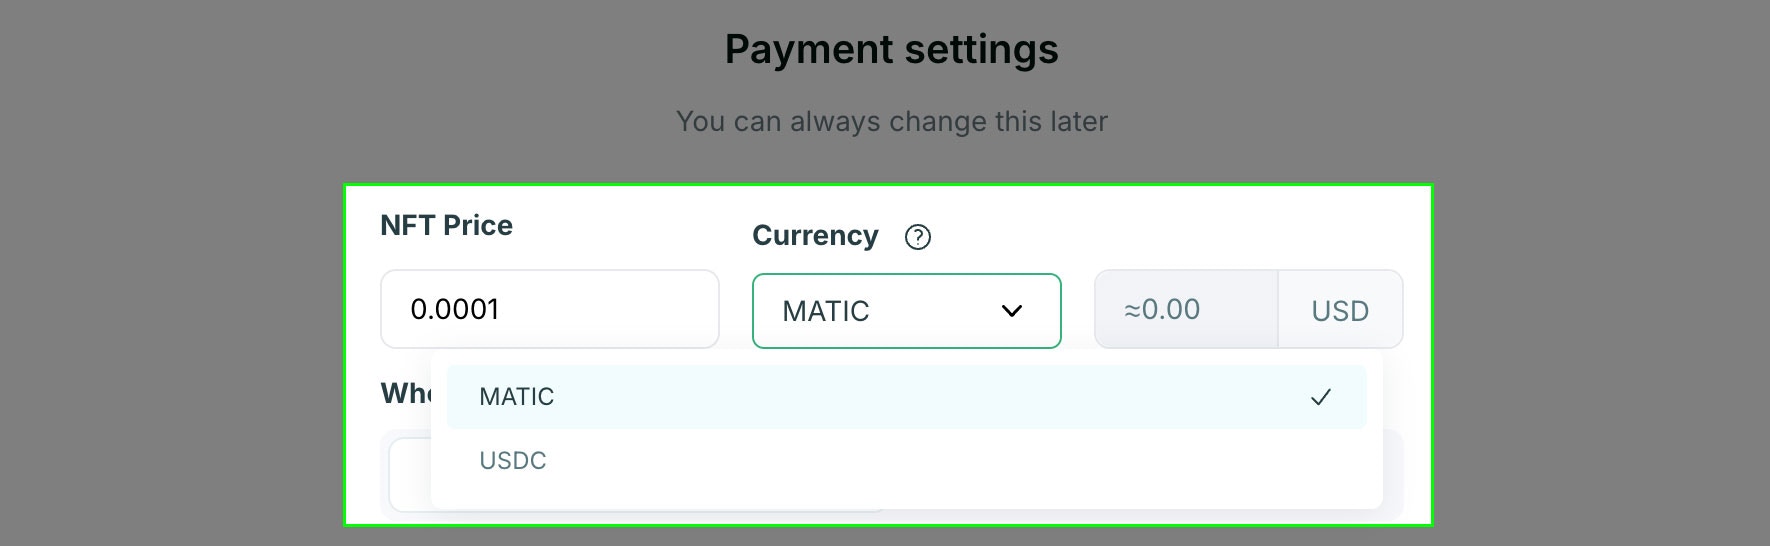
Enter the price you want to charge for your NFT. When using the staging environment, please set very low test prices to help use preserve our testnet currency. Everything works the same in staging and production, so you can test your collection with low prices in staging and then deploy to production with higher prices.
In production, there is a lower bound limit of USD $0.75, and an upper bound limit of USD $1,500 per transaction. You can find more information if you need to [increase this limit](/payments/advanced/production-launch#default-transaction-limit).
#### USDC
Several chains support USDC for the currency. This option is useful for price stability and to receive payouts in a stable token. You can find more info on [configuring USDC here](/payments/advanced/usdc-support).
 ### Fee Sponsorship
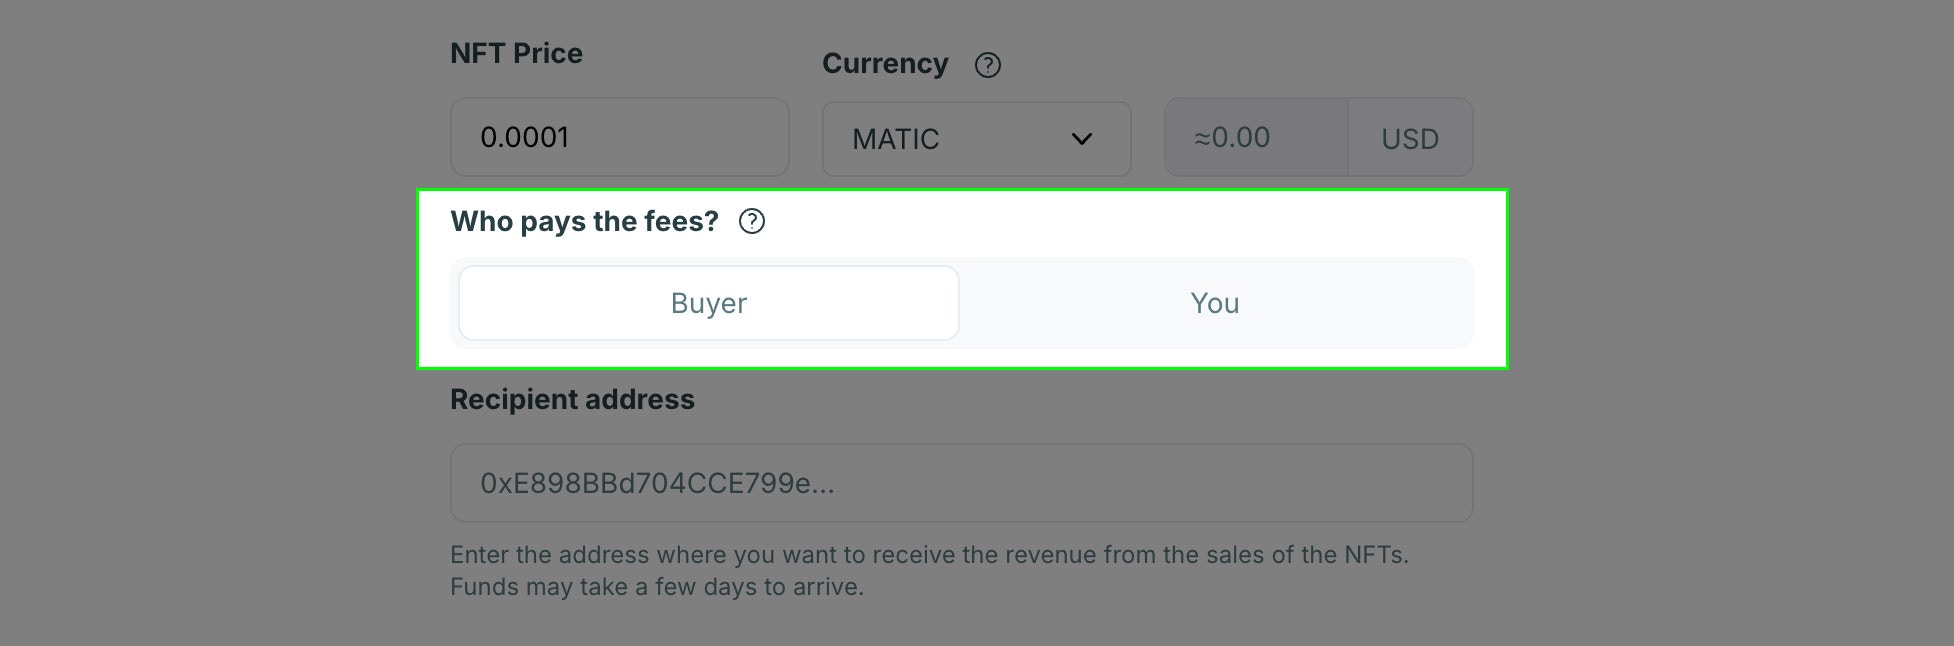
This option enables you to control who pays the fees of the NFT purchase including gas and credit card transaction fees. The default option is "Buyer", which means that if you set a price of 10 USDC, the final price the buyer pays will be 10 USDC plus fees.
If you want to provide a consistent price for your customers, select the "You" option to sponsor the fees. When you sponsor the fees they will be deducted from the amount the buyer pays and the remainder will be paid to the recipient wallet you set in the next step.
### Fee Sponsorship
This option enables you to control who pays the fees of the NFT purchase including gas and credit card transaction fees. The default option is "Buyer", which means that if you set a price of 10 USDC, the final price the buyer pays will be 10 USDC plus fees.
If you want to provide a consistent price for your customers, select the "You" option to sponsor the fees. When you sponsor the fees they will be deducted from the amount the buyer pays and the remainder will be paid to the recipient wallet you set in the next step.
 #### Recipient Address
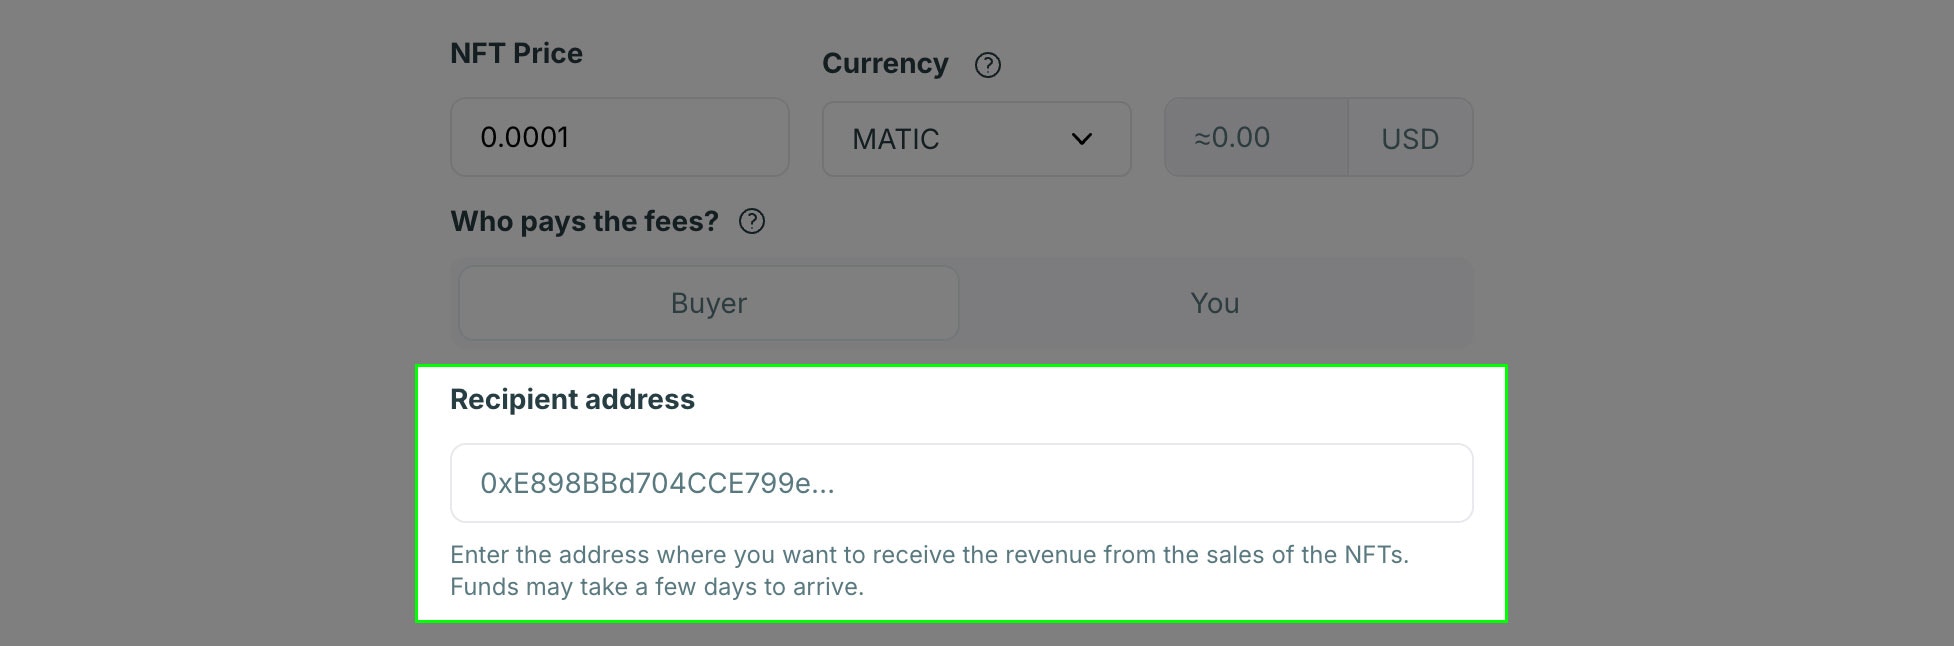
Enter the wallet address where you want to receive payments. This is the address where Crossmint will send the proceeds from NFT sales.
Want to split payments across multiple addresses? Use a [splits.org](https://splits.org) address as the payout recipient.
#### Recipient Address
Enter the wallet address where you want to receive payments. This is the address where Crossmint will send the proceeds from NFT sales.
Want to split payments across multiple addresses? Use a [splits.org](https://splits.org) address as the payout recipient.
 Make sure you review the Content policy. When launching in production you'll need to submit collection verification information to ensure your collection is compliant with our Content Policy. You can find more information about everything required for your production launch in the [Production Launch](/payments/advanced/production-launch) section.
 ## Adding NFTs
This is **required** before you can sell or airdrop the NFTs. Without this step there is not any actual information to use for creating the NFTs yet. You can create unique NFT metadata per token or an Open Edition style NFT where all tokens share the same metadata.
## Adding NFTs
This is **required** before you can sell or airdrop the NFTs. Without this step there is not any actual information to use for creating the NFTs yet. You can create unique NFT metadata per token or an Open Edition style NFT where all tokens share the same metadata.
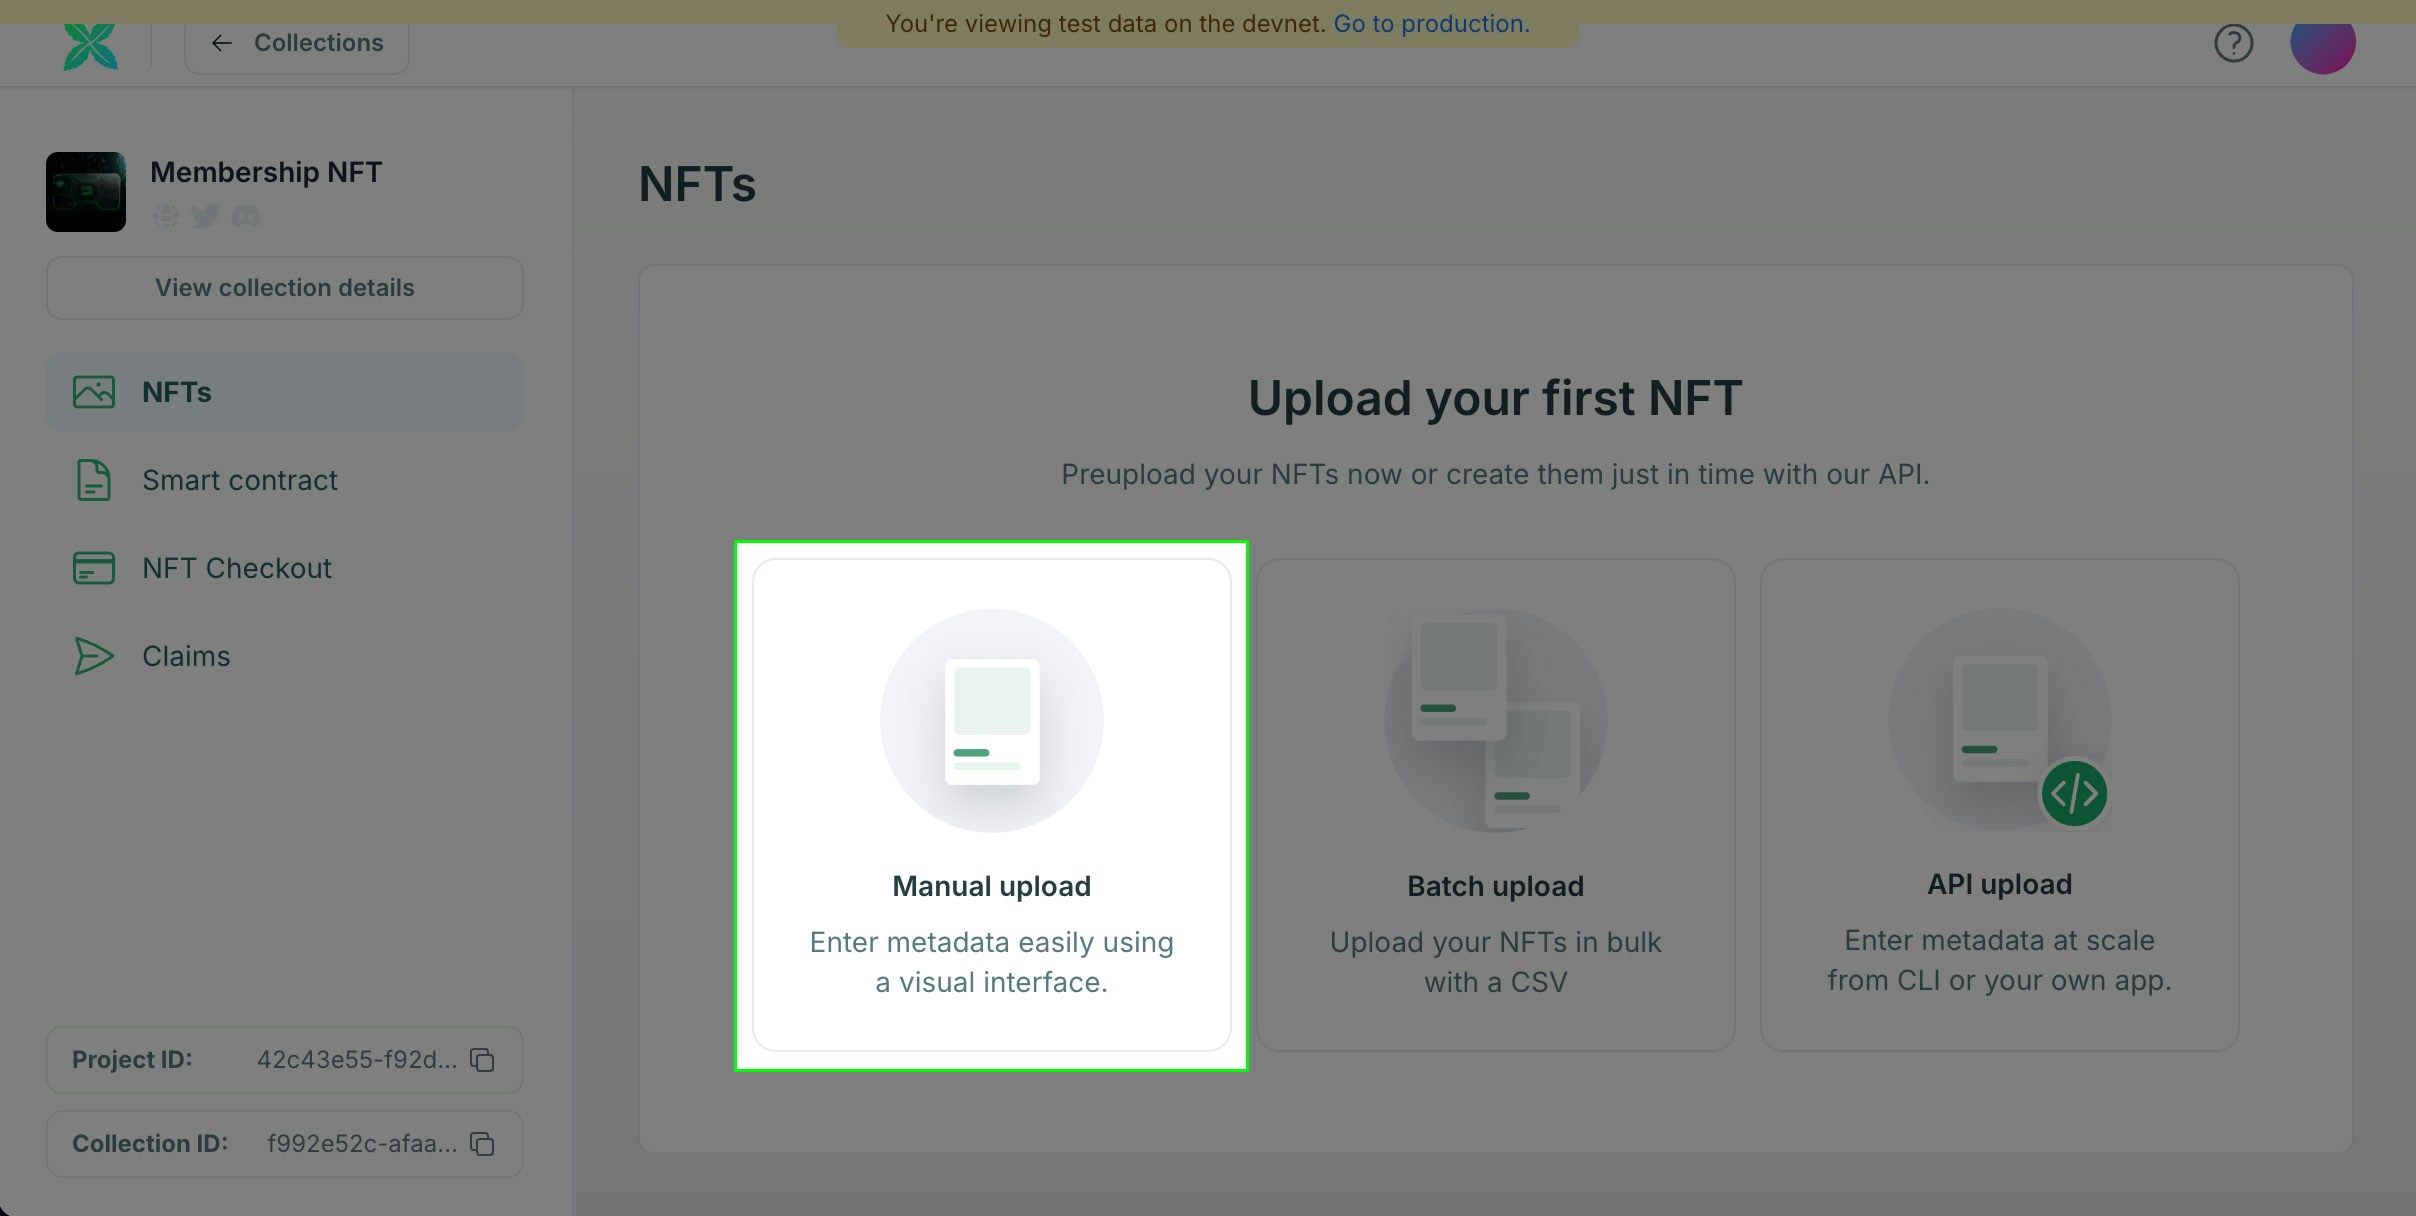 #### NFT Name
The name of your NFT (max 32 characters).
#### Supply
For unique per NFT, enter 1. You will need to configure the metadata for each NFT. You can do this via the developer console individually. For projects with many unique NFTs you should use the [Create Template API](/api-reference/minting/template/create-template) with a script.
For an Open Edition NFT, enter the total quantity, or select the Unlimited checkbox. This will be the only metadata you need to configure.
#### Description
The description of your NFT (max 64 characters).
#### Image
Upload an image for your NFT.
Recommended image formats are: JPEG, PNG, WEBP, or GIF. In most cases, the medium in which NFTs are displayed don't require extremely high resolution files. Strike a balance and lean towards file sizes that do not require significant bandwidth to download (below 10 MB for example).
#### Attributes `optional`
Additional attributes of the NFT. Add as few or as many as you like. You can refer to the [OpenSea metadata standards](https://docs.opensea.io/docs/metadata-standards#attributes) page for detailed explanations of how to use these in your project.
#### NFT Name
The name of your NFT (max 32 characters).
#### Supply
For unique per NFT, enter 1. You will need to configure the metadata for each NFT. You can do this via the developer console individually. For projects with many unique NFTs you should use the [Create Template API](/api-reference/minting/template/create-template) with a script.
For an Open Edition NFT, enter the total quantity, or select the Unlimited checkbox. This will be the only metadata you need to configure.
#### Description
The description of your NFT (max 64 characters).
#### Image
Upload an image for your NFT.
Recommended image formats are: JPEG, PNG, WEBP, or GIF. In most cases, the medium in which NFTs are displayed don't require extremely high resolution files. Strike a balance and lean towards file sizes that do not require significant bandwidth to download (below 10 MB for example).
#### Attributes `optional`
Additional attributes of the NFT. Add as few or as many as you like. You can refer to the [OpenSea metadata standards](https://docs.opensea.io/docs/metadata-standards#attributes) page for detailed explanations of how to use these in your project.
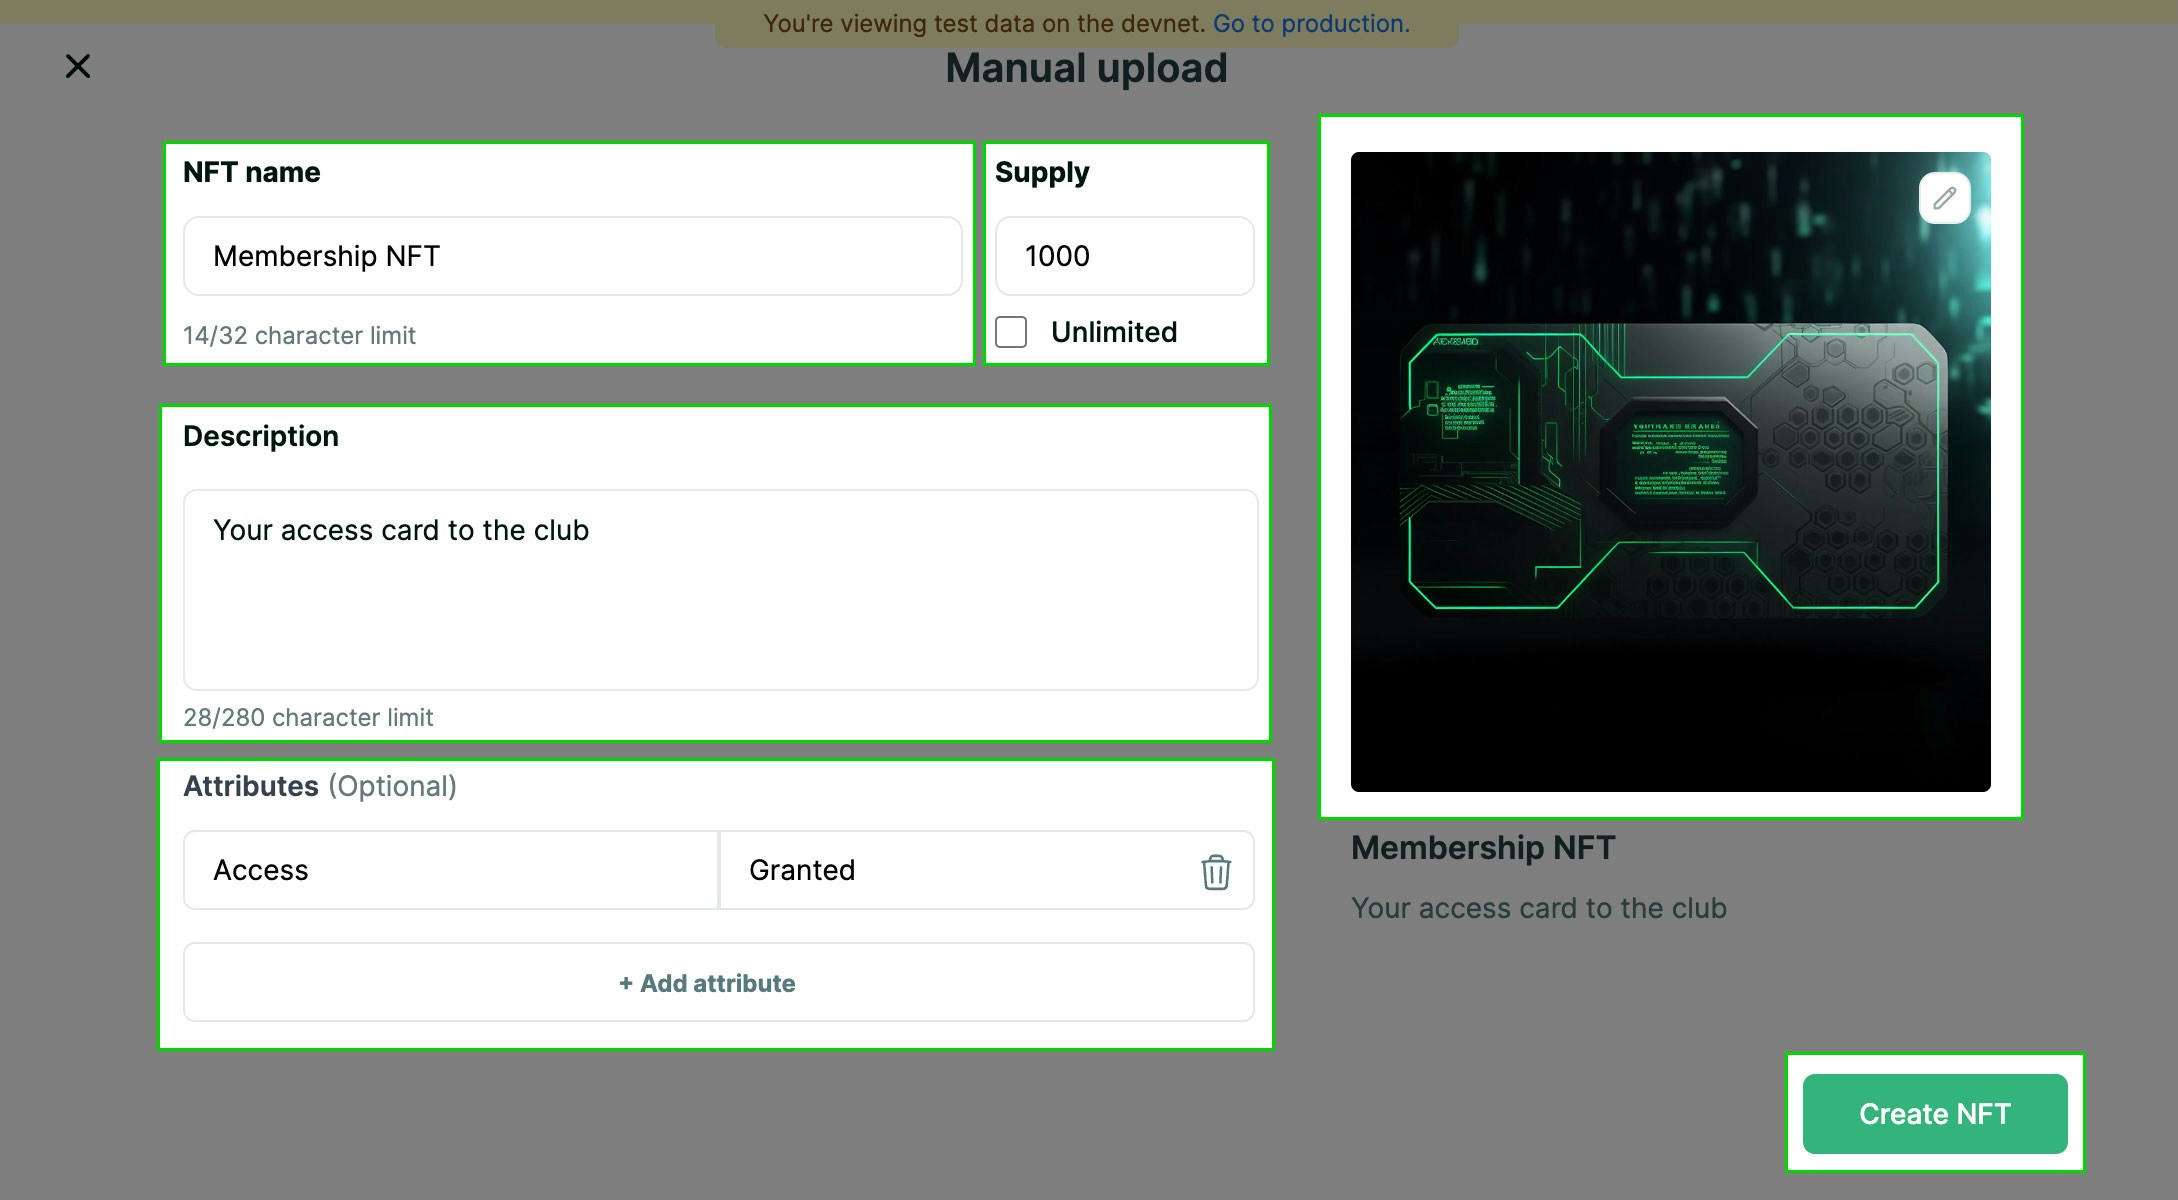 Click the `Create NFT` button to complete.
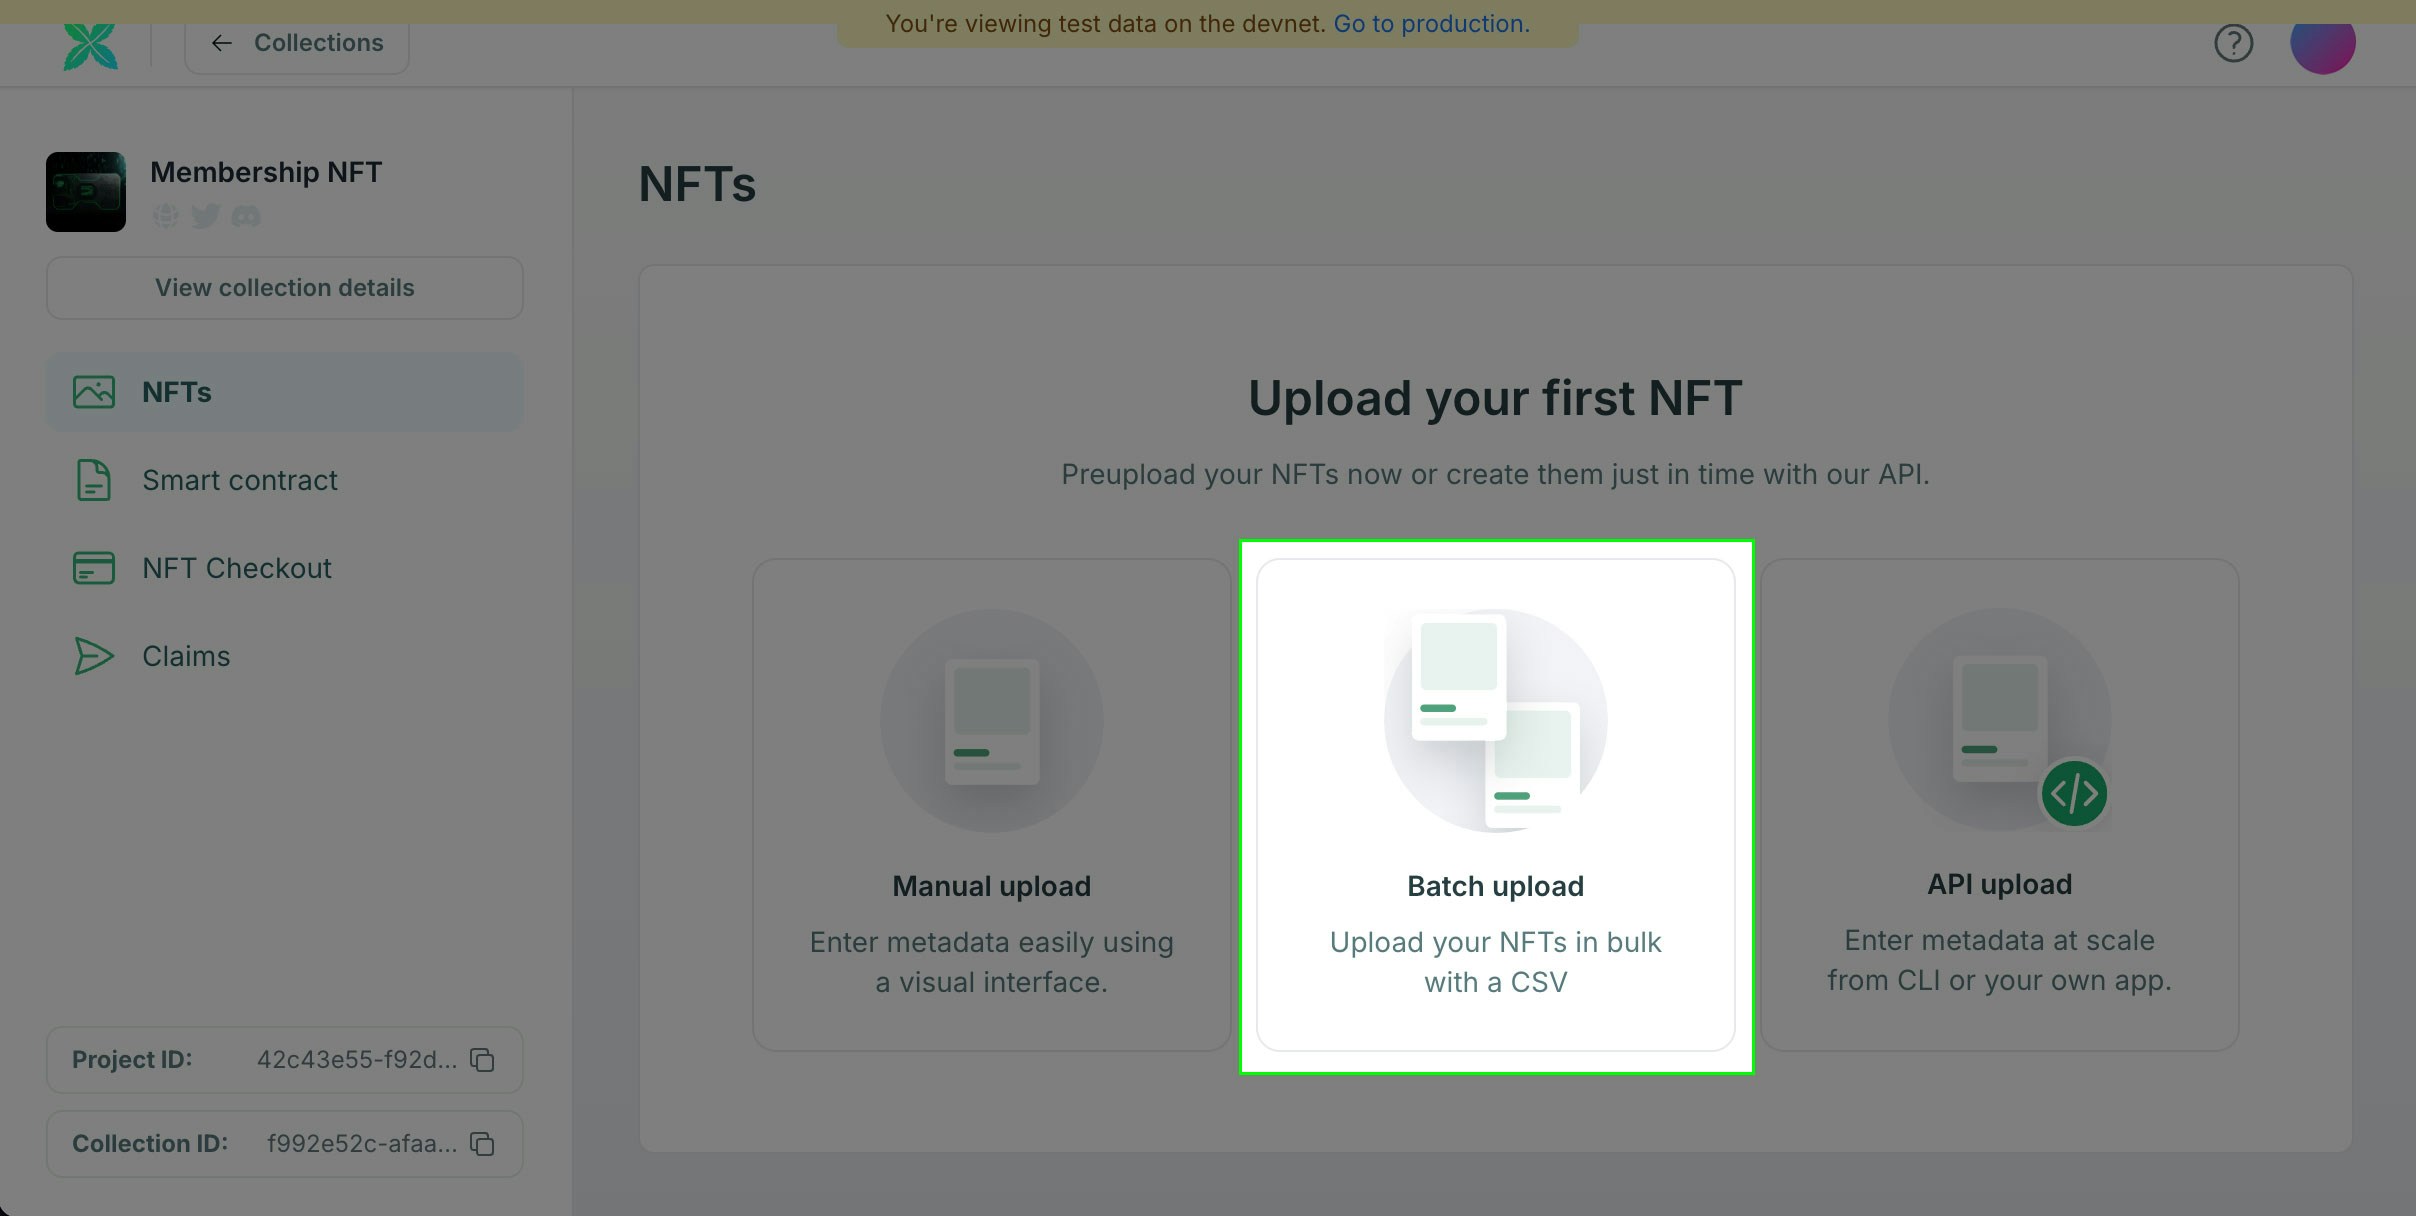 You can download an example of how your file should be structured here: [batch-upload-example.zip](https://www.crossmint.com/assets/examples/batch-upload-example.zip).
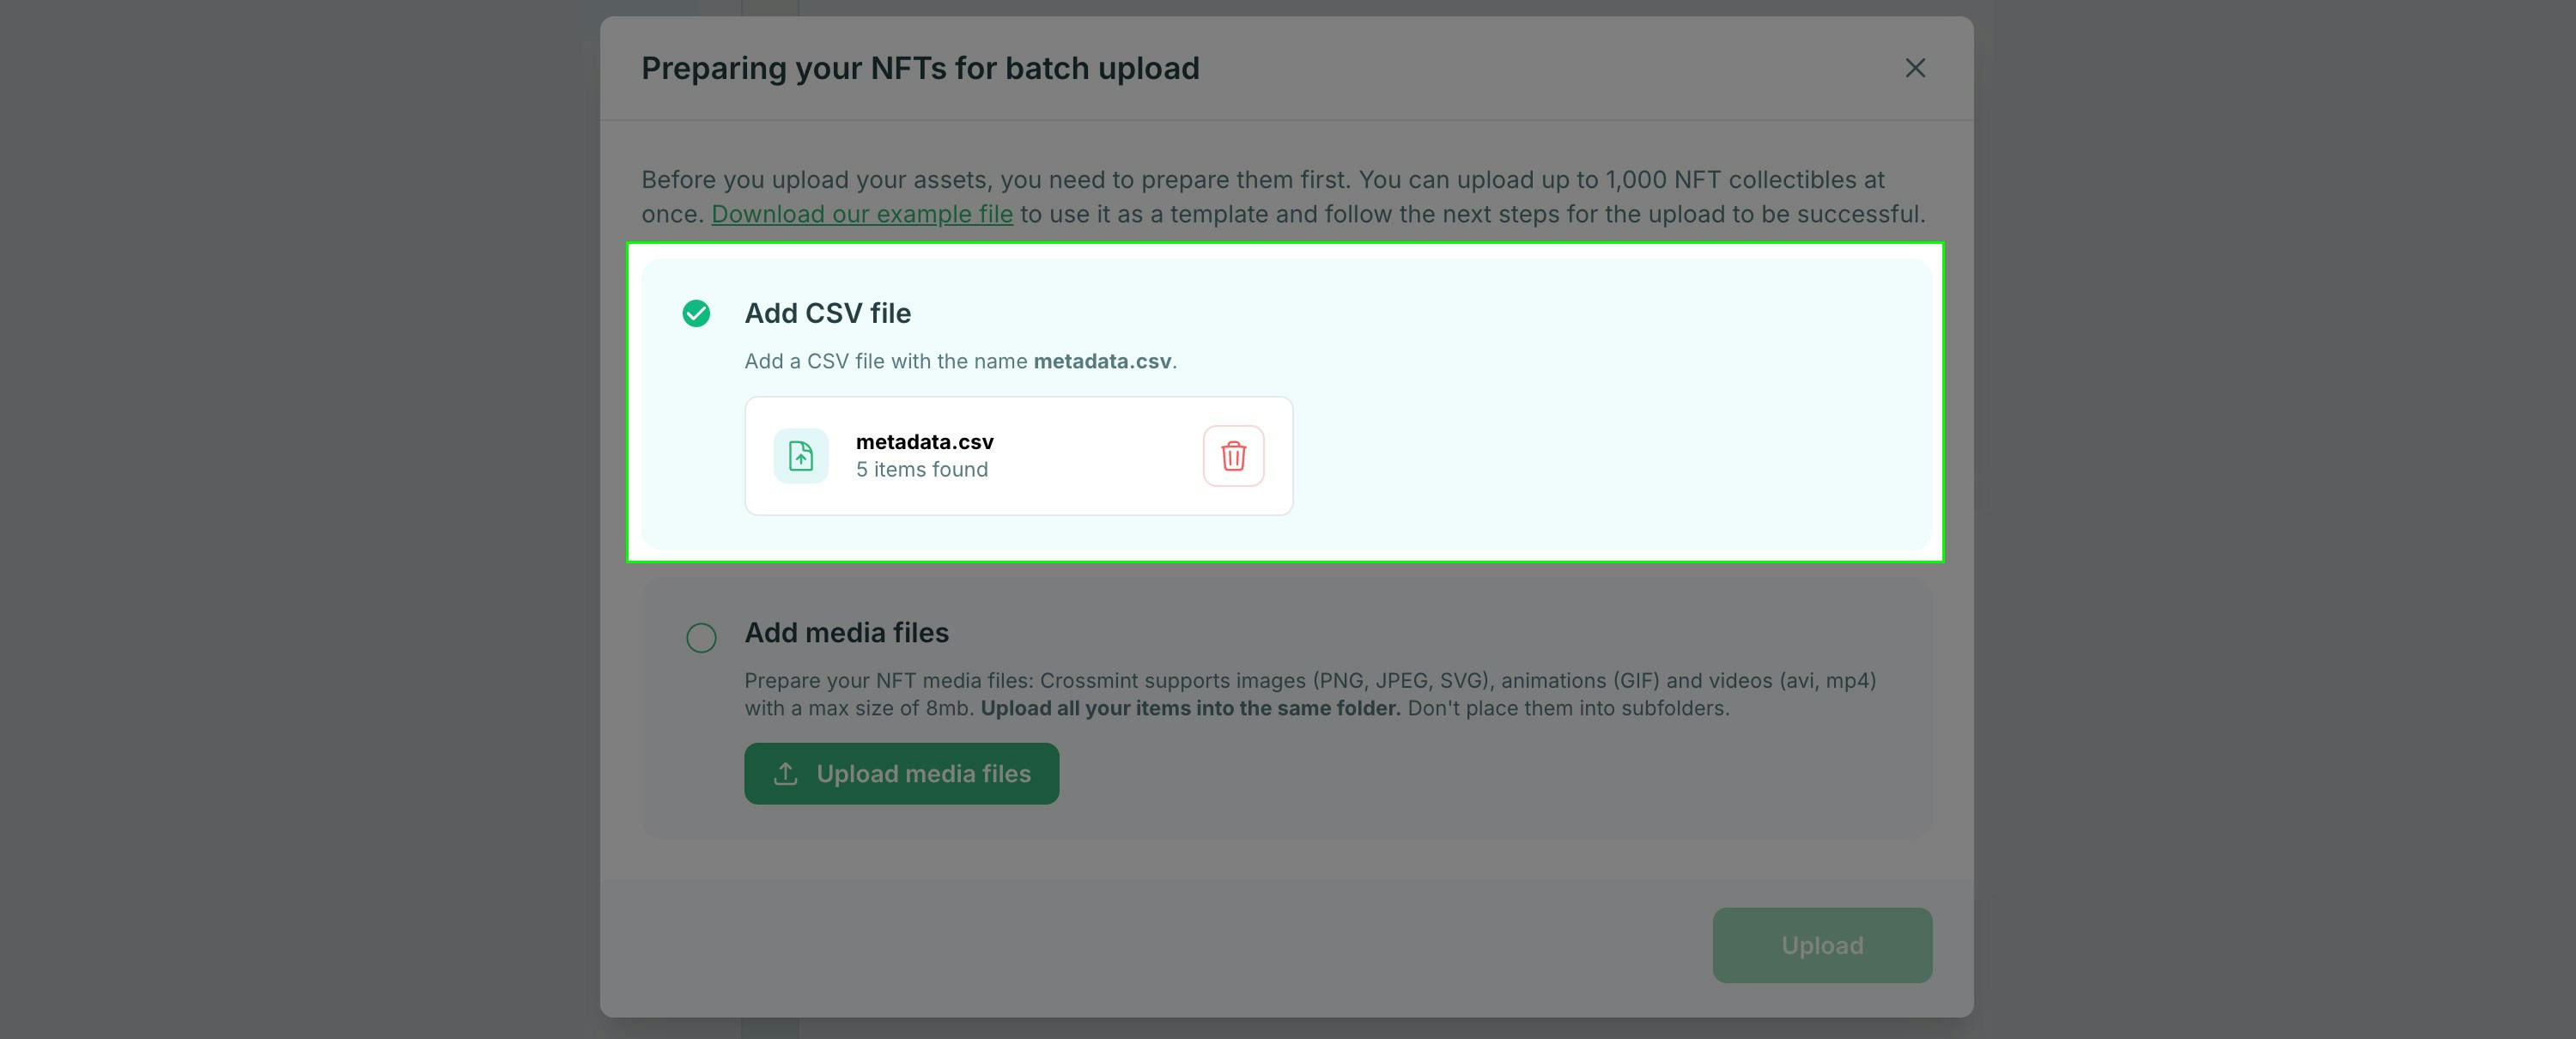 You can upload a maximum of 1000 items at a time. For collections that require more than 1000 tokens, you can repeat the batch upload process multiple times.
The CSV should include a header row with the following fields:
* `name` - The name for the token.
* `image` - The filename of the image, which will be uploaded in the next step.
* `description` - A description for the token.
* `supply ` - How many of the token should be available.
* `animation_url` - (optional)
You can add attributes via additional columns in the spreadsheet. For example, to add an attribute named `weapon`, include an additional column with the attribute name for the header row. You can refer to the example file linked above to see this in action.
Once you have your CSV ready, upload it to move on to the next step for media files.
The image file names must match the value(s) in the `image` column of the uploaded CSV file. These files should be in a flat folder structure for upload (no sub-folders).
Click the "Upload media files" button and then select all of the images referenced in the `metadata.csv` file you uploaded in the previous step.
You can upload a maximum of 1000 items at a time. For collections that require more than 1000 tokens, you can repeat the batch upload process multiple times.
The CSV should include a header row with the following fields:
* `name` - The name for the token.
* `image` - The filename of the image, which will be uploaded in the next step.
* `description` - A description for the token.
* `supply ` - How many of the token should be available.
* `animation_url` - (optional)
You can add attributes via additional columns in the spreadsheet. For example, to add an attribute named `weapon`, include an additional column with the attribute name for the header row. You can refer to the example file linked above to see this in action.
Once you have your CSV ready, upload it to move on to the next step for media files.
The image file names must match the value(s) in the `image` column of the uploaded CSV file. These files should be in a flat folder structure for upload (no sub-folders).
Click the "Upload media files" button and then select all of the images referenced in the `metadata.csv` file you uploaded in the previous step.
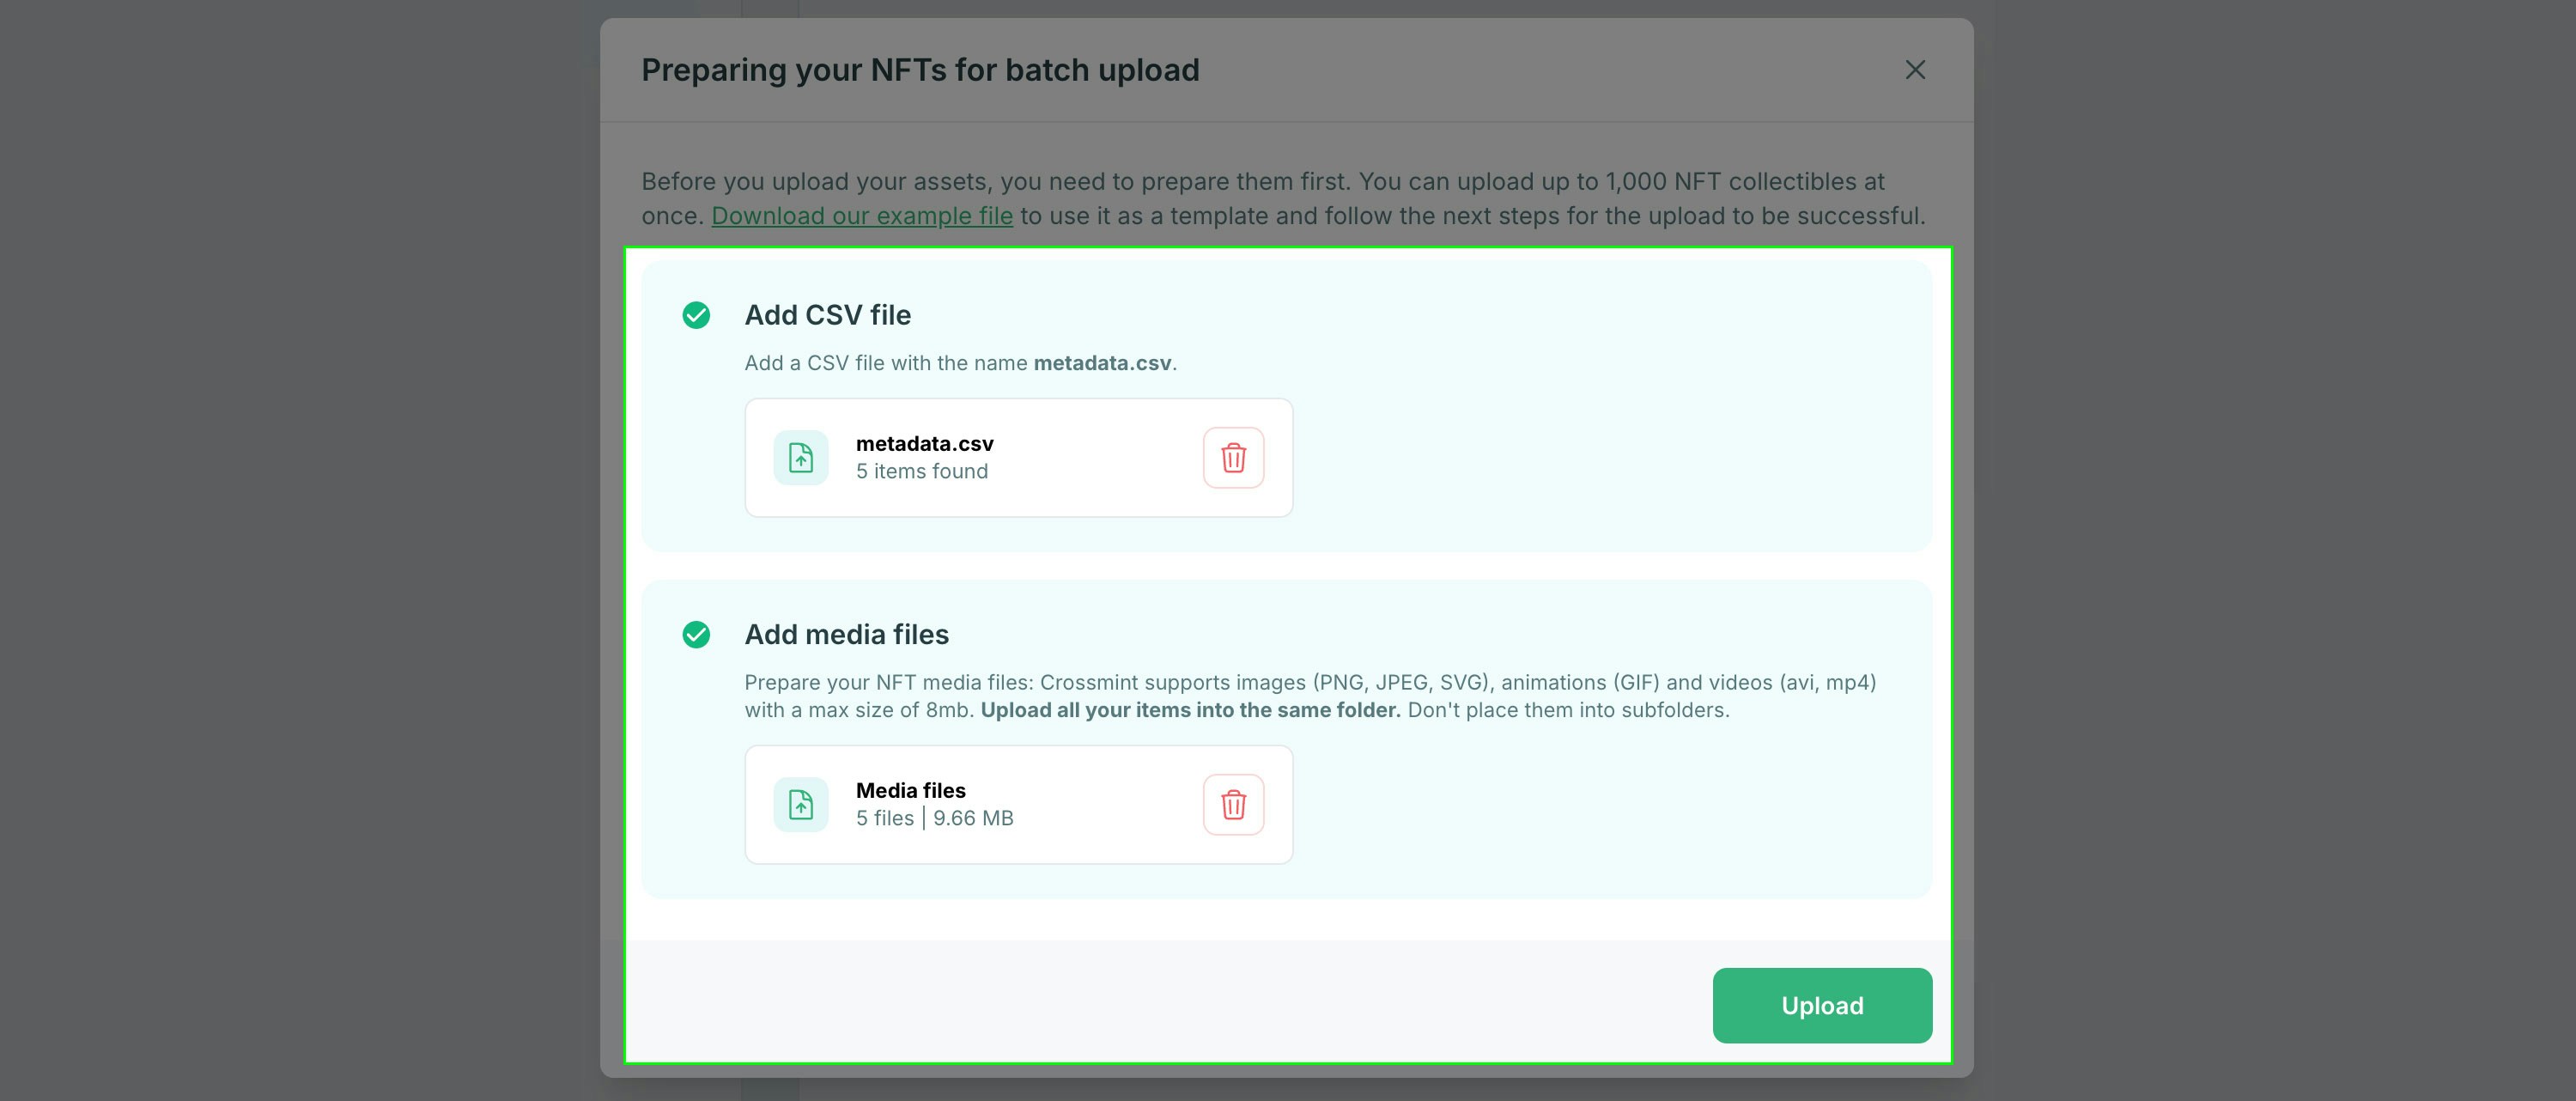
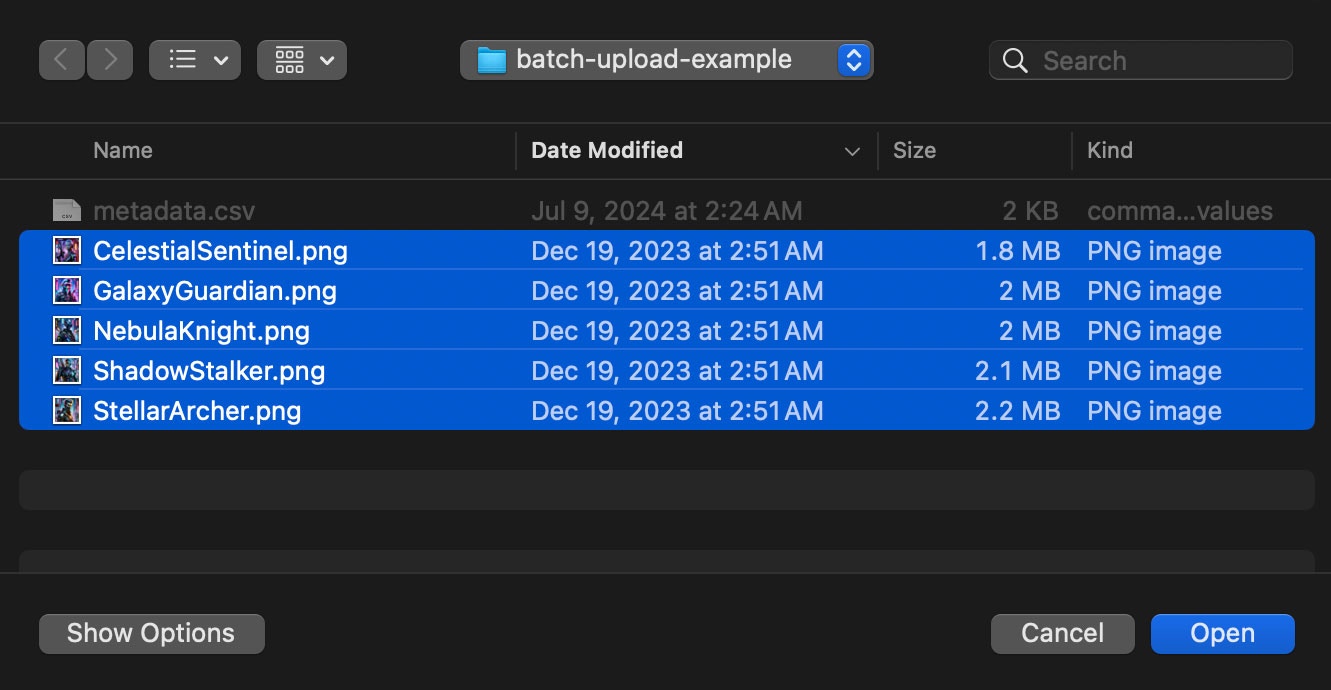 Click the "Upload" button to upload the CSV and media files. If any media files are missing you'll be notified which ones they are in the UI.
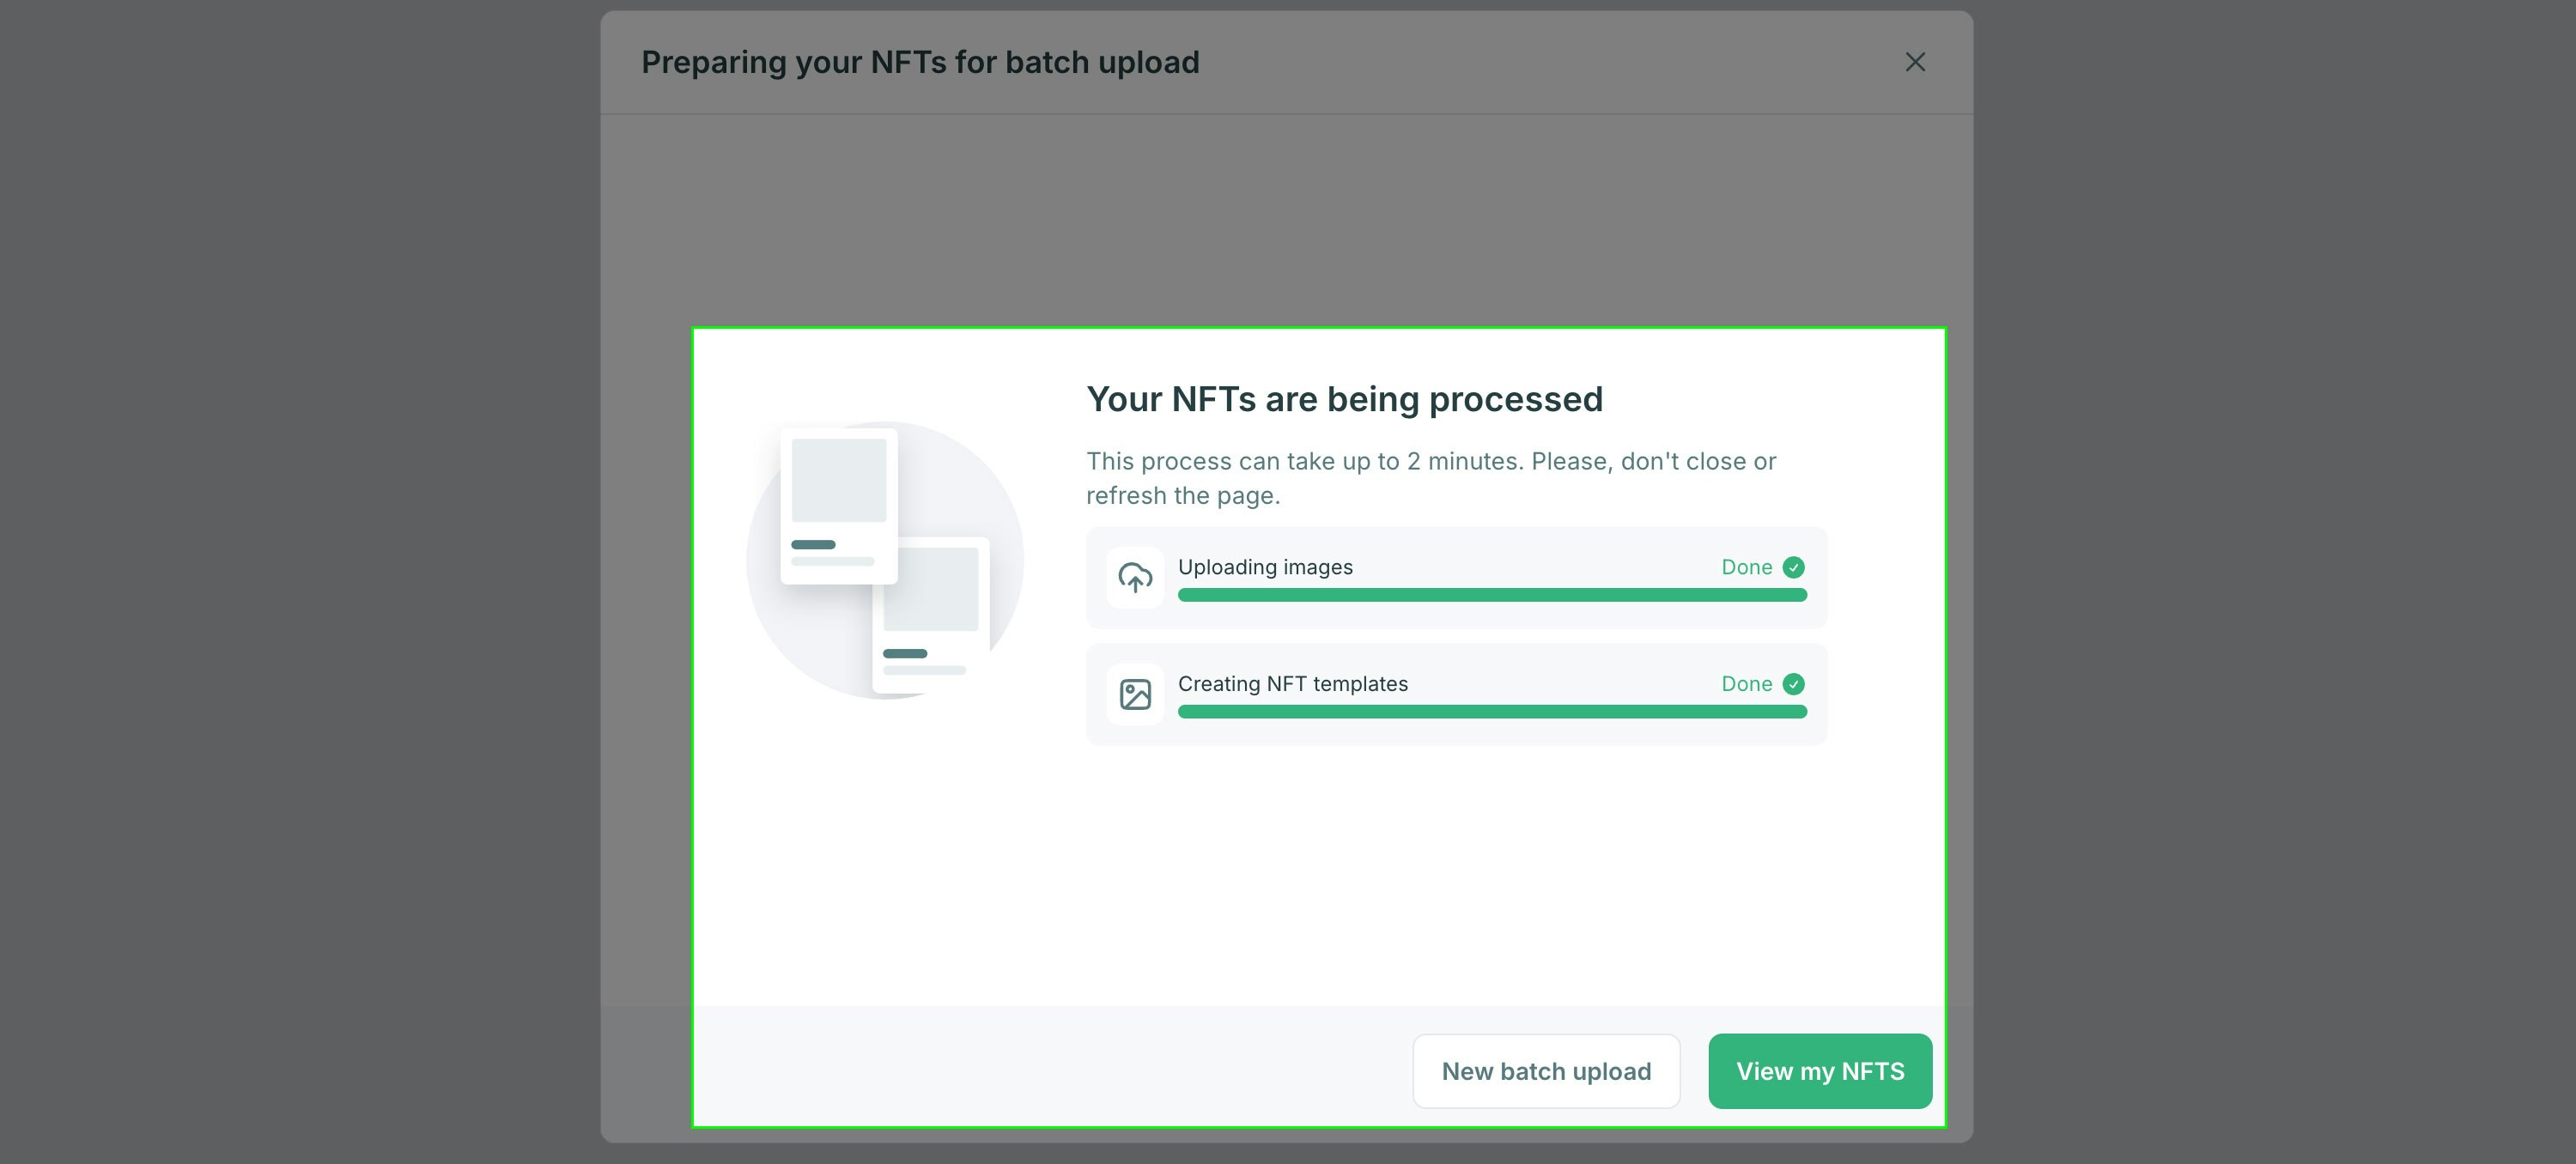
 If you need to upload additional token metadata click the "New batch upload" button. Otherwise select "View my NFTS" to close the modal and view the metadata for your tokens.
 You can also perform bulk uploading by calling the [create-template](/api-reference/minting/template/create-template) API using a script that loops through your `metadata.csv` file. You'll need to have an [API key](/introduction/platform/api-keys#how-to-get-and-use-api-keys) with the `nfts.create` scope enabled.
Below is an example script that will keep your request volume below the 120/min [rate limit](/introduction/platform/api-keys#rate-limits).
This code example is available as a repository on GitHub also:
[crossmint/bulk-uploader](https://github.com/Crossmint/bulk-uploader)
Before running this script you'll need to upload your media files to a service that can host the files, such as [Pinata](https://www.pinata.cloud/).
The `image` column of your `metadata.csv` should include the full URL to the file instead of only a file name like the batch upload option above.
```javascript bulkUploader.js theme={null}
const fs = require("fs");
const csv = require("csv-parser");
require("dotenv").config();
const collectionId = process.env.COLLECTION_ID;
const apiKey = process.env.API_KEY;
const apiUrl = `https://staging.crossmint.com/api/2022-06-09/collections/${collectionId}/templates`;
// Rate limiting setup
const rateLimit = 100; // requests per minute
const interval = 60000 / rateLimit; // interval in milliseconds
async function sendRequest(data) {
try {
const response = await fetch(apiUrl, {
method: "POST",
headers: {
"Content-Type": "application/json",
"X-API-KEY": `${apiKey}`,
},
body: JSON.stringify(data),
});
const responseData = await response.json();
console.log("Success:", responseData);
} catch (error) {
console.error("Error:", error.message);
}
}
// Read and process the CSV file
function processFile() {
let promise = Promise.resolve();
fs.createReadStream("metadata.csv")
.pipe(csv())
.on("data", (row) => {
promise = promise.then(() => {
const postData = {
metadata: {
name: row.name,
image: row.image, // this should be a publicly accessible URL
description: row.description,
},
supply: { limit: Number(row.supply) },
reuploadLinkedFiles: false, // this is optional
};
return sendRequest(postData).then(() => new Promise((resolve) => setTimeout(resolve, interval)));
});
})
.on("end", () => {
promise.then(() => {
console.log("Finished processing file.");
});
});
}
processFile();
```
Run the script to bulk upload your template metadata.
```node theme={null}
node bulkUploader.js
```
## Send a Test NFT
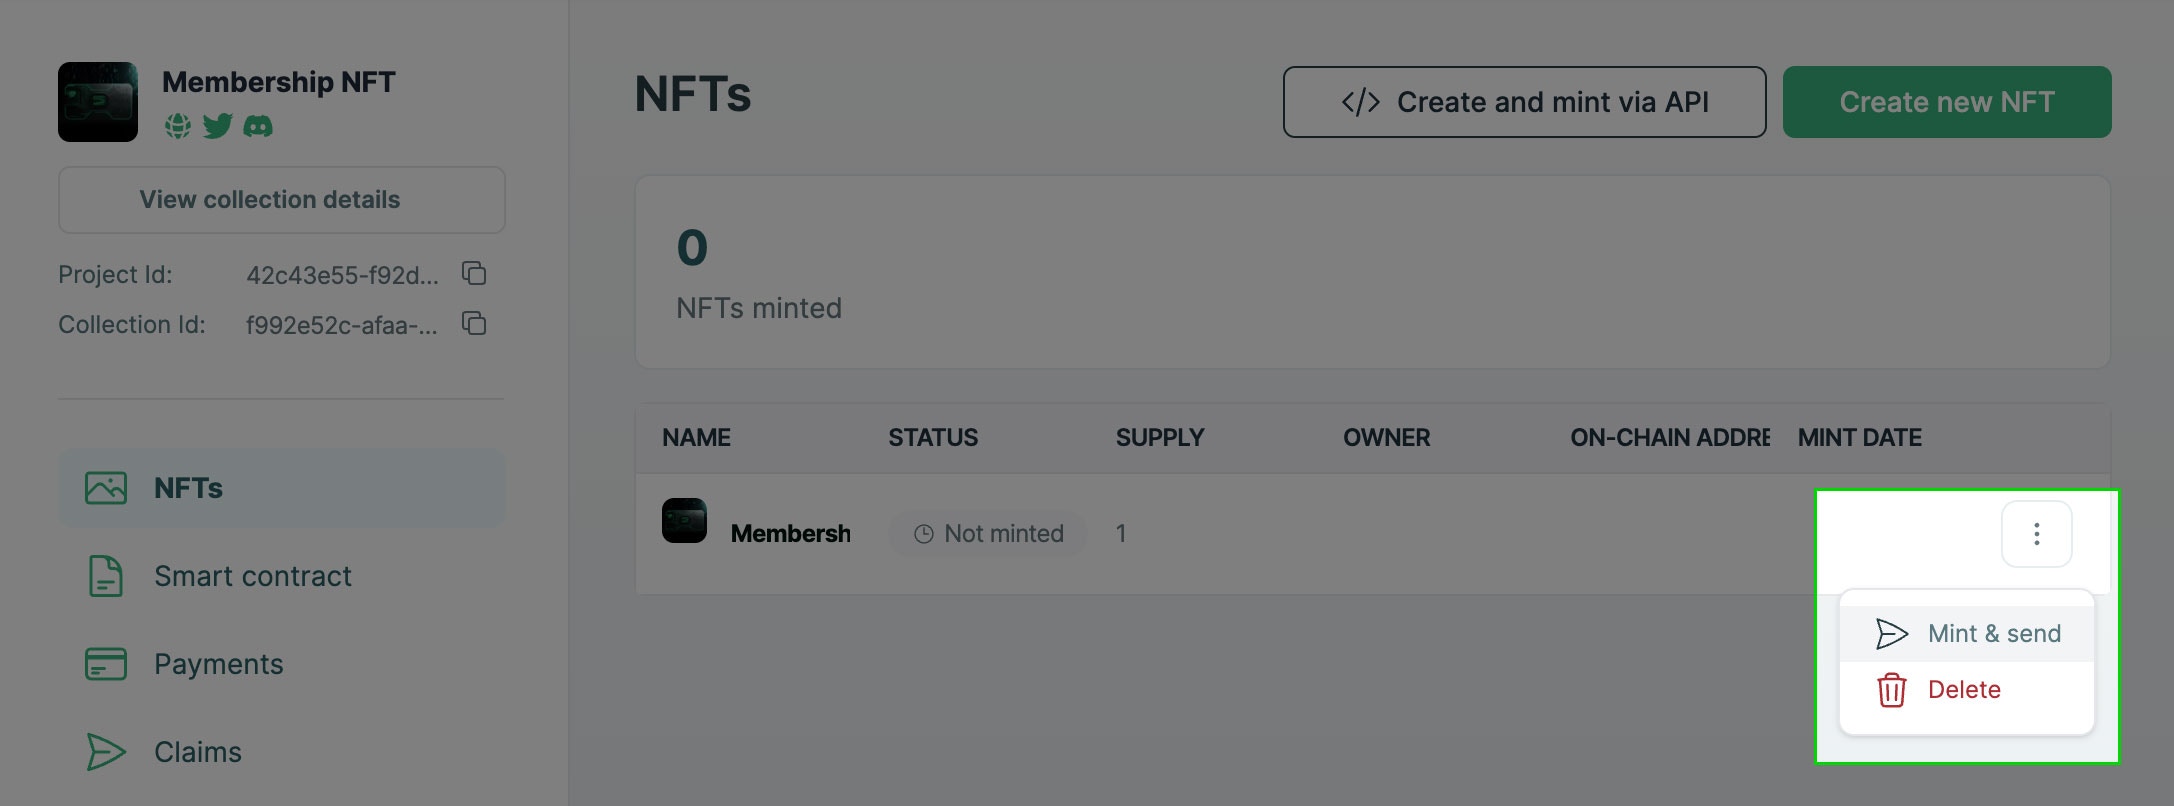
Once you have added metadata you can send a test NFT to yourself or another user. The interface to mint and send from the console supports email and wallet address for the recipient.
You can mint and send a test NFT to an email address or wallet to make sure everything is working as expected.
You can also perform bulk uploading by calling the [create-template](/api-reference/minting/template/create-template) API using a script that loops through your `metadata.csv` file. You'll need to have an [API key](/introduction/platform/api-keys#how-to-get-and-use-api-keys) with the `nfts.create` scope enabled.
Below is an example script that will keep your request volume below the 120/min [rate limit](/introduction/platform/api-keys#rate-limits).
This code example is available as a repository on GitHub also:
[crossmint/bulk-uploader](https://github.com/Crossmint/bulk-uploader)
Before running this script you'll need to upload your media files to a service that can host the files, such as [Pinata](https://www.pinata.cloud/).
The `image` column of your `metadata.csv` should include the full URL to the file instead of only a file name like the batch upload option above.
```javascript bulkUploader.js theme={null}
const fs = require("fs");
const csv = require("csv-parser");
require("dotenv").config();
const collectionId = process.env.COLLECTION_ID;
const apiKey = process.env.API_KEY;
const apiUrl = `https://staging.crossmint.com/api/2022-06-09/collections/${collectionId}/templates`;
// Rate limiting setup
const rateLimit = 100; // requests per minute
const interval = 60000 / rateLimit; // interval in milliseconds
async function sendRequest(data) {
try {
const response = await fetch(apiUrl, {
method: "POST",
headers: {
"Content-Type": "application/json",
"X-API-KEY": `${apiKey}`,
},
body: JSON.stringify(data),
});
const responseData = await response.json();
console.log("Success:", responseData);
} catch (error) {
console.error("Error:", error.message);
}
}
// Read and process the CSV file
function processFile() {
let promise = Promise.resolve();
fs.createReadStream("metadata.csv")
.pipe(csv())
.on("data", (row) => {
promise = promise.then(() => {
const postData = {
metadata: {
name: row.name,
image: row.image, // this should be a publicly accessible URL
description: row.description,
},
supply: { limit: Number(row.supply) },
reuploadLinkedFiles: false, // this is optional
};
return sendRequest(postData).then(() => new Promise((resolve) => setTimeout(resolve, interval)));
});
})
.on("end", () => {
promise.then(() => {
console.log("Finished processing file.");
});
});
}
processFile();
```
Run the script to bulk upload your template metadata.
```node theme={null}
node bulkUploader.js
```
## Send a Test NFT
Once you have added metadata you can send a test NFT to yourself or another user. The interface to mint and send from the console supports email and wallet address for the recipient.
You can mint and send a test NFT to an email address or wallet to make sure everything is working as expected.
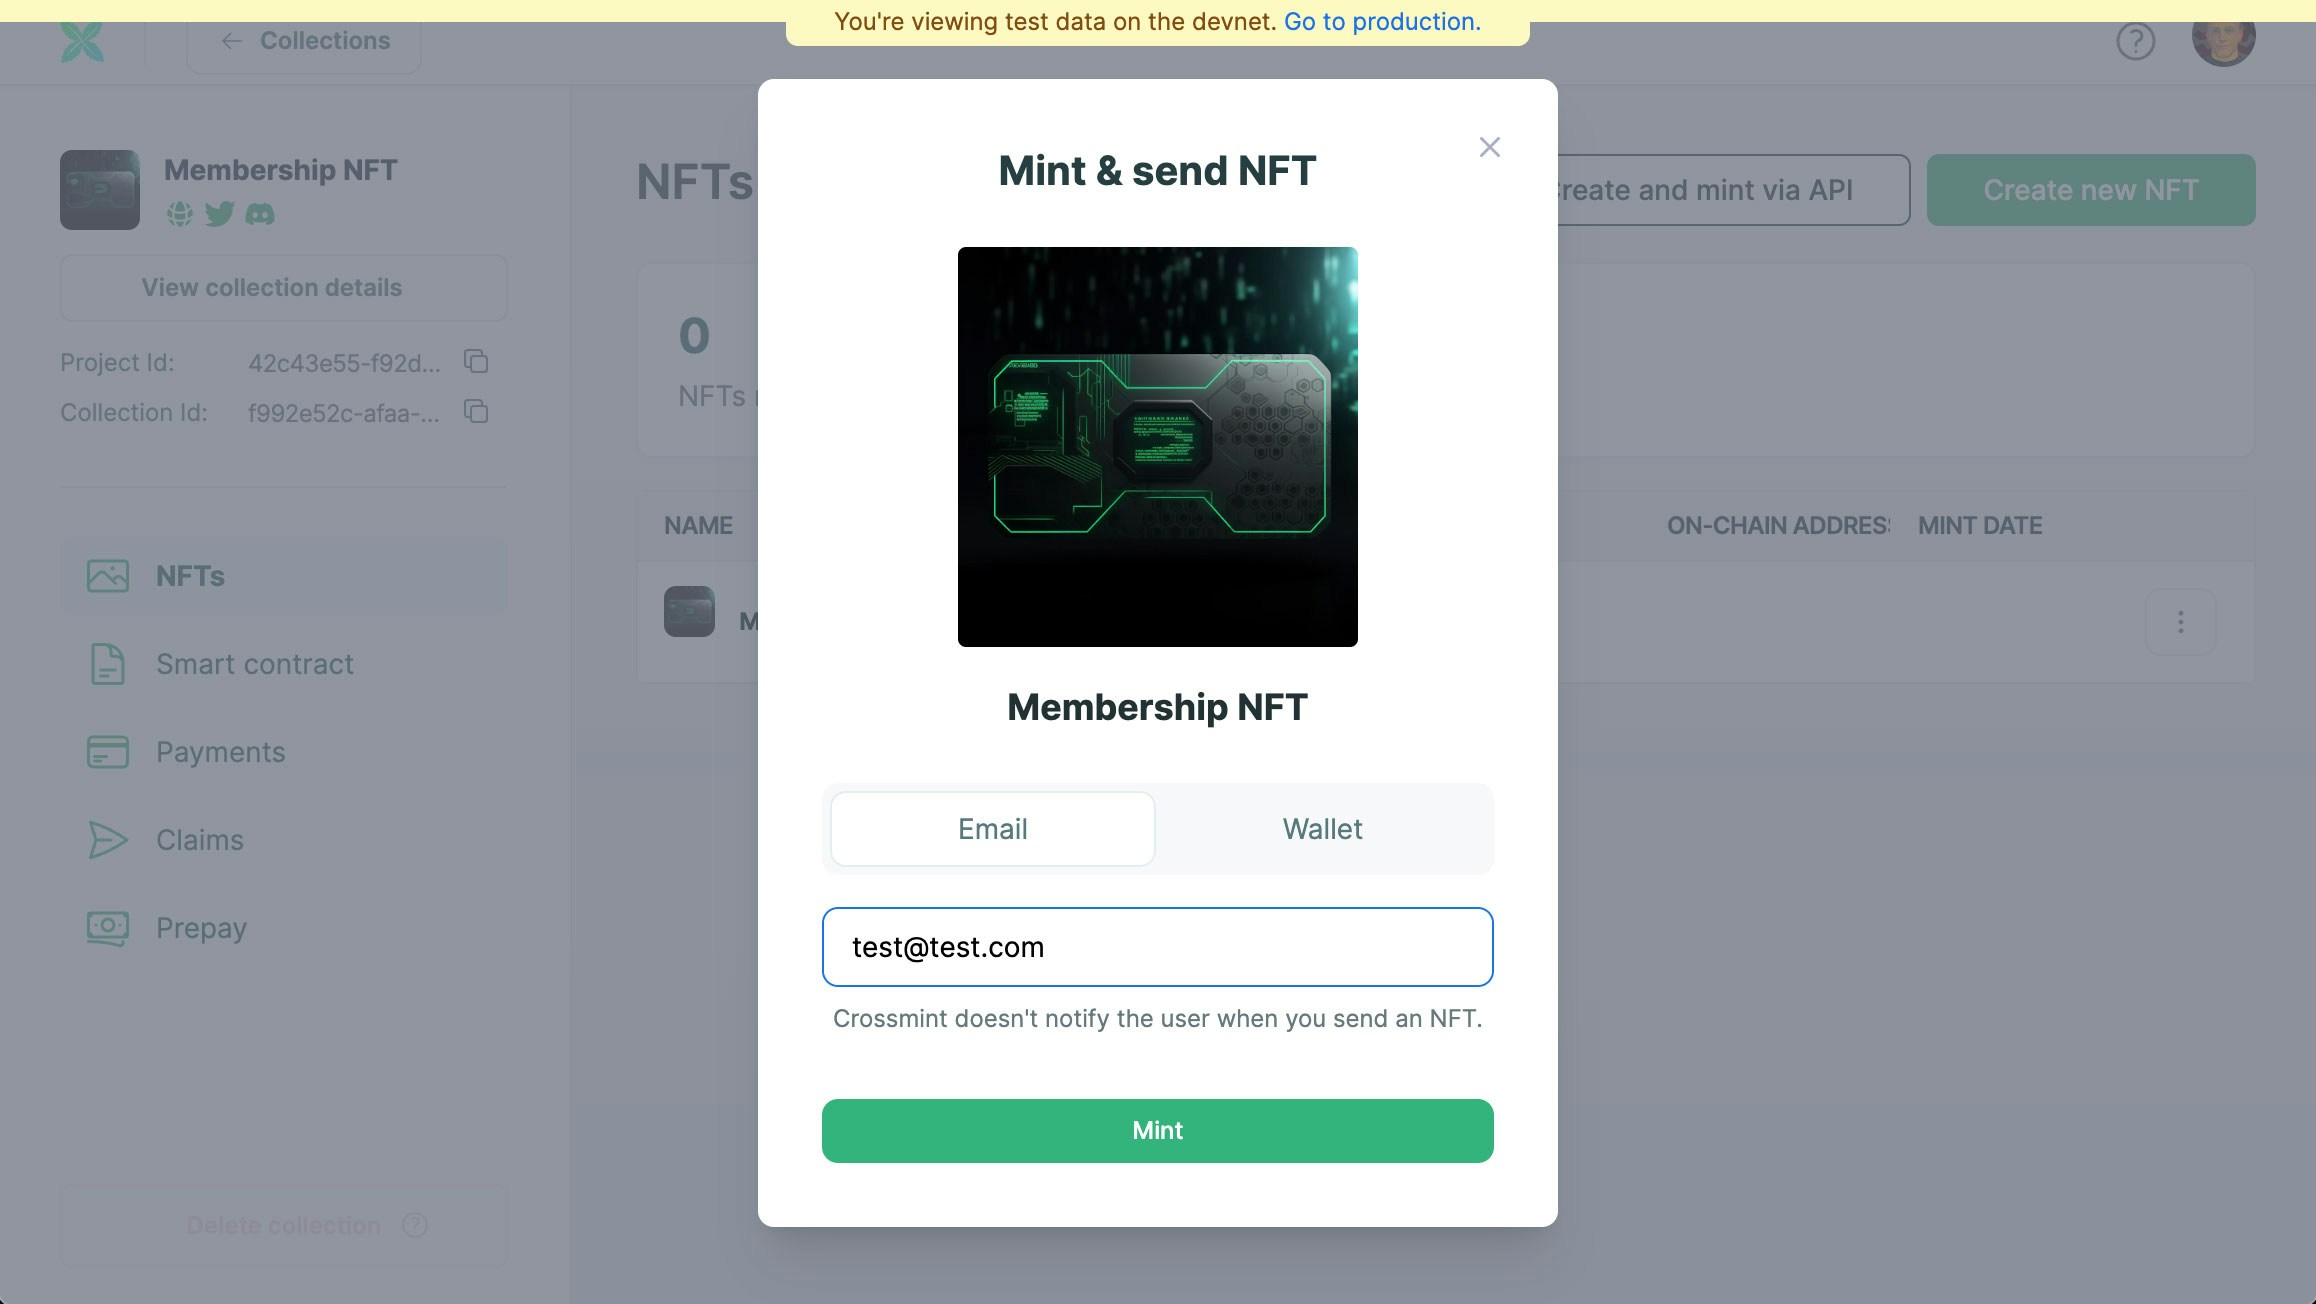
 If you enter an email address the NFT will be sent to a unique Crossmint custodial wallet associated with that email address. The owner of this email can log in to Crossmint to view their NFT. The wallet option will send directly to the wallet address.
Crossmint does ***not*** send an email to the user when you airdrop NFTs from the console.
If you enter an email address the NFT will be sent to a unique Crossmint custodial wallet associated with that email address. The owner of this email can log in to Crossmint to view their NFT. The wallet option will send directly to the wallet address.
Crossmint does ***not*** send an email to the user when you airdrop NFTs from the console.
 That's all there is to it. Check below for recommended next steps.