> ## Documentation Index
> Fetch the complete documentation index at: https://docs.crossmint.com/llms.txt
> Use this file to discover all available pages before exploring further.

# Quickstart ⚡

> Build your first workflow in under 5 minutes

In this quickstart you will create a simple workflow that creates a wallet and fetches its balance.

## Installation

<Steps>
  <Step title="Create an n8n account">
    Register with n8n <a href="https://app.n8n.cloud/register" target="_blank" rel="noopener noreferrer">here</a>, otherwise <a href="https://app.n8n.cloud/login" target="_blank" rel="noopener noreferrer">login</a> to your existing account.
  </Step>

  <Step title="Create a new workflow">
    On the top right of your n8n dashboard, click the **Create workflow** button.
  </Step>

  <Step title="Install Crossmint Node">
    In the middle of the screen, click <b>Add first step</b>. In the search bar, type <b>Crossmint</b> to find the Crossmint nodes.<br /><br />
    For both <b>Crossmint Wallets</b> and <b>Crossmint Checkout</b> nodes, you need to click the <b>Install Node</b> button to add them to your workspace.
  </Step>
</Steps>

You now have access to two nodes: **Crossmint Wallets** and **Crossmint Checkout**. You can close the Settings page and get ready to build your first workflow.

## Get Started

<Steps>
  <Step title="Create a wallet node">
    <ol>
      <li>Click the <b>+</b> button on the top left of your screen to start a new workflow.</li>
      <li>Click the <b>+</b> button in the middle of your screen to add a new node.</li>

      <li>
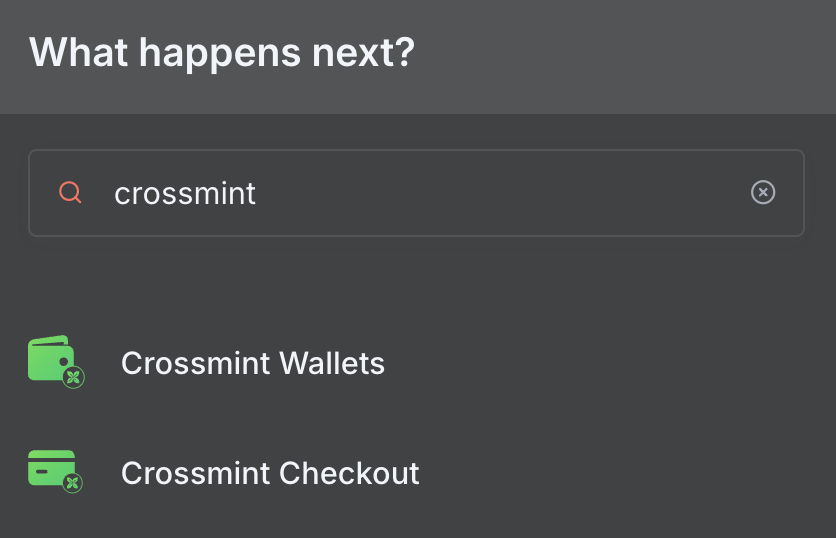
        <p>Search for <b>Crossmint</b> and you will see:</p>

        <ul>
          <li><b>Crossmint Wallets</b></li>
          <li><b>Crossmint Checkout</b></li>
        </ul>
      </li>

      <img src="https://mintcdn.com/crossmint/iJ4Pa4z5KCoLtzBg/images/solutions/n8n/crossmint-search.png?fit=max&auto=format&n=iJ4Pa4z5KCoLtzBg&q=85&s=9d78f52a7cfd4c0977462390a6fa92c2" alt="Crossmint node search" style={{width: '475px'}} width="836" height="538" data-path="images/solutions/n8n/crossmint-search.png" />

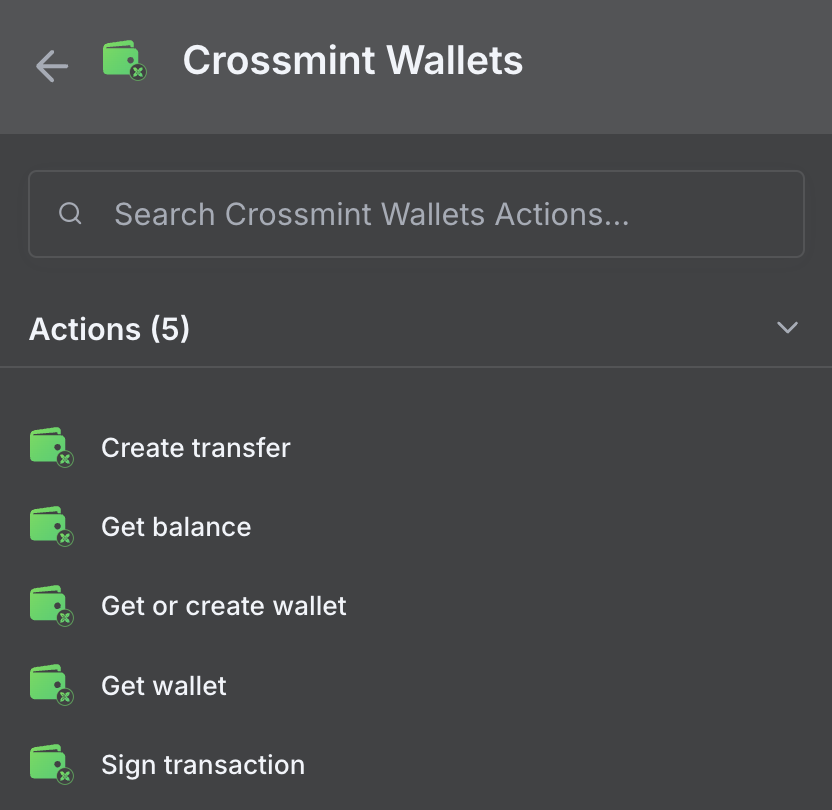
      <li>For this example, choose the <b>Get or Create Wallet</b> operation.</li>
    </ol>

    <img src="https://mintcdn.com/crossmint/iJ4Pa4z5KCoLtzBg/images/solutions/n8n/crossmint-wallets.png?fit=max&auto=format&n=iJ4Pa4z5KCoLtzBg&q=85&s=b88ef809fcfd047da9199e385657a498" alt="Crossmint node search" style={{width: '500px'}} width="832" height="810" data-path="images/solutions/n8n/crossmint-wallets.png" />
  </Step>

  <Step title="Obtain a Crossmint credential">
    <ol>
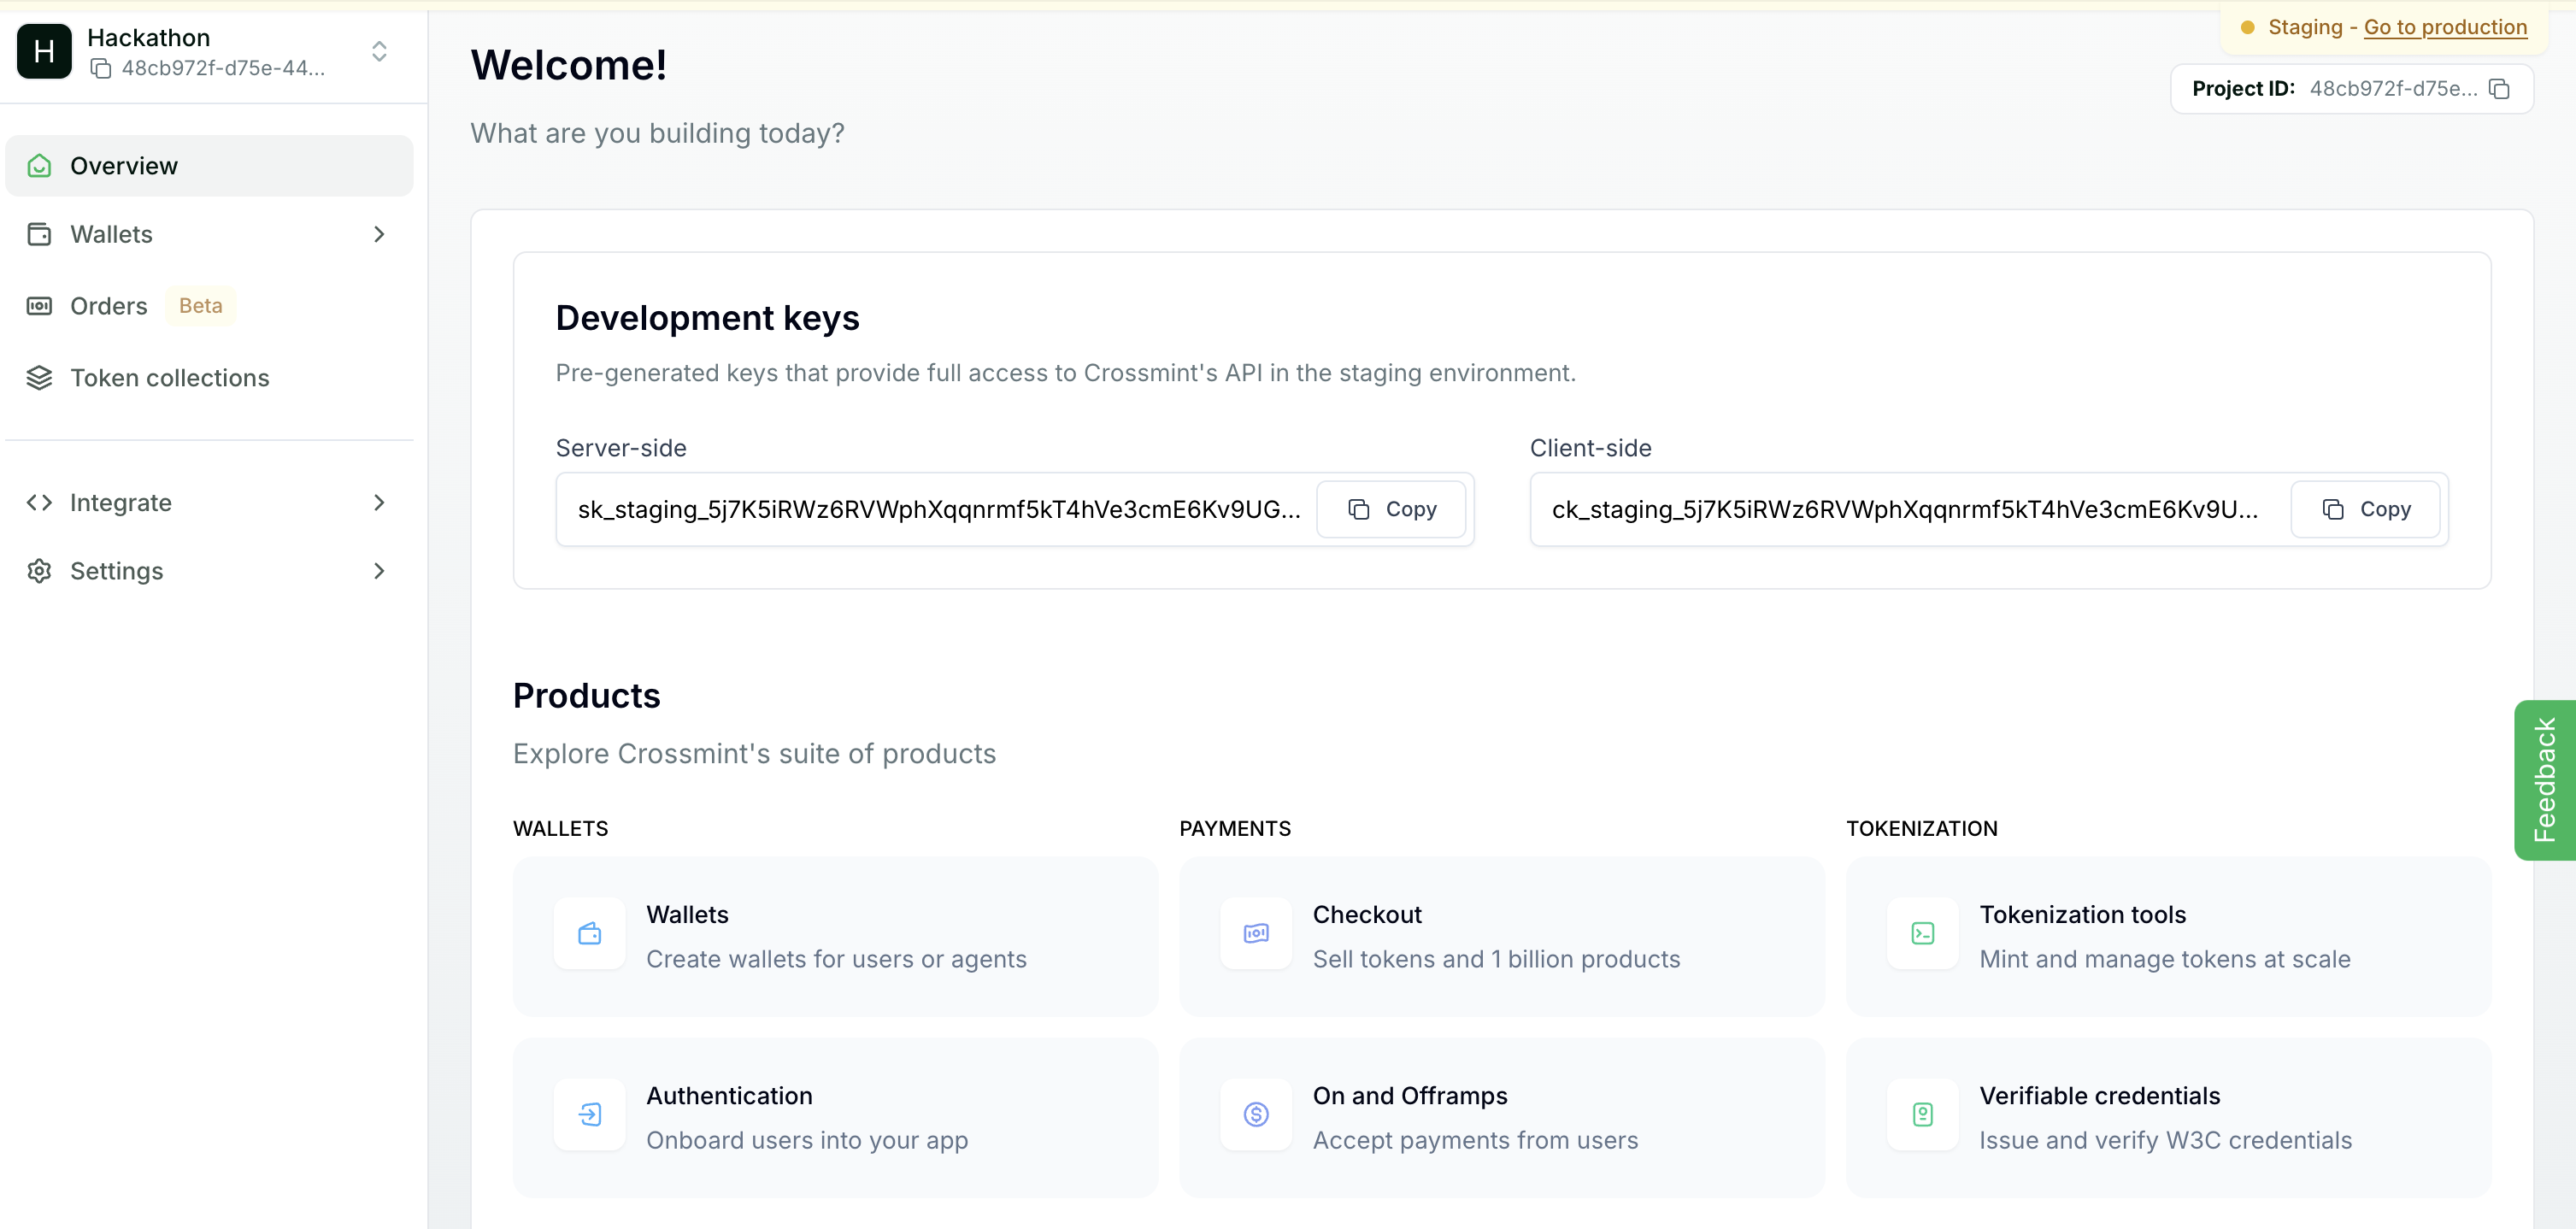
      <li>Create an account on <a href="https://staging.crossmint.com/console/overview" rel="noopener">Crossmint Console</a>.</li>
      <li>Copy your <b>server-side API key</b> from the project settings.</li>
    </ol>

    <img src="https://mintcdn.com/crossmint/iJ4Pa4z5KCoLtzBg/images/solutions/n8n/crossmint-staging-console.png?fit=max&auto=format&n=iJ4Pa4z5KCoLtzBg&q=85&s=87867ac91e6b8176a342258631e13ee5" alt="Crossmint staging console" style={{width: '500px'}} width="3014" height="1438" data-path="images/solutions/n8n/crossmint-staging-console.png" />

    <ol start="3">
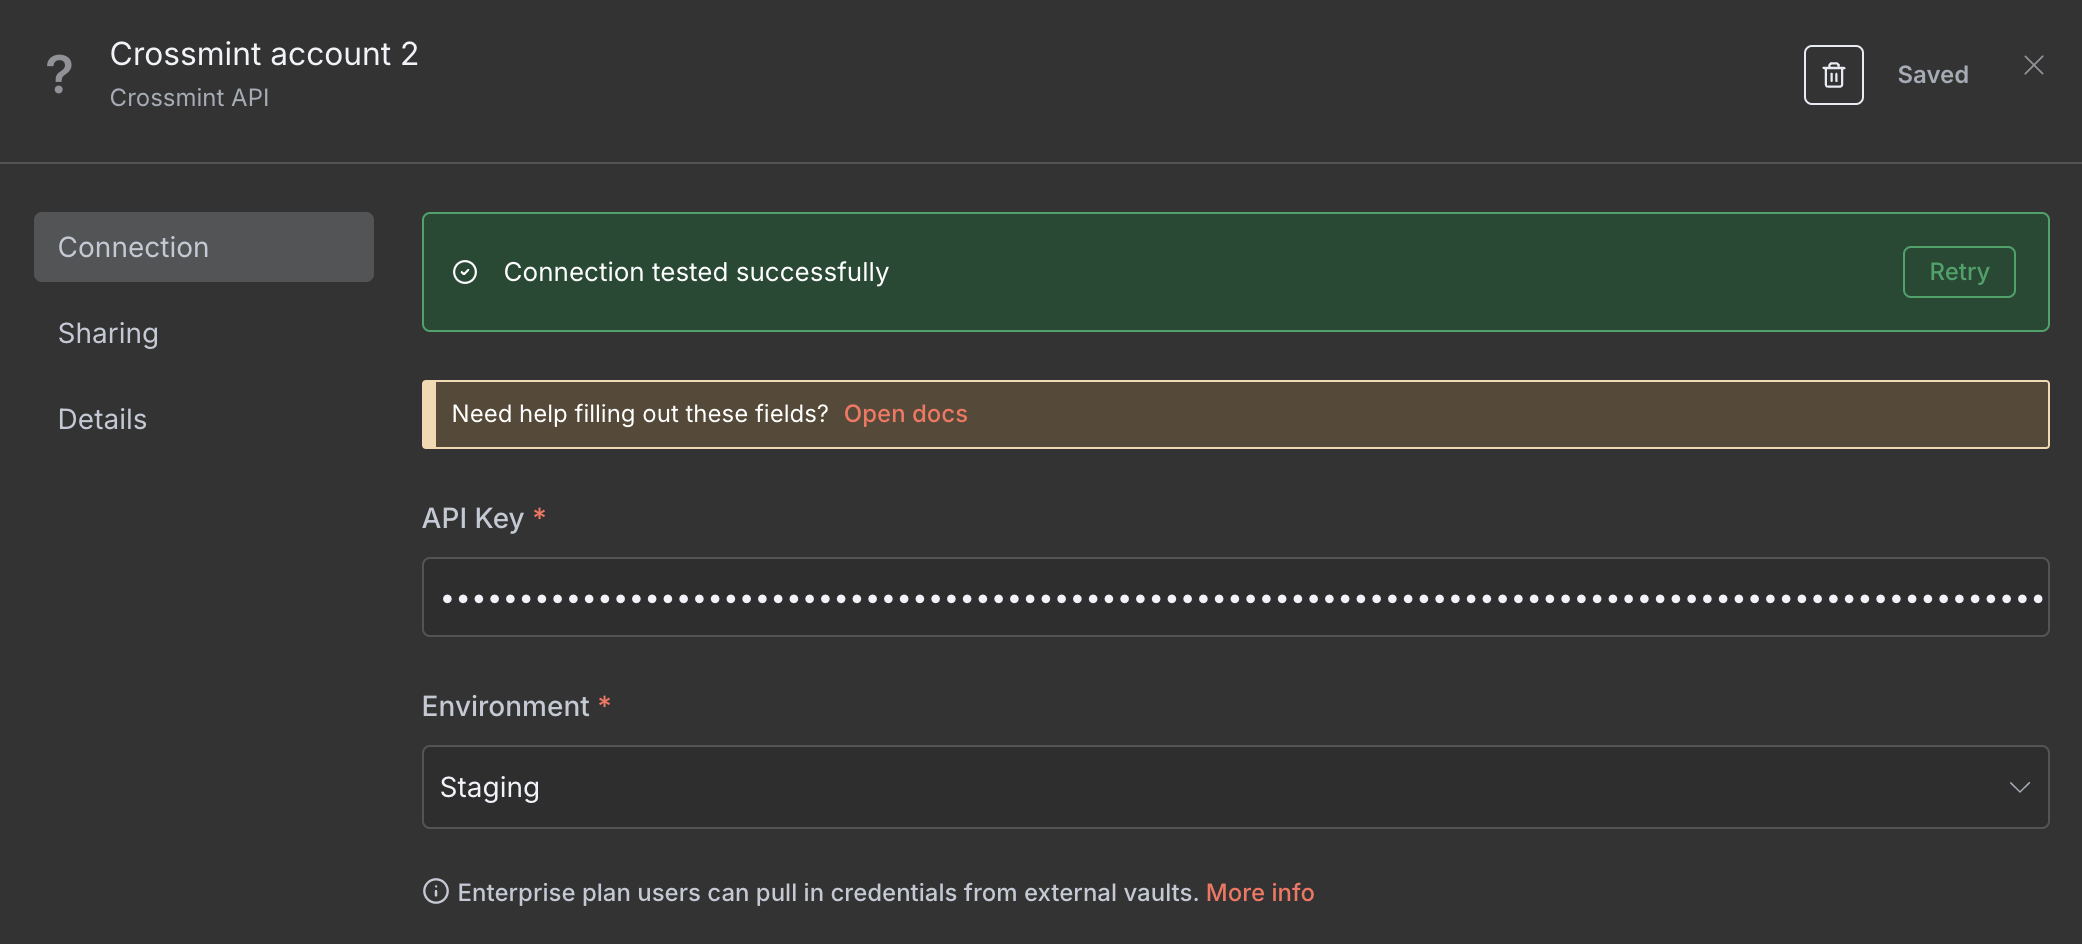
      <li>Back in n8n, in the Crossmint Wallets node, open <b>Credential to connect with</b> and choose <b>Create New</b>.</li>
      <li>Enter your Crossmint <b>API Key</b> and hit Save.</li>
    </ol>

    <img src="https://mintcdn.com/crossmint/iJ4Pa4z5KCoLtzBg/images/solutions/n8n/credential-form.png?fit=max&auto=format&n=iJ4Pa4z5KCoLtzBg&q=85&s=d27a8514b57485f3d092971a7e294d0f" alt="Crossmint API credential form" style={{width: '500px'}} width="2082" height="944" data-path="images/solutions/n8n/credential-form.png" />

    <Note>
      To test this flow in production, obtain a Crossmint API key from the <a href="https://www.crossmint.com/console/overview" rel="noopener">Crossmint Console</a>.
    </Note>
  </Step>

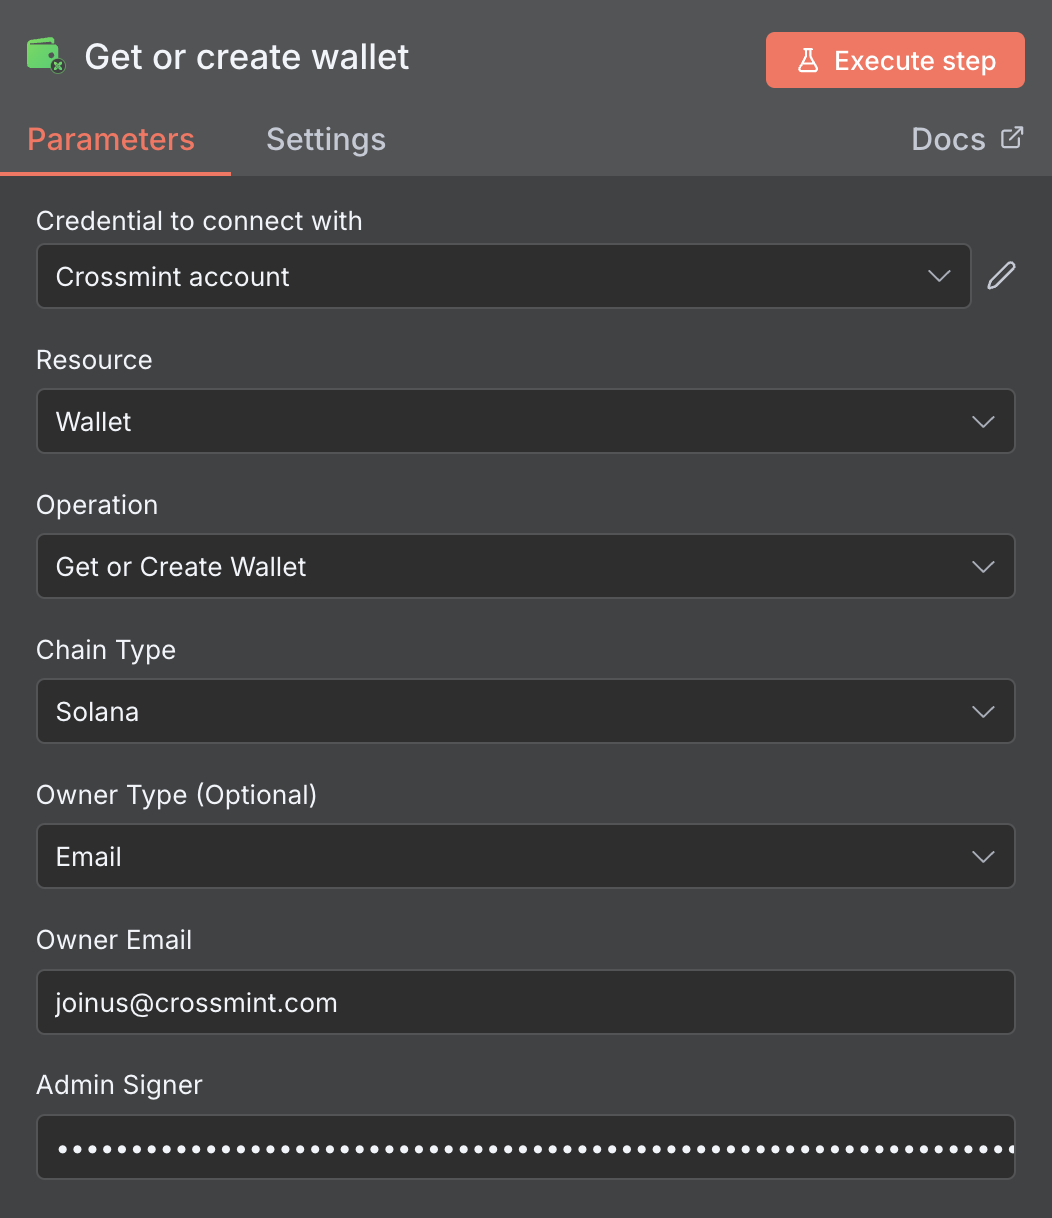
  <Step title="Configure the wallet">
    Specify the wallet's required parameters:

    * **Owner Type**: Select `Email`
    * **Owner Details**: Enter an email address you control
    * **Admin Signer**: Set this to a private key you can generate from <a href="/solutions/n8n/nodes/wallets#generating-private-keys">here</a>.

    <img src="https://mintcdn.com/crossmint/iJ4Pa4z5KCoLtzBg/images/solutions/n8n/crossmint-config.png?fit=max&auto=format&n=iJ4Pa4z5KCoLtzBg&q=85&s=c4ba94ab6a0715cf8e4b27c778b097cb" alt="Crossmint node configuration" style={{width: '500px'}} width="1052" height="1218" data-path="images/solutions/n8n/crossmint-config.png" />
  </Step>

  <Step title="Execute the workflow">
    Click **Execute Node** to run the workflow. You should see a successful response with your wallet details.
  </Step>

  <Step title="Fund the wallet">
    Use Circle's USDC <a href="https://faucet.circle.com/" rel="noopener noreferrer">faucet</a> to fund the wallet
  </Step>

  <Step title="Add node to get the wallet's balance">
    <ol>
      <li>Add another Crossmint Wallets node to your workflow</li>
      <li>Select the <b>Get Balance</b> operation</li>
      <li>Configure it to use the wallet address returned from the previous step</li>
    </ol>
  </Step>

  <Step title="Execute workflow">
    Execute the final workflow to see your wallet's USDC balance.
  </Step>
</Steps>

## Next Steps

Congratulations! You've created your first Crossmint workflow in n8n. Here's what you can explore next:

<CardGroup cols={2}>
  <Card title="Example Workflows" icon="diagram-project" href="/solutions/n8n/example-workflows">
    Try ready-to-use workflow templates
  </Card>

  <Card title="Ask ChatGPT" icon="comments" href="https://chatgpt.com/g/g-68d13ccc81ac8191a0c3716ce980faff-n8n-crossmint-expert">
    Ask Crossmint Expert GPT for n8n guidance
  </Card>
</CardGroup>