> ## Documentation Index
> Fetch the complete documentation index at: https://docs.crossmint.com/llms.txt
> Use this file to discover all available pages before exploring further.
# Swift
> Create user wallets from your iOS app in under 5 minutes
**You are viewing docs for the previous version of the Wallets SDK.** We recommend upgrading to V1.
See the [updated version of this page](/wallets/quickstarts/swift) or the [V1 migration guide](/wallets/guides/migrate-to-v1).
This quickstart integrates the Crossmint Swift SDK into an iOS app to create a non-custodial wallet for a user, fund it with testnet USDC on Base Sepolia, and send USDC to another wallet.
See a full working example with a repository to clone.
Add the Crossmint Swift SDK to your project using Swift Package Manager.
In Xcode, go to **File > Add Package Dependencies** and enter the repository URL:
```text theme={null}
https://github.com/Crossmint/crossmint-swift-sdk
```
Select the `CrossmintClientSDK` product to add to your target.
### Requirements
* iOS 15.0+
* Xcode 16.0+
* Swift 5.9+
The Crossmint SDK requires a client API key for authentication.
[Get your client API key](/introduction/platform/api-keys/client-side) using the Crossmint Console.
Create a file to store your configuration:
```swift CrossmintConfig.swift theme={null}
import CrossmintAuth
import CrossmintClient
let crossmintApiKey = ""
lazy var crossmintAuthManager: CrossmintAuthManager = {
do {
return try CrossmintAuthManager(apiKey: crossmintApiKey)
} catch {
fatalError("Invalid Crossmint configuration: \(error)")
}
}()
```
The environment (staging vs production) is automatically determined by your API key. Staging keys start with `ck_staging_`, production keys with `ck_production_`.
Initialize the SDK in your app's entry point and add the non-custodial signer view modifier. This example uses [Crossmint Auth](/authentication/introduction) but you can use [any authentication provider of your choice](/wallets/v0/guides/bring-your-own-auth).
```swift YourApp.swift theme={null}
import SwiftUI
import CrossmintClient
@main
struct YourApp: App {
var body: some Scene {
WindowGroup {
ContentView()
.crossmintNonCustodialSigner(
CrossmintSDK.shared(
apiKey: crossmintApiKey,
authManager: crossmintAuthManager
)
)
}
}
}
```
The `.crossmintNonCustodialSigner()` modifier is required for transaction signing. It embeds a hidden web view that securely manages the signing process.
### Access SDK instances
Inside your views, access SDK functionality using `CrossmintSDK.shared`:
```swift theme={null}
import CrossmintClient
let sdk = CrossmintSDK.shared
let authManager = sdk.authManager
let wallets = sdk.crossmintWallets
```
Actions within the SDK are user-based, so first you need to authenticate a user.
Choose your authentication method:
Use Crossmint's built-in OTP authentication for easy, email-based login.
```swift theme={null}
import CrossmintClient
let email = "user@example.com"
do {
let status = try await crossmintAuthManager.otpAuthentication(
email: email,
code: nil,
forceRefresh: false
)
if case let .emailSent(_, emailId) = status {
// OTP sent to email, now display an input for the OTP
// Store emailId for the verification step
}
} catch let error as AuthManagerError {
// Handle error: error.errorMessage
}
```
```swift theme={null}
import CrossmintClient
let otpCode = "123456" // Code entered by user
do {
let status = try await crossmintAuthManager.otpAuthentication(
email: email,
code: otpCode,
forceRefresh: false
)
if case .authenticated = status {
// User is authenticated, proceed to create wallet
}
} catch let error as AuthManagerError {
// Handle error: error.errorMessage
}
```
See the [iOS Demo App](https://github.com/Crossmint/crossmint-swift-sdk/tree/main/Examples/SmartWalletsDemo) repository for a complete UI implementation example with SwiftUI views.
If you have an existing auth provider (Auth0, Firebase, Supabase, etc.), authenticate users with your provider and pass the JWT to Crossmint.
```swift theme={null}
import CrossmintClient
// After user authenticates with your provider, get their JWT
let authManager = CrossmintSDK.shared.authManager
do {
try await authManager.authenticateWithToken(
jwt: yourProviderJWT,
refreshToken: yourProviderRefreshToken // optional
)
// User authenticated with Crossmint
} catch {
// Handle error
}
```
Configure JWT authentication in the [Crossmint Console](https://console.crossmint.com) under API Keys > JWT Authentication before using third-party auth.
After authentication, create the user's wallet. This example uses Base Sepolia (Base testnet) but you can choose any [supported chain](/introduction/supported-chains).
```swift theme={null}
import CrossmintClient
let sdk = CrossmintSDK.shared
do {
guard let email = await crossmintAuthManager.email else {
// User not authenticated
return
}
let wallet = try await sdk.crossmintWallets.getOrCreateWallet(
chain: .baseSepolia,
signer: .email(email)
)
// Wallet is ready to use!
print("Wallet address: \(wallet.address)")
} catch let error as WalletError {
// Handle error: error.errorMessage
}
```
Before sending tokens, check the wallet balance:
```swift theme={null}
import CrossmintClient
import Wallet
import CrossmintCommonTypes
// Convert to EVMWallet for EVM-specific operations
guard let evmWallet = try? EVMWallet.from(wallet: wallet) else {
return
}
do {
let balance = try await evmWallet.balances([.eth, .usdc, .usdxm])
// Access native token balance
print("ETH: \(balance.nativeToken.amount)")
// Access USDC balance
print("USDC: \(balance.usdc.amount)")
// Access other tokens
for token in balance.tokens {
print("\(token.token.name): \(token.amount)")
}
} catch let error as WalletError {
// Handle error: error.errorMessage
}
```
Before sending USDC, you need to get some into the wallet.
**Option 1: Use the staging fund method (staging only)**
```swift theme={null}
do {
try await evmWallet.fund(token: .usdxm, amount: 10)
} catch {
// Handle error
}
```
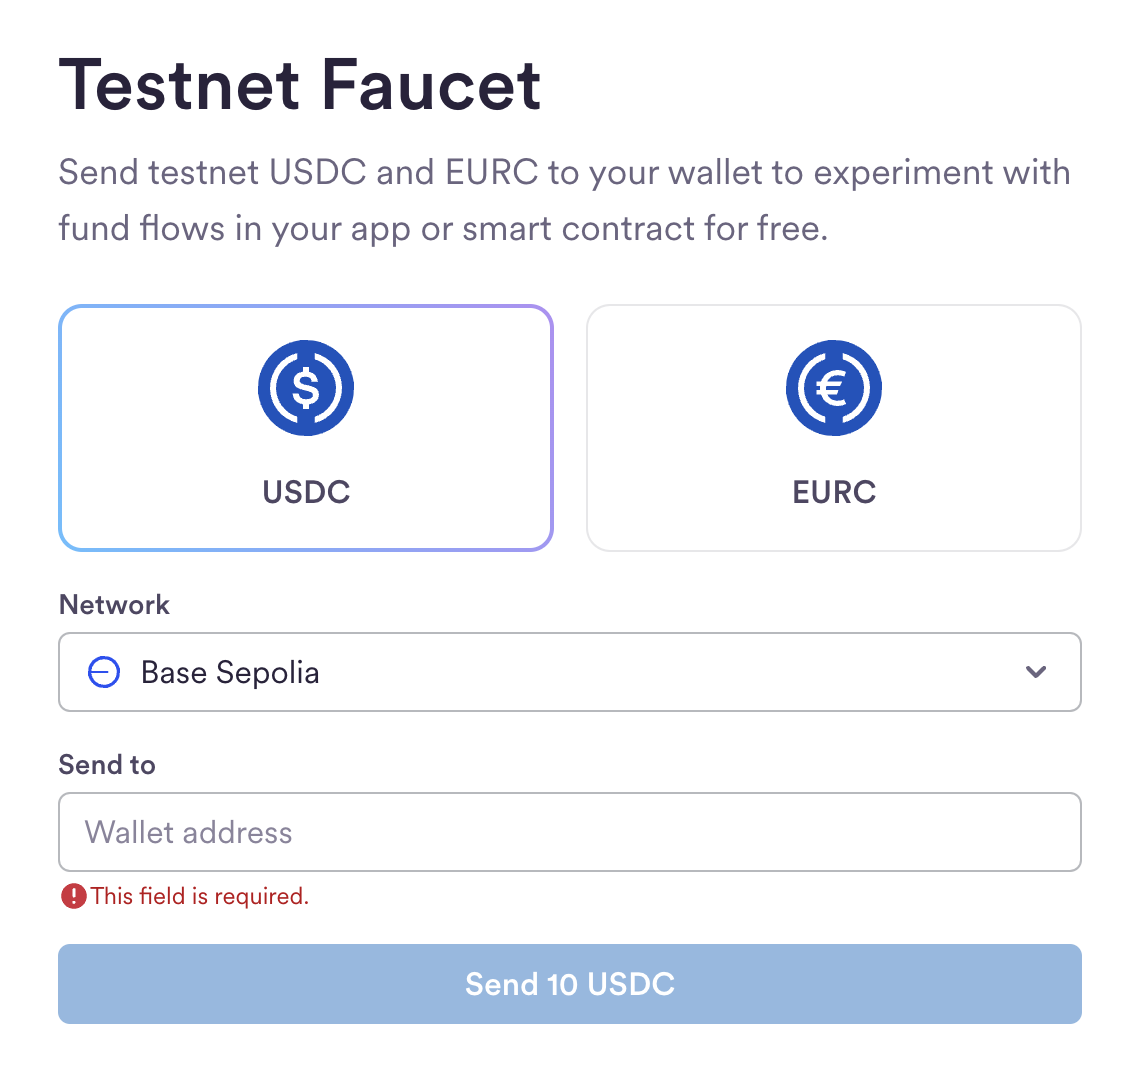
**Option 2: Use the USDC Faucet**
Get the wallet address and use the [USDC Faucet](https://faucet.circle.com/):
```swift theme={null}
let walletAddress = wallet.address
print("Fund this address: \(walletAddress)")
```
Navigate to the faucet, select **Base Sepolia**, and enter the wallet address.
 Send USDC to another wallet using the `wallet.send` function:
```swift theme={null}
import CrossmintClient
import Wallet
import CrossmintCommonTypes
let recipientAddress = "0x742d35Cc6634C0532925a3b844Bc9e7595f0bEb"
do {
guard let evmAddress = try? EVMAddress(address: recipientAddress) else {
// Invalid address
return
}
let result = try await wallet.send(
token: .usdc,
recipient: .address(.evm(.baseSepolia, evmAddress)),
amount: "0.01"
)
// Transaction successful
print("Transaction completed")
} catch let error as TransactionError {
switch error {
case .userCancelled:
// User cancelled the transaction
break
default:
// Handle error: error.errorMessage
break
}
}
```
The first time a wallet sends a transaction on a device, an OTP verification is required. The SDK automatically handles this by presenting an OTP input view.
To handle the OTP flow, observe the `isOTPRequired` publisher in your view:
```swift theme={null}
import SwiftUI
import CrossmintClient
struct ContentView: View {
@State private var showOTPView = false
var body: some View {
YourMainView()
.onReceive(CrossmintSDK.shared.isOTPRequired) { required in
showOTPView = required
}
.sheet(isPresented: $showOTPView) {
OTPValidatorView()
}
}
}
```
Following transactions sent from the same device do not need OTP verification.
And that is it! You just created a non-custodial wallet for your user and made a USDC transaction on Base Sepolia.
## Launching in Production
For production, the steps are almost identical, but some changes are required:
1. Create a developer account on the [production console](https://www.crossmint.com/console)
2. Create a production client API key on the [API Keys](https://www.crossmint.com/console/projects/apiKeys) page with the API scopes `users.create`, `users.read`, `wallets.read`, `wallets.create`, `wallets:transactions.create`, `wallets:transactions.sign`, `wallets:balance.read`, `wallets.fund`
3. Update your configuration with the production API key
4. **Use your own authentication provider**: For production applications, Crossmint recommends using [third-party authentication](/wallets/v0/guides/bring-your-own-auth) with providers like Auth0, Firebase, or Supabase, rather than Crossmint Auth (OTP). Configure JWT authentication in the [Crossmint Console](https://www.crossmint.com/console/projects/apiKeys) under API Keys > JWT Authentication
## Learn More
Check the balance of a wallet.
Send tokens between wallets.
Register operational signers on a wallet.
## Other Links
Deep dive into Swift SDK reference docs.
Contact the Crossmint sales team for support.
Send USDC to another wallet using the `wallet.send` function:
```swift theme={null}
import CrossmintClient
import Wallet
import CrossmintCommonTypes
let recipientAddress = "0x742d35Cc6634C0532925a3b844Bc9e7595f0bEb"
do {
guard let evmAddress = try? EVMAddress(address: recipientAddress) else {
// Invalid address
return
}
let result = try await wallet.send(
token: .usdc,
recipient: .address(.evm(.baseSepolia, evmAddress)),
amount: "0.01"
)
// Transaction successful
print("Transaction completed")
} catch let error as TransactionError {
switch error {
case .userCancelled:
// User cancelled the transaction
break
default:
// Handle error: error.errorMessage
break
}
}
```
The first time a wallet sends a transaction on a device, an OTP verification is required. The SDK automatically handles this by presenting an OTP input view.
To handle the OTP flow, observe the `isOTPRequired` publisher in your view:
```swift theme={null}
import SwiftUI
import CrossmintClient
struct ContentView: View {
@State private var showOTPView = false
var body: some View {
YourMainView()
.onReceive(CrossmintSDK.shared.isOTPRequired) { required in
showOTPView = required
}
.sheet(isPresented: $showOTPView) {
OTPValidatorView()
}
}
}
```
Following transactions sent from the same device do not need OTP verification.
And that is it! You just created a non-custodial wallet for your user and made a USDC transaction on Base Sepolia.
## Launching in Production
For production, the steps are almost identical, but some changes are required:
1. Create a developer account on the [production console](https://www.crossmint.com/console)
2. Create a production client API key on the [API Keys](https://www.crossmint.com/console/projects/apiKeys) page with the API scopes `users.create`, `users.read`, `wallets.read`, `wallets.create`, `wallets:transactions.create`, `wallets:transactions.sign`, `wallets:balance.read`, `wallets.fund`
3. Update your configuration with the production API key
4. **Use your own authentication provider**: For production applications, Crossmint recommends using [third-party authentication](/wallets/v0/guides/bring-your-own-auth) with providers like Auth0, Firebase, or Supabase, rather than Crossmint Auth (OTP). Configure JWT authentication in the [Crossmint Console](https://www.crossmint.com/console/projects/apiKeys) under API Keys > JWT Authentication
## Learn More
Check the balance of a wallet.
Send tokens between wallets.
Register operational signers on a wallet.
## Other Links
Deep dive into Swift SDK reference docs.
Contact the Crossmint sales team for support.