- Notifying your customers via email that their NFT is ready to access
- Updating your database with the NFT id for the user
- Showing in your website that that the mint has been successful
Ways to check the status of an action
| Model | Best for | Mechanism |
|---|---|---|
| Pull (query for updates) | Quick testing | Action Status API |
| Push (get notified) | Scalable apps in production | Webhooks |
- Action Status APIs
- Webhooks
Action Status APIs
Call the following API to check the status of an action:cURL
# Set your variables
env=staging  # or "www" for production
YOUR_API_KEY=<ENTER_YOUR_API_KEY>
actionId=<ENTER_YOUR_actionId>

# Execute the curl command
curl --request GET \
--url "https://${env}.crossmint.com/api/2022-06-09/actions/${actionId}" \
--header 'accept: application/json' \
--header "x-api-key: ${YOUR_API_KEY}"
API Reference
Where can I find the actionId and API_KEY?
Where can I find the actionId and API_KEY?
actionIDis returned from any async API calls you perform.YOUR_API_KEYcan be found in theDevelopers -> API Keystab of the Production or Staging consoles.
Webhooks
In this guide, we will use nodejs to create an API endpoint to listen for and parse webhook events:1. Create an endpoint route
Using a standard nodejs API server, create an endpoint.I don't have a webserver or want to test locally
I don't have a webserver or want to test locally
You can test locally by installing ngrok and creating a routed endpoint to a specified port.
2. Configure the endpoint to read and parse webhook events
On this endpoint, modify the code to handle POST requests only. When a POST request comes through, parse the webhook event of the request body. Ensure your webhook listener responds with a200 status code. Otherwise the webhook may be sent until you acknowledge it.The snippet below is an example handler that parses webhook events:// endpoint.js
// listen to webhook ingestion
export default function handler(req, res) {
if (req.method === "POST") {
console.log(`[webhook] Successfully minted ${req.body.id}`);
}
res.status(200).json({});
}
Don’t be strict with payload validations as Crossmint may add new fields to
the webhooks as products evolve.
collections.create.succeeded
collections.create.succeeded
{
  "actionId": "897eadae-ee2d-43f9-a97b-1a9d9c682d6f",
  "startedAt": "2023-10-04T15:48:20.000Z",
  "completedAt": "2023-10-04T15:48:42.000Z",
  "type": "collections.create.succeeded",
  "data": {
    "chain": "polygon",
    "txId": "0x919ec33c1ceffd292d1d0cdd9675ffcc0af31a1f34622edd4865a9ca9fa82aa1",
    "collection": {
      "id": "897eadae-ee2d-43f9-a97b-1a9d9c682d6f",
      "contractAddress": "0x59195995f248450267AD40CAc1d79fAAba290467"
    }
  },
  "resource": "https://crossmint.com/api/2022-06-09/collections/897eadae-ee2d-43f9-a97b-1a9d9c682d6f"
}
{
  "actionId": "01ac4b77-9bc9-42d3-a110-b0572ec299fd",
  "startedAt": "2023-10-04T15:50:12.000Z",
  "completedAt": "2023-10-04T15:50:23.000Z",
  "type": "collections.create.succeeded",
  "data": {
    "chain": "solana",
    "txId": "2M4tFbGWFPWAjHmZdssoTiTRjxx43nRd3vt9RpQ3wLWsW69duUhvEQrDvsyfafnQNoh6LmDQg4KPLvffgCskkwoV",
    "collection": {
      "id": "01ac4b77-9bc9-42d3-a110-b0572ec299fd",
      "mintAddress": "JCpAQcjqWCwTpRPsMumsXtg3A4SGMXbxVbowu8qrntqt"
    }
  },
  "resource": "https://a5b6-181-167-232-117.ngrok-free.app/api/2022-06-09/collections/01ac4b77-9bc9-42d3-a110-b0572ec299fd"
}
collections.update.succeeded
collections.update.succeeded
{
  "actionId": "e0926e73-8212-4074-b934-4d6ac68cfcff",
  "startedAt": "2023-10-04T15:57:14.000Z",
  "completedAt": "2023-10-04T15:57:36.000Z",
  "type": "collections.update.succeeded",
  "data": {
    "chain": "polygon",
    "txId": "0x919ec33c1ceffd292d1d0cdd9675ffcc0af31a1f34622edd4865a9ca9fa82aa1",
    "collection": {
      "id": "897eadae-ee2d-43f9-a97b-1a9d9c682d6f",
      "contractAddress": "0x59195995f248450267AD40CAc1d79fAAba290467"
    },
    "changes": ["supplyLimit"]
  },
  "resource": "https://crossmint.com/api/2022-06-09/collections/e0926e73-8212-4074-b934-4d6ac68cfcff",
  "timestamp": 1696424259573
}
nfts.create.succeeded
nfts.create.succeeded
{
  "type": "nfts.create.succeeded",
  "actionId": "771d7e38-2890-47d7-b733-a1462736b528",
  "startedAt": "2023-10-04T19:59:47.000Z",
  "completedAt": "2023-10-04T20:00:00.000Z",
  "data": {
    "chain": "polygon",
    "txId": "0x919ec33c1ceffd292d1d0cdd9675ffcc0af31a1f34622edd4865a9ca9fa82aa1",
    "collection": {
      "id": "default-polygon",
      "contractAddress": "0x2DdDDEe8dad8b2ec123F5ceEc3E8dA4E57C0ed29"
    },
    "recipient": {
      "walletAddress": "0x10324e5B8879CA6662ff83617F74b0AaD251b819",
      "email": "recipient@crossmint.com"
    },
    "token": {
      "id": "771d7e38-2890-47d7-b733-a1462736b528",
      "owner": {
        "walletAddress": "0x10324e5B8879CA6662ff83617F74b0AaD251b819"
      },
      "tokenId": "15"
    }
  },
  "resource": "https://crossmint.com/api/2022-06-09/collections/default-polygon/nfts/771d7e38-2890-47d7-b733-a1462736b528"
}
{
  "type": "nfts.create.succeeded",
  "actionId": "2c5f9ec6-ae68-4e17-a671-db4af2208a2d",
  "startedAt": "2023-10-04T20:01:21.000Z",
  "completedAt": "2023-10-04T20:01:27.000Z",
  "data": {
    "chain": "solana",
    "txId": "2M4tFbGWFPWAjHmZdssoTiTRjxx43nRd3vt9RpQ3wLWsW69duUhvEQrDvsyfafnQNoh6LmDQg4KPLvffgCskkwoV",
    "collection": {
      "id": "default-solana",
      "mintAddress": "qCTMcsRBYYt1YKDAkJnstjgXJU625YX5LBfwsUi1Mn4"
    },
    "recipient": {
      "walletAddress": "EjLpq6RAxzPuwjcwJ2C6ZjwrFZuqhu2CiVTDzkSSCE5B",
      "email": "recipient@crossmint.com"
    },
    "token": {
      "id": "2c5f9ec6-ae68-4e17-a671-db4af2208a2d",
      "owner": {
        "walletAddress": "EjLpq6RAxzPuwjcwJ2C6ZjwrFZuqhu2CiVTDzkSSCE5B"
      },
      "mintHash": "Gec66rG8Rj6Q2nqaFpGRvggiAfriMb93o28qGSeeY1gJ"
    }
  },
  "resource": "https://staging.crossmint.com/api/2022-06-09/collections/default-solana/nfts/2c5f9ec6-ae68-4e17-a671-db4af2208a2d",
  "timestamp": 1696449687501
}
nfts.create.failed
nfts.create.failed
{
  "actionId":"cf9985d3-3341-4fd6-bd0e-548ef97a3486",
  "startedAt":"2024-02-05T21:48:17.000Z",
  "type":"nfts.create.failed",
  "data":{
    "chain":"polygon",
    "collection":{
      "id":"297199ba-c763-4464-b592-26c2ca2dbe5d",
      "contractAddress":"0x2ADBeb5e1976615883D3c5F07234E38b50e09edB"
  },
  "contractArguments":{
    "key":28
  },
  "recipient":{
    "walletAddress":"0x78359E7dF948834caFEcBE0494B010C6f7f7fA74"
  },
  "token":{
    "id":"cf9985d3-3341-4fd6-bd0e-548ef97a3486"
  },
  "error":{
    "reason":"execution_reverted",
    "message":"Minting smart contract reverted. Check 'revertReason' for details",
    "revertReason":"execution reverted: Wrong value for key",
    "callInfo":{
        "functionName":"mintTo",
        "arguments":{
          "key":28,
          "recipient":"0x78359E7dF948834caFEcBE0494B010C6f7f7fA74"
        },
        "calldata":"0x449a52f800000000000000000000000078359e7df948834cafecbe0494b010c6f7f7fa74000000000000000000000000000000000000000000000000000000000000001c"
    }
  }
  },
  "resource":"https://1a7a-181-110-64-58.ngrok-free.app/api/2022-06-09/collections/297199ba-c763-4464-b592-26c2ca2dbe5d/nfts/cf9985d3-3341-4fd6-bd0e-548ef97a3486",
  "timestamp":1707158908733
}
nfts.update.succeeded
nfts.update.succeeded
{
  "type": "nfts.update.succeeded",
  "actionId": "f7fedd17-2feb-4bc9-88fa-8890ea8f99e8",
  "startedAt": "2023-10-04T20:09:27.000Z",
  "completedAt": "2023-10-04T20:09:35.000Z",
  "data": {
    "chain": "polygon",
    "txId": "0x919ec33c1ceffd292d1d0cdd9675ffcc0af31a1f34622edd4865a9ca9fa82aa1",
    "collection": {
      "id": "default-polygon",
      "contractAddress": "0x2DdDDEe8dad8b2ec123F5ceEc3E8dA4E57C0ed29"
    },
    "token": {
      "id": "210a95ab-d59c-41ef-9f60-8e41550a753e",
      "owner": {
        "walletAddress": "0x10324e5B8879CA6662ff83617F74b0AaD251b819"
      },
      "tokenId": "16"
    },
    "changes": ["metadata"]
  },
  "resource": "https://crossmint.com/api/2022-06-09/collections/default-polygon/nfts/f7fedd17-2feb-4bc9-88fa-8890ea8f99e8",
  "timestamp": 1696450175660
}
{
  "type": "nfts.update.succeeded",
  "actionId": "57d3cedd-e8e8-4509-88bc-97d6baea478f",
  "startedAt": "2023-10-04T20:07:55.000Z",
  "completedAt": "2023-10-04T20:08:01.000Z",
  "data": {
    "chain": "solana",
    "txId": "2M4tFbGWFPWAjHmZdssoTiTRjxx43nRd3vt9RpQ3wLWsW69duUhvEQrDvsyfafnQNoh6LmDQg4KPLvffgCskkwoV",
    "collection": {
      "id": "default-solana",
      "mintAddress": "qCTMcsRBYYt1YKDAkJnstjgXJU625YX5LBfwsUi1Mn4"
    },
    "token": {
      "id": "1f3f0959-417d-43a7-95f8-39e6f22d5573",
      "owner": {
        "walletAddress": "EjLpq6RAxzPuwjcwJ2C6ZjwrFZuqhu2CiVTDzkSSCE5B"
      },
      "mintHash": "BnyGQcmU4mXMi5NMUuKTjFdYkg79RZoBX3qCWdXZVcyb"
    },
    "changes": ["metadata"]
  },
  "resource": "https://crossmint.com/api/2022-06-09/collections/default-solana/nfts/57d3cedd-e8e8-4509-88bc-97d6baea478f",
  "timestamp": 1696450081841
}
3. Pre & post processing
Add your pre and post processing logic when setting up your webhook listener. For example, you can call back to your database when a certain id has succeeded or even use Sendgrid or EmailJS to send an email to a recipient when a mint completes.4. Setting Up Webhooks on the Crossmint Console
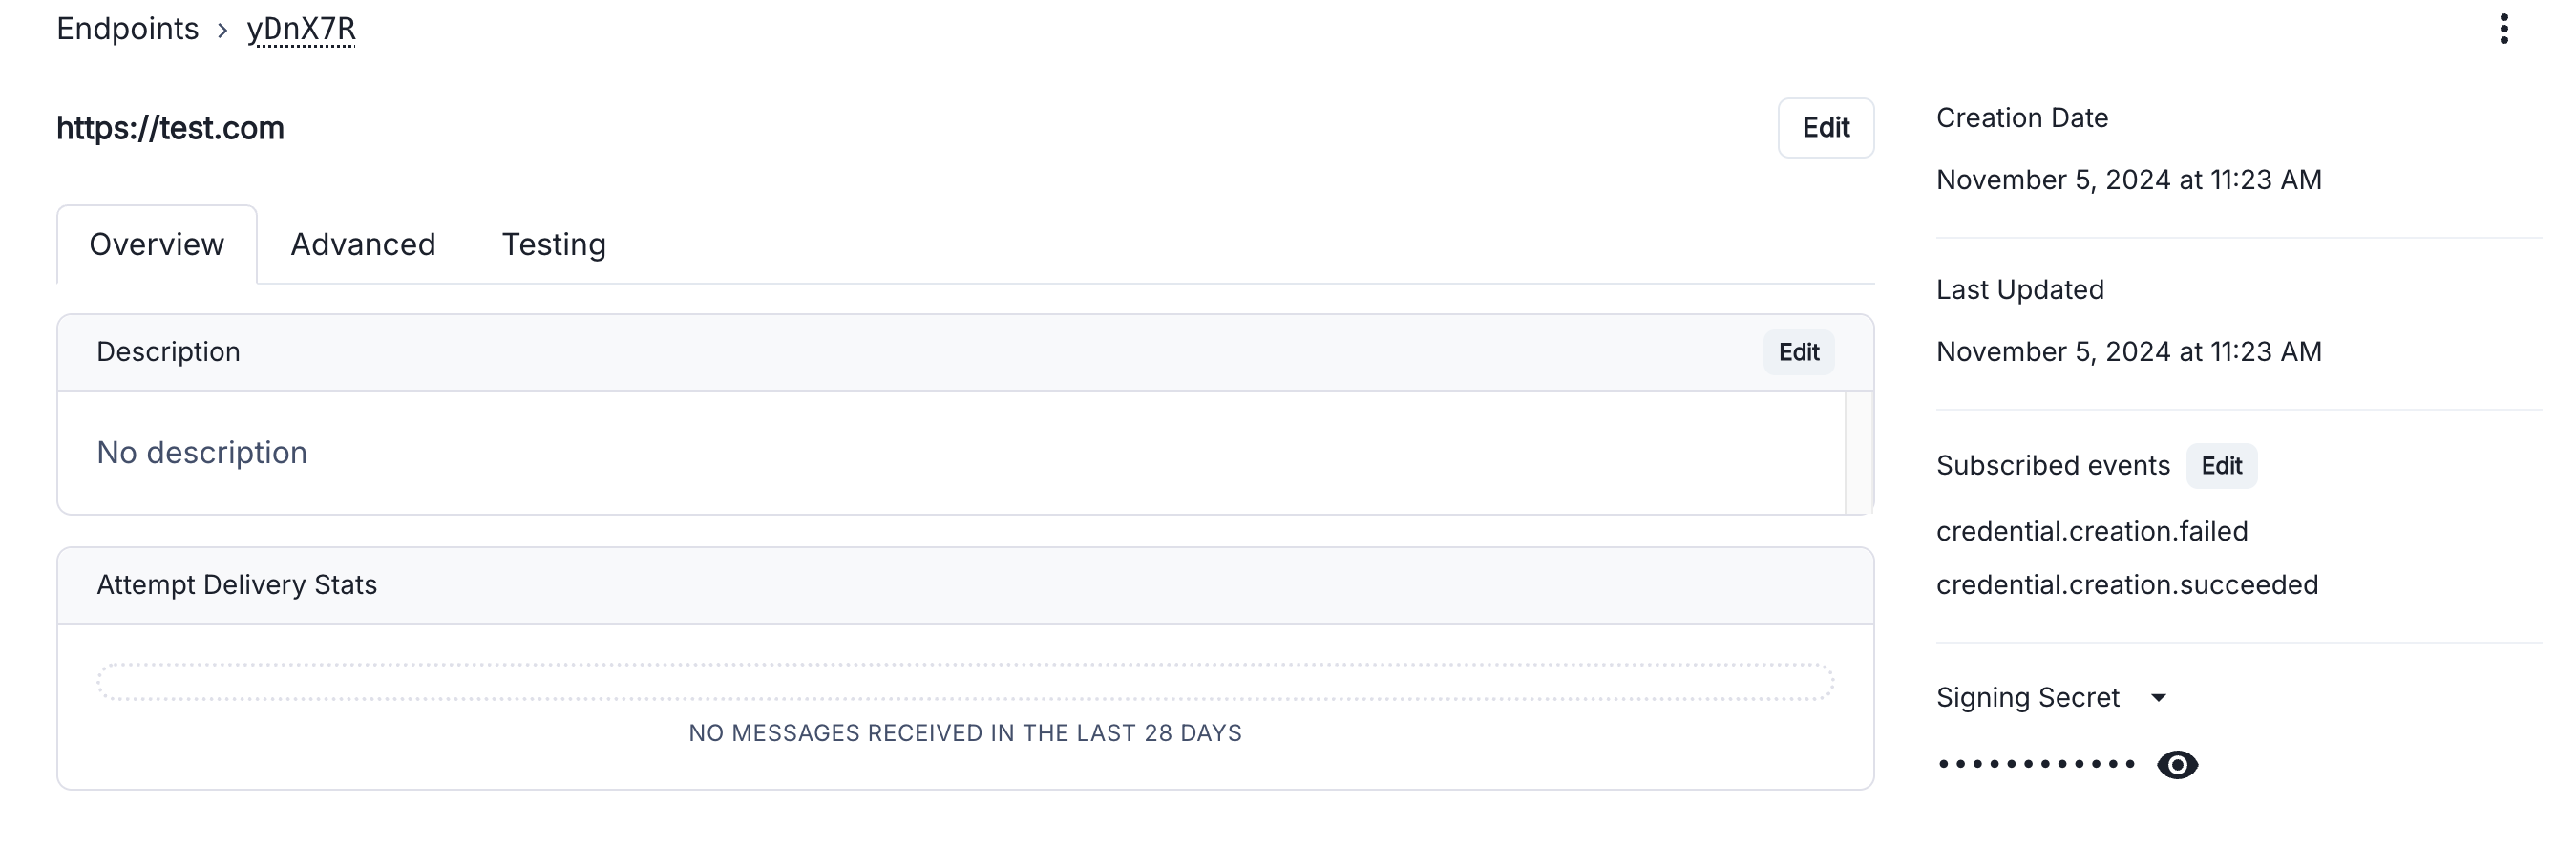
Add an endpoint for the eventmint.succeeded by following this guide.Once completed, you’ll be redirected to the endpoint details page. Here, you can find the signing secret for verifying webhooks and view a table of all triggered webhook events.