Create a Client-side Key
Navigate to the API Keys section of the developer console and click the “Create new key” button in the client-side keys section.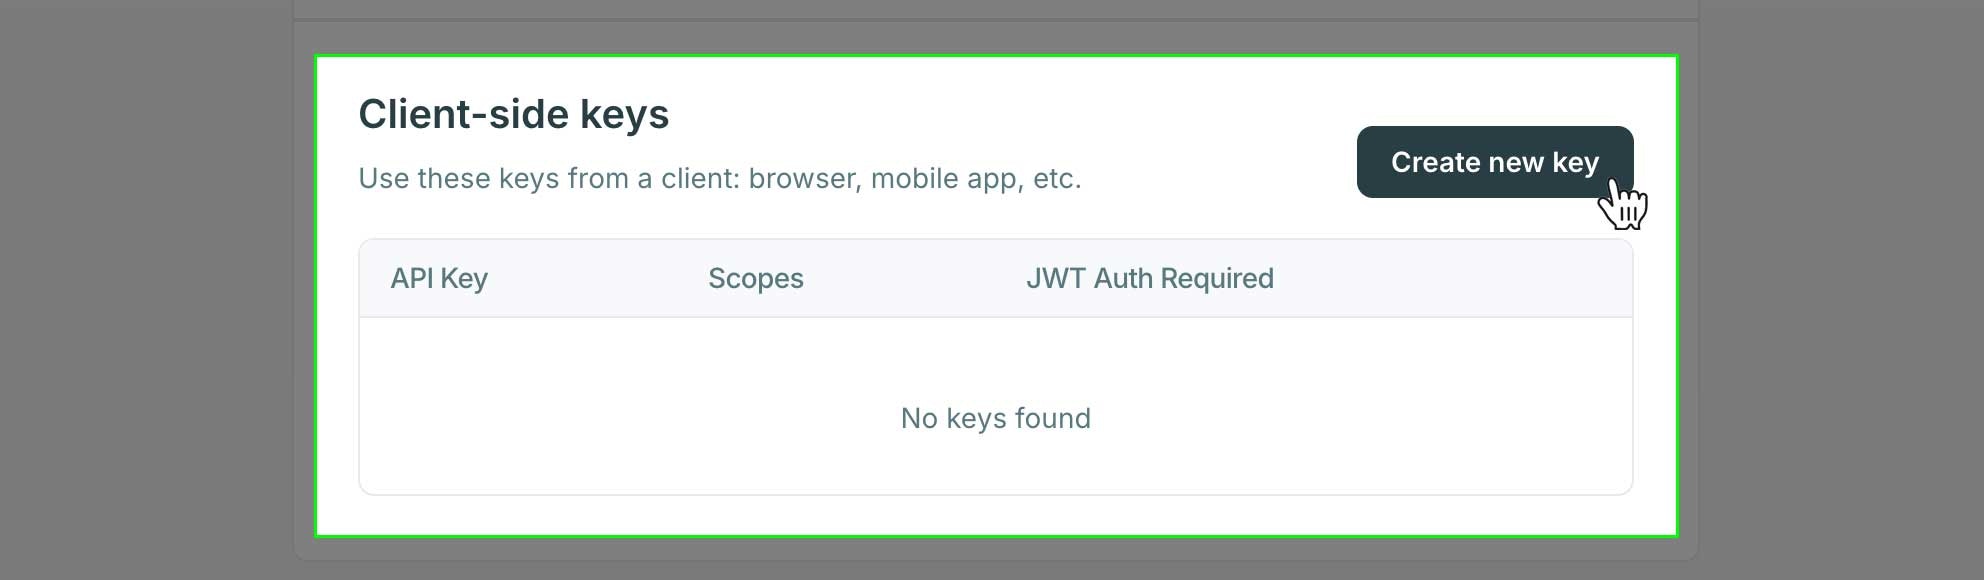
Setting Authorized Origins
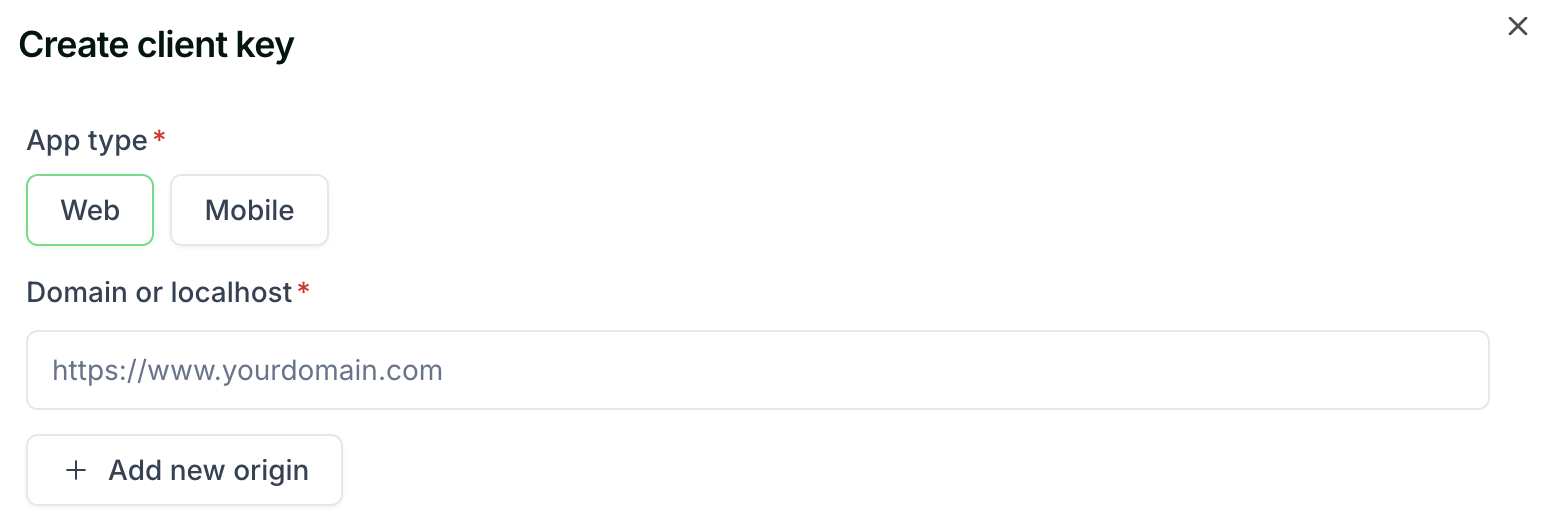
Client-side keys are exposed in the application and thus require additional security measures. The minimum requirement is to whitelist URLs that requests can be sent from. Client-side keys support two types of origins:Web Origins
For web applications, you need to add the domains that requests will be sent from. In development, you’ll need to add the local domain you test your application from. This is commonlyhttp://localhost followed by a port number such as 3000, 5173, etc. For example, when developing with NextJS, the default origin you need to authorize is http://localhost:3000.
The expected format for web origins is a full URL with protocol, such as https://www.yourdomain.com or http://localhost:3000.
Mobile App Identifiers
For mobile applications, you need to add the bundle identifiers for iOS apps or package names for Android apps. The expected format is:- iOS: Bundle ID (e.g.,
com.company.appname) - Android: Package name (e.g.,
com.company.appname)
Desktop/CLI Applications
For desktop applications and CLI tools where origin headers cannot be reliably set, you can select the “Desktop/CLI” app type when creating your client-side API key. This option allows the key to be used without origin restrictions. To create a Desktop/CLI key:- Select “Desktop/CLI” as the app type when creating or editing a client-side key
- Consider enabling JWT authentication for additional security
- Store the key securely and rotate it regularly
Select Scopes
Within the modal that opens, toggle the required scopes you want to enable. You may need to expand an accordion for the product area you’re working on to expose additional scope options.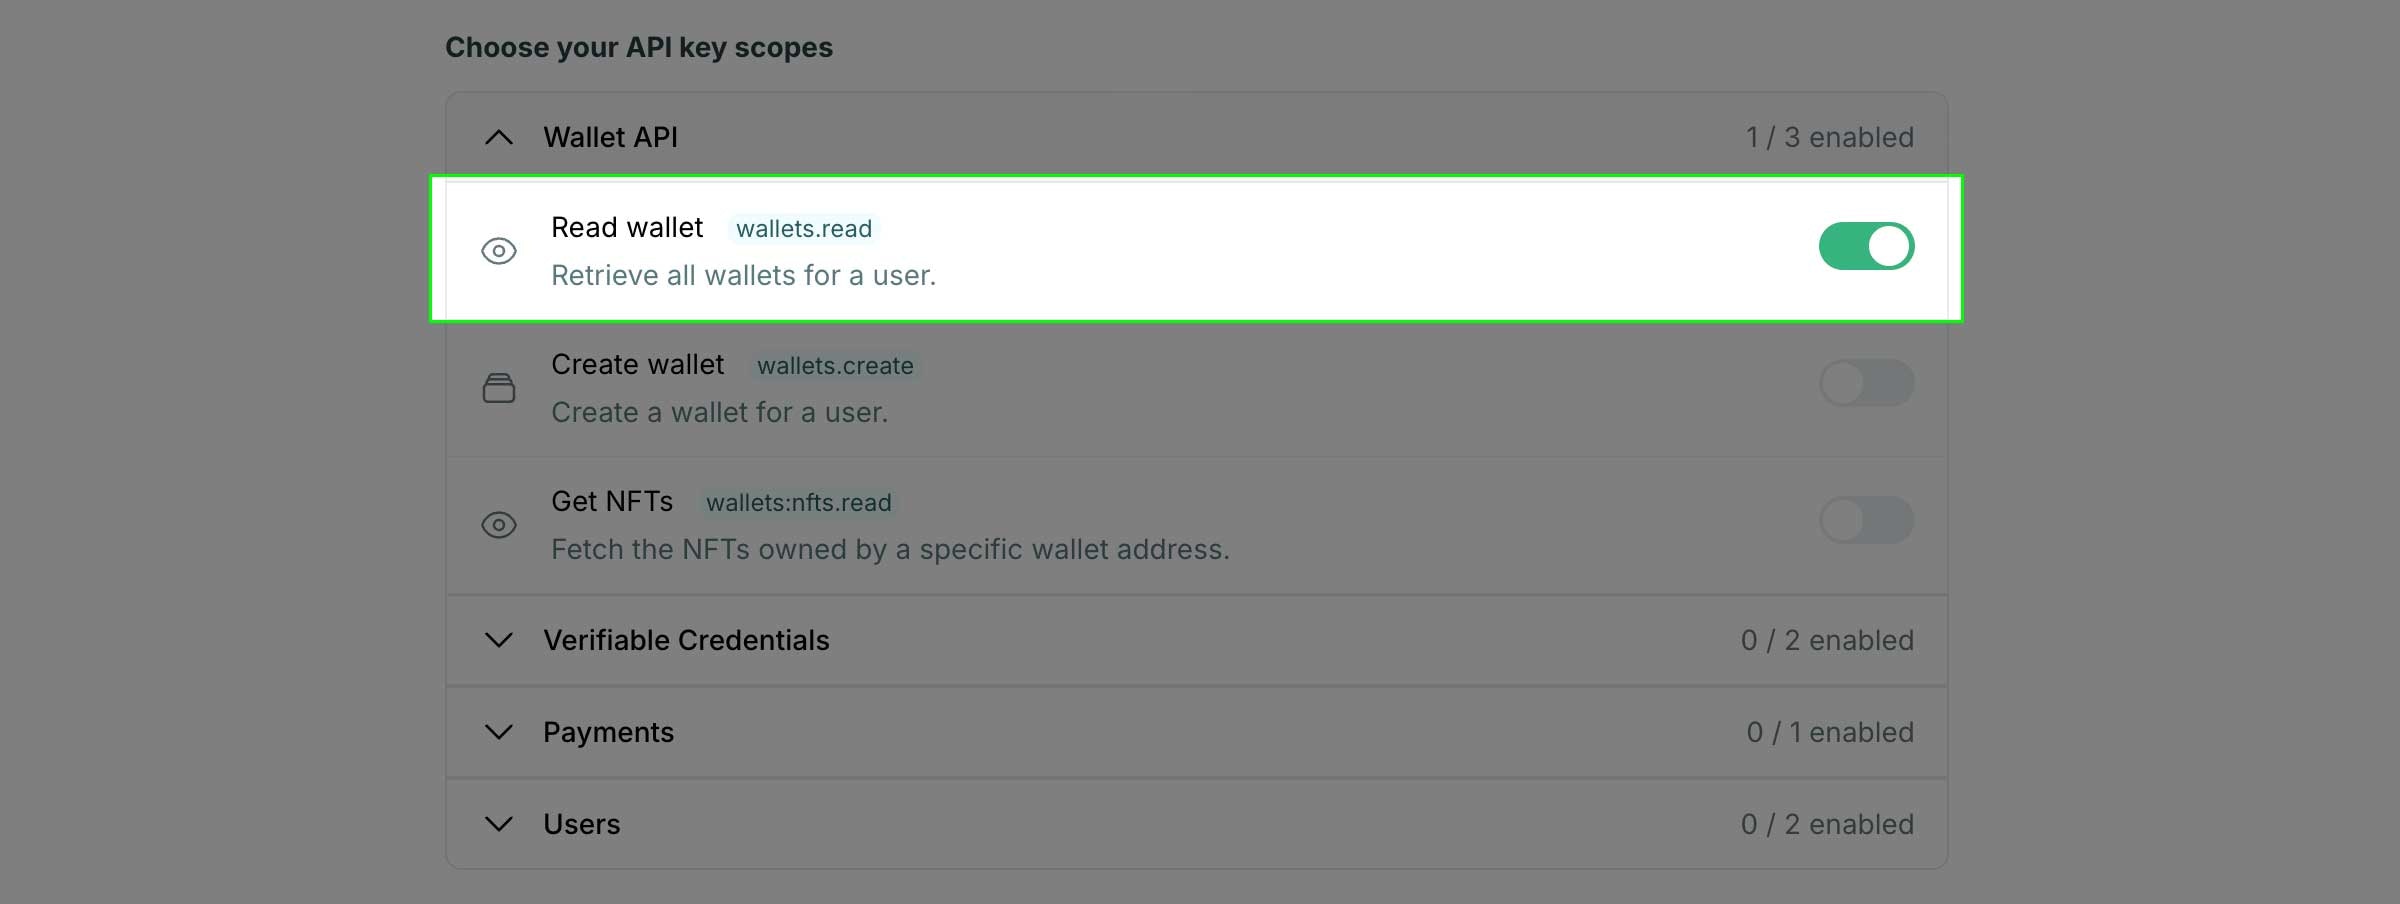
API Scopes
Complete list of available API scopes
API Reference
Detailed docs for all API endpoints
JWT Authentication
Finally, select the option to require a JWT if your application or use case requires it. Enabing this setting will require that users are authenticated to permit API requests.
Using a Client-side Key
There are a few different approaches to using a client-side key. The most common option is passing it to theinit function for a supported SDK. There are also some cases where you’ll pass the key as a header in a raw API call from custom code, similar to how a server-side key works.
Initializing an SDK
The most common way you’ll leverage a client-side API key is by passing it to theinit function for a supported SDK. See the examples below.
Direct API Call From Client
The Headless Checkout is one example where you may be writing custom API calls from your application to create orders. In this case, you set the client-side API key as a header namedX-API-KEY, much like you would when making a server-side API call.