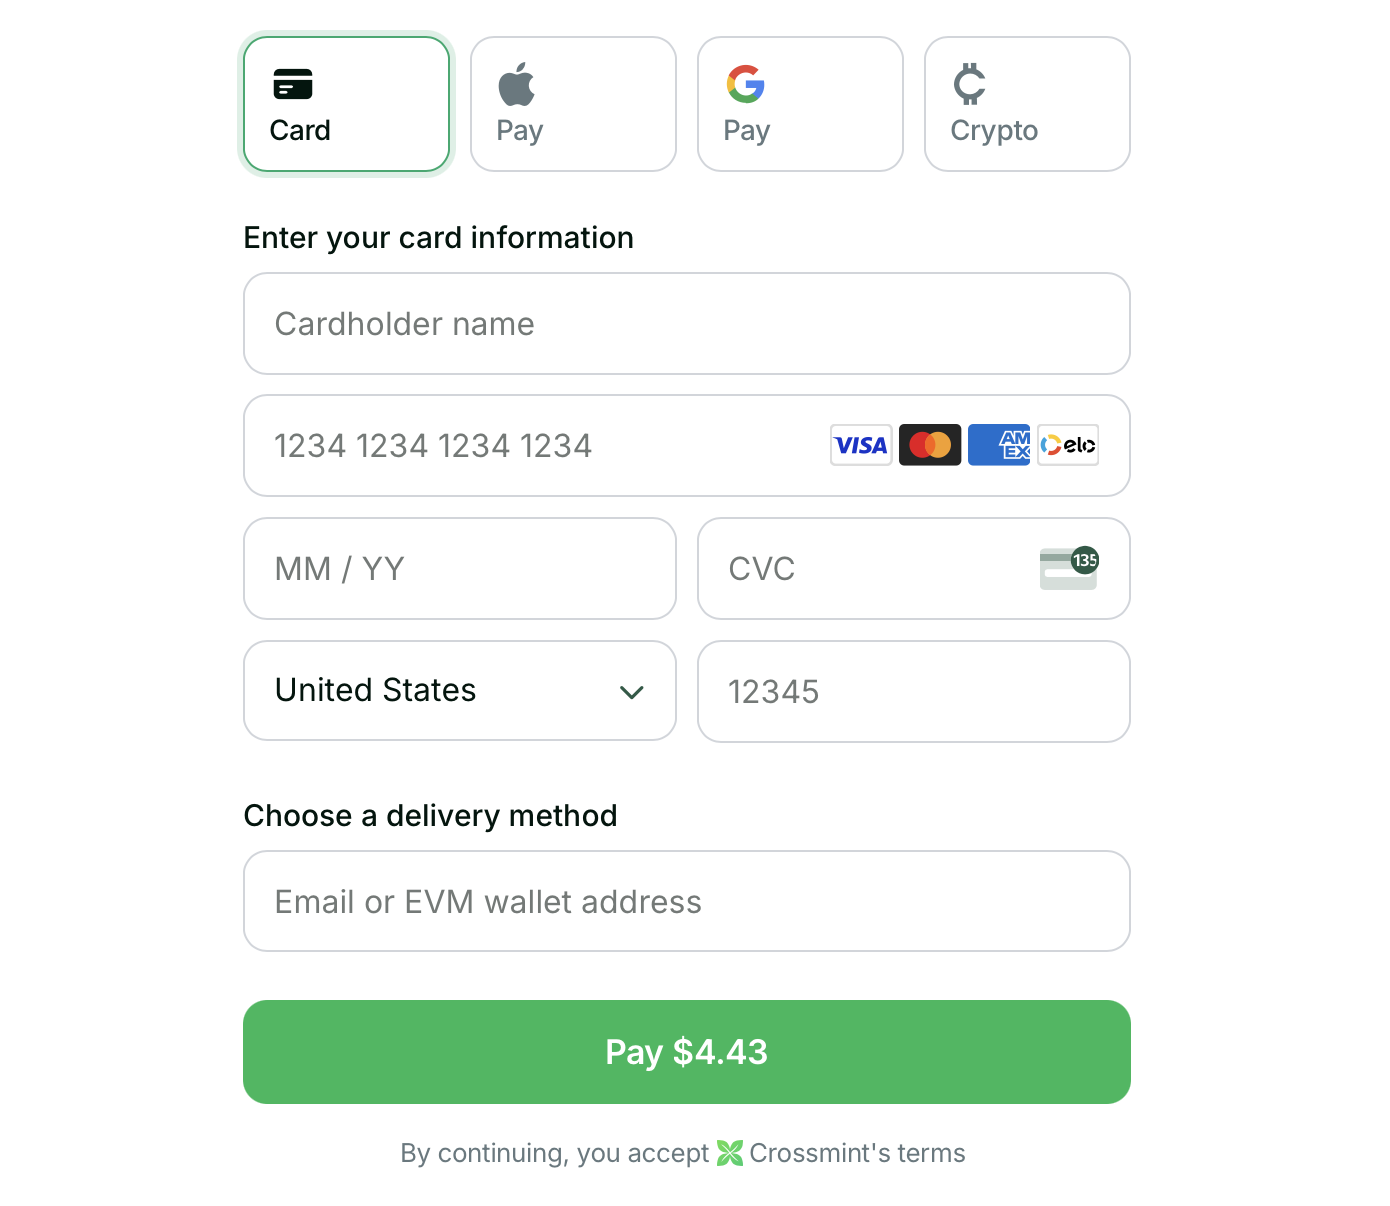
You will build this demo

If you are using our previous version of embedded checkout, please refer to the old quickstart guide

Introduction

In this guide, you will create a web app with Next.js which allows customers to buy NFTs with credit card and crypto payments, using Crossmint’s embedded checkout.

From Crossmint

  1. Create a developer account in the Staging Console.
  2. Create a new collection or import yours into the console, and have your collectionId ready.
    • Make sure you follow the maximum prices for collections set in staging outlined here.
  3. Create a client-side API key with the orders.create scope enabled. More info on creating API keys here.

To integrate in production/mainnet, you'll also need to complete account and collection verification. More information in the production launch guide.

Integration Steps

This guide will start from scratch with an empty Next.js application. You'll install the required @crossmint/client-sdk-react-ui dependency and add the NFT checkout component. To get started:

Set up the Project

1

Create a new Next.js application

npx create-next-app@latest

If you see this message, type y and press Enter to proceed:

Need to install the following packages:
  create-next-app@latest
Ok to proceed? (y)
2

Name your app `crossmint-nft-checkout-demo` and accept the default options

What is your project named? crossmint-nft-checkout-demo
Would you like to use TypeScript? Yes
Would you like to use ESLint? Yes
Would you like to use Tailwind CSS? Yes
Would you like to use `src/` directory? No
Would you like to use App Router? (recommended) Yes
Would you like to customize the default import alias? No
3

Change into the directory created in previous steps

cd crossmint-nft-checkout-demo
4

Install @crossmint/client-sdk-react-ui

5

Open the project in your preferred code editor

Basic Integration

Perfect for getting started quickly with a simple checkout flow.

1

Add environment variables

Create .env.local in your project root:

.env.local
NEXT_PUBLIC_CLIENT_API_KEY="_YOUR_CLIENT_API_KEY_"    # From API Keys page
NEXT_PUBLIC_COLLECTION_ID="_YOUR_COLLECTION_ID_"      # From Collection details page
2

Create the checkout page

Create /src/app/page.tsx with:

"use client";

import { CrossmintProvider, CrossmintEmbeddedCheckout } from "@crossmint/client-sdk-react-ui";

export default function Home() {
    const clientApiKey = process.env.NEXT_PUBLIC_CLIENT_API_KEY as string;
    const collectionId = process.env.NEXT_PUBLIC_COLLECTION_ID as string;

    return (
        <div className="flex flex-col items-center justify-start h-screen p-6 bg-white">
            <CrossmintProvider apiKey={clientApiKey}>
                <div className="max-w-[450px] w-full">
                    <CrossmintEmbeddedCheckout
                        lineItems={{
                            collectionLocator: `crossmint:${collectionId}`,
                            callData: {
                                totalPrice: "0.001",
                                quantity: 1,
                            },
                        }}
                        payment={{
                            crypto: { enabled: true },
                            fiat: { enabled: true },
                        }}
                    />
                </div>
            </CrossmintProvider>
        </div>
    );
}
3

Run your app

pnpm dev

Visit http://localhost:3000 to see your checkout!

Advanced Integration

Need purchase tracking, multiple NFTs, or more customization? Here’s a complete setup with additional features:

"use client";

import { useEffect } from "react";
import {
    CrossmintProvider,
    CrossmintCheckoutProvider,
    CrossmintEmbeddedCheckout,
    useCrossmintCheckout,
} from "@crossmint/client-sdk-react-ui";

// Component with purchase tracking
function Checkout() {
    const { status } = useCrossmintCheckout();
    const collectionId = process.env.NEXT_PUBLIC_COLLECTION_ID as string;

    useEffect(() => {
        if (status === "success") {
            console.log("Purchase completed!");
            // Handle successful purchase
        }
    }, [status]);

    return (
        <CrossmintEmbeddedCheckout
            lineItems={[
                {
                    collectionLocator: `crossmint:${collectionId}`,
                    callData: {
                        totalPrice: "0.001",
                        quantity: 1,
                    },
                },
                {
                    collectionLocator: `crossmint:${collectionId}`,
                    callData: {
                        totalPrice: "0.002",
                        quantity: 2,
                    },
                },
            ]}
            payment={{
                crypto: {
                    enabled: true,
                    defaultChain: "polygon", // Set preferred blockchain
                    defaultCurrency: "matic", // Set preferred crypto
                },
                fiat: {
                    enabled: true,
                    defaultCurrency: "usd", // Set preferred fiat currency
                    allowedMethods: {
                        card: true,
                        applePay: true,
                        googlePay: true,
                    },
                },
                receiptEmail: "receipt@example.com", // Optional: Set receipt email
            }}
            recipient={{
                email: "buyer@example.com", // NFTs will be delivered to this email's wallet
                // Or use walletAddress: "0x..." for direct delivery
            }}
            locale="en-US" // Set interface language
        />
    );
}

// Main component with providers
export default function Home() {
    const clientApiKey = process.env.NEXT_PUBLIC_CLIENT_API_KEY as string;

    return (
        <div className="flex flex-col items-center justify-start min-h-screen p-6">
            <CrossmintProvider apiKey={clientApiKey}>
                <CrossmintCheckoutProvider>
                    <Checkout />
                </CrossmintCheckoutProvider>
            </CrossmintProvider>
        </div>
    );
}

This advanced example showcases: - Multiple NFTs in one checkout - Purchase status tracking - Preferred payment methods and currencies - Email-based NFT delivery - Language settings Learn more in our guides: - Payment Methods - Multi-purchases - React Hooks

Testing Your Integration

This demo uses the staging environment: - Use test credit cards for payments - Get test USDC from our faucet - Check price limits for staging

All Set!

You’ve successfully integrated card and crypto payments with the Crossmint Embedded Checkout!

Remember this demo is built on staging, so the NFTs will show up on the testnets. To launch on production, check the production launch checklist. You will need to contact Sales to enable the embedded checkout on production.

Next Steps

Customize the UI and Behavior Further

Advanced Topics