When does it make sense to bring my own contract?
When does it make sense to bring my own contract?
- When you require very custom functionality not supported by Crossmint’s contracts.
- If you’re developing a marketplace.
- If you have an accesslist.
What about secondary sale contracts/marketplaces?
What about secondary sale contracts/marketplaces?
- Auction House: Solana’s native marketplace protocol
- Tensor: High-performance Solana NFT marketplace
- Magic Eden API: Popular multi-chain NFT marketplace
- Hyperspace: Cross-chain NFT marketplace and aggregator
Quick Navigation
All collection imports start with the same initial steps, then diverge based on your blockchain:- Common Steps (All Chains) - Steps 1-4 for all blockchains
- EVM-Specific Steps - Steps for Ethereum, Polygon, etc.
- Solana-Specific Steps - Additional steps for Solana candy machines
Common Steps (All Chains)
These initial steps are the same whether you’re importing an EVM contract or a Solana candy machine:Navigate to Token collections and click `New collection`

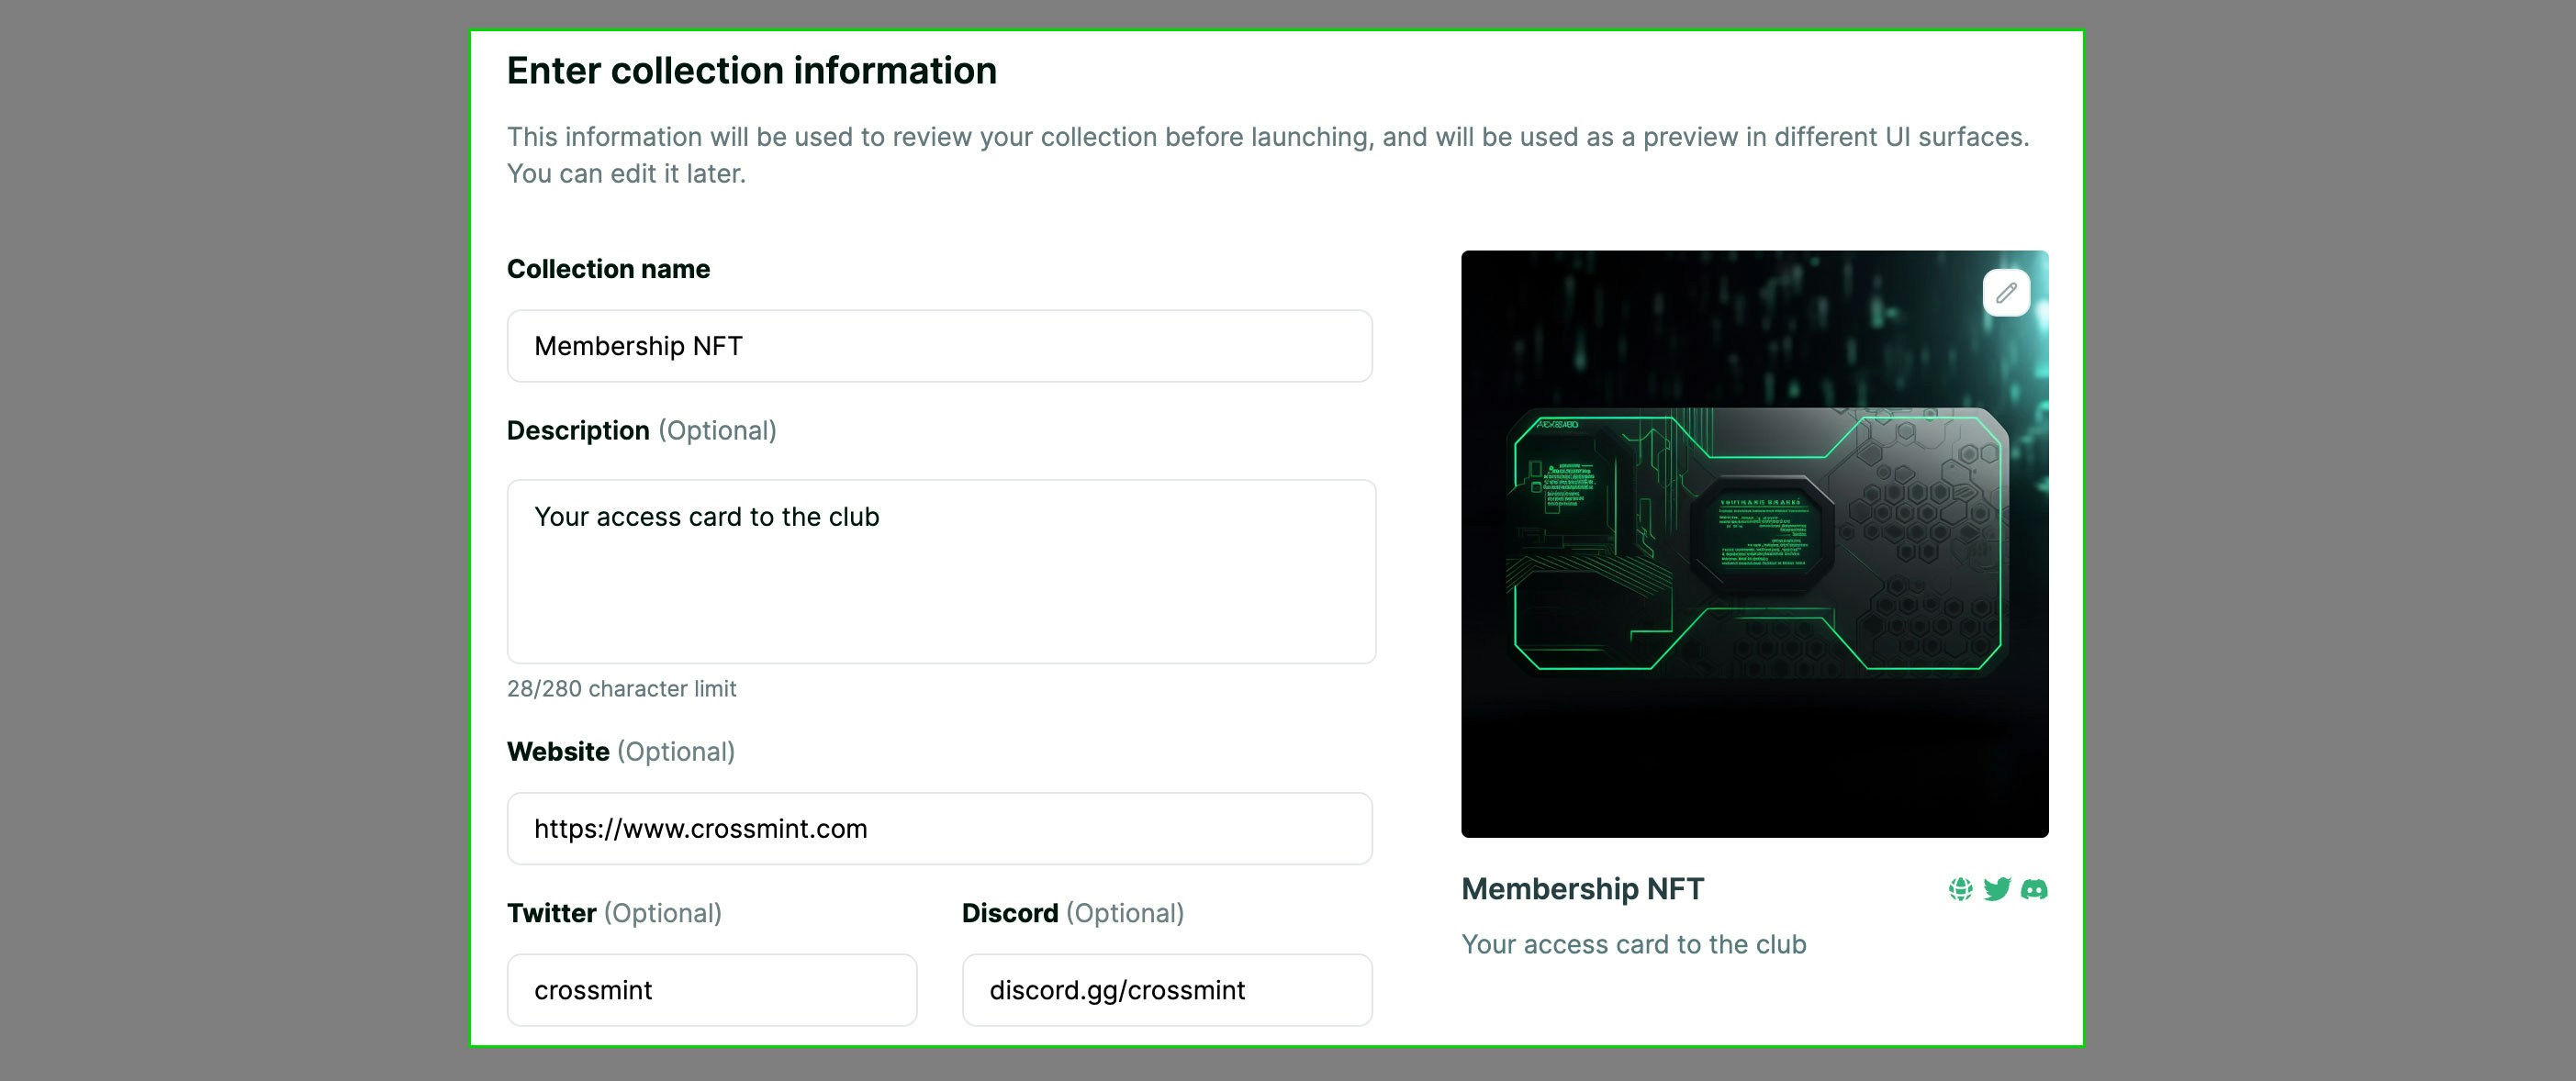
Enter Collection Information
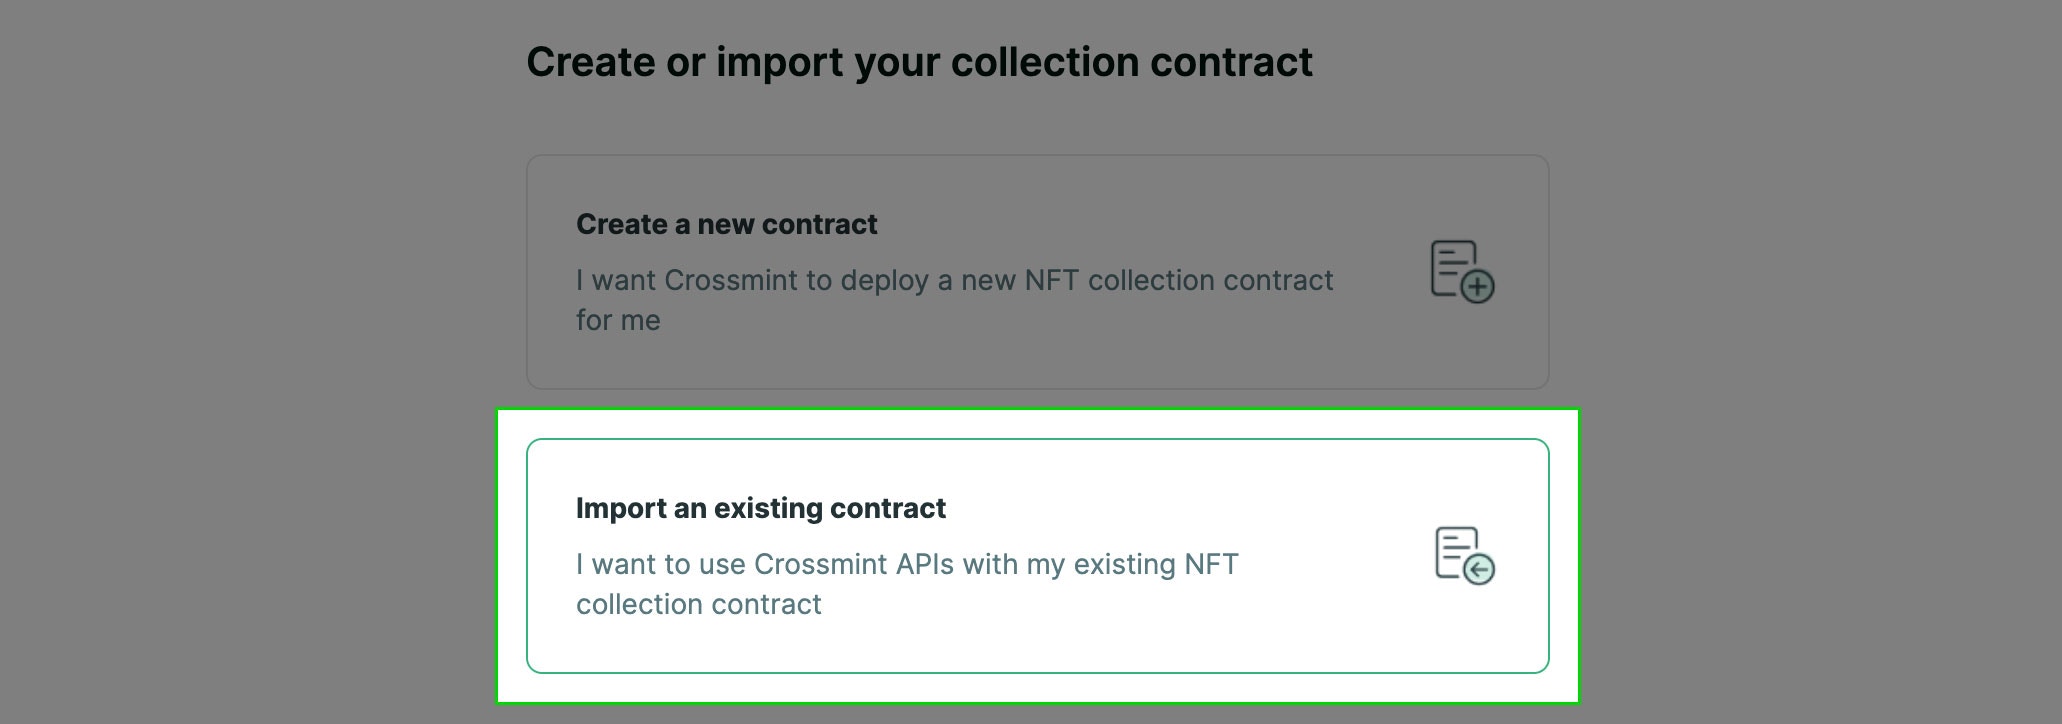
Select `Import an existing contract` option
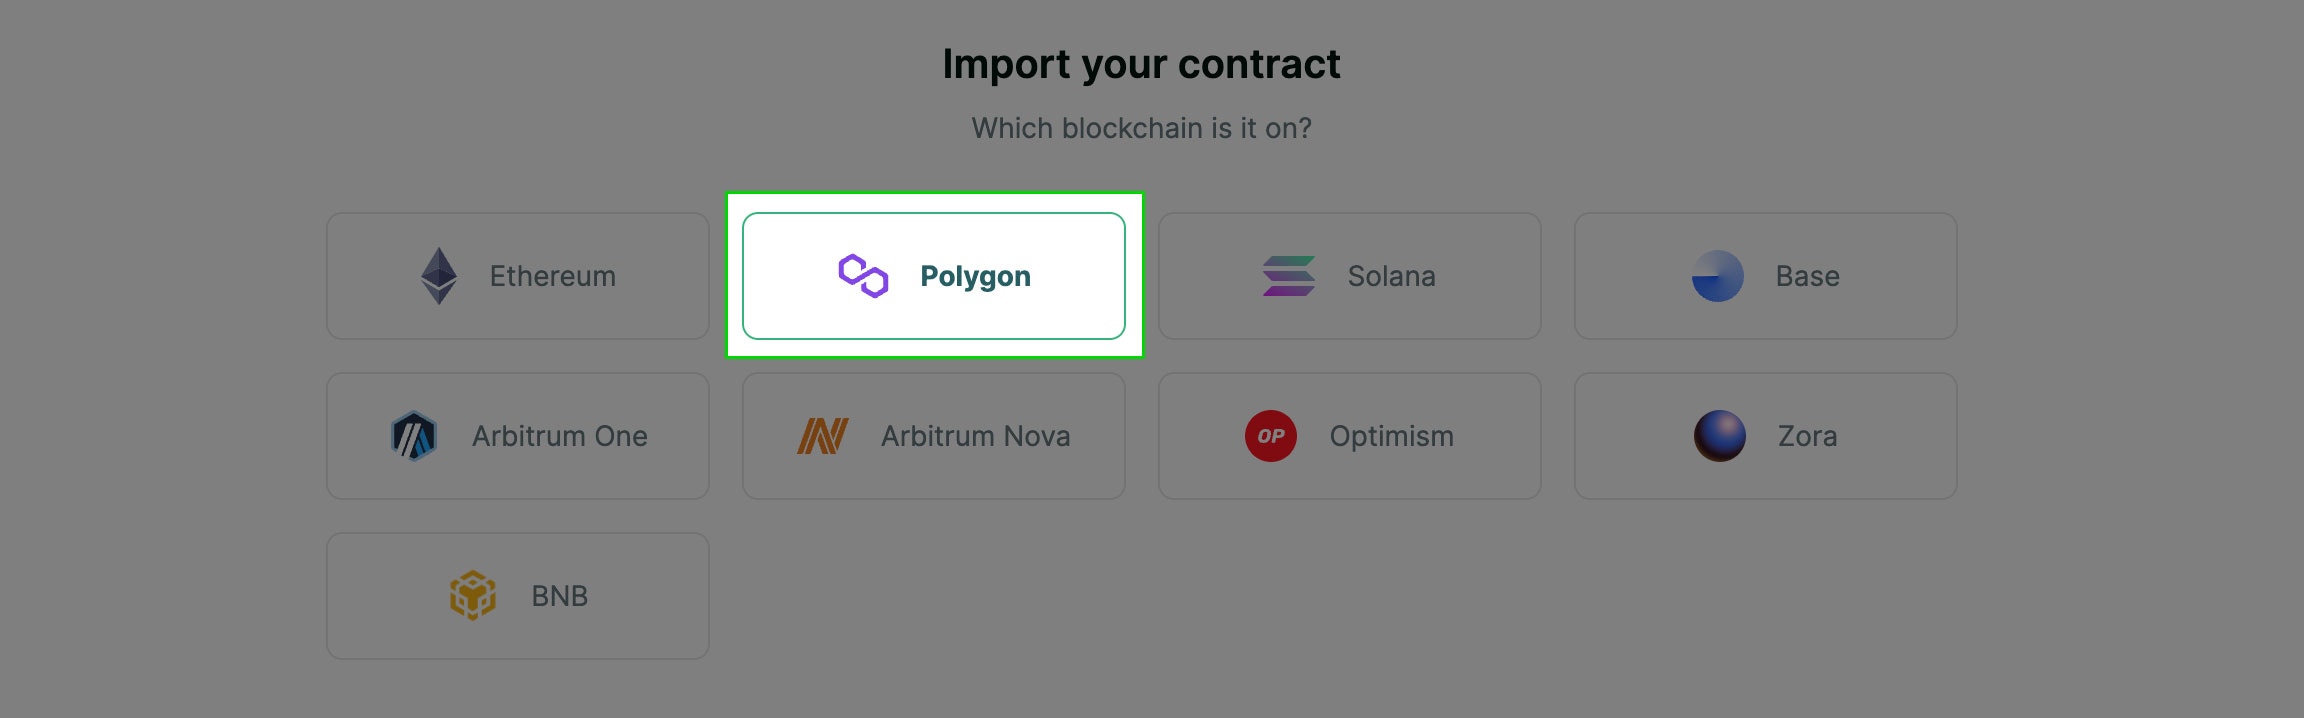
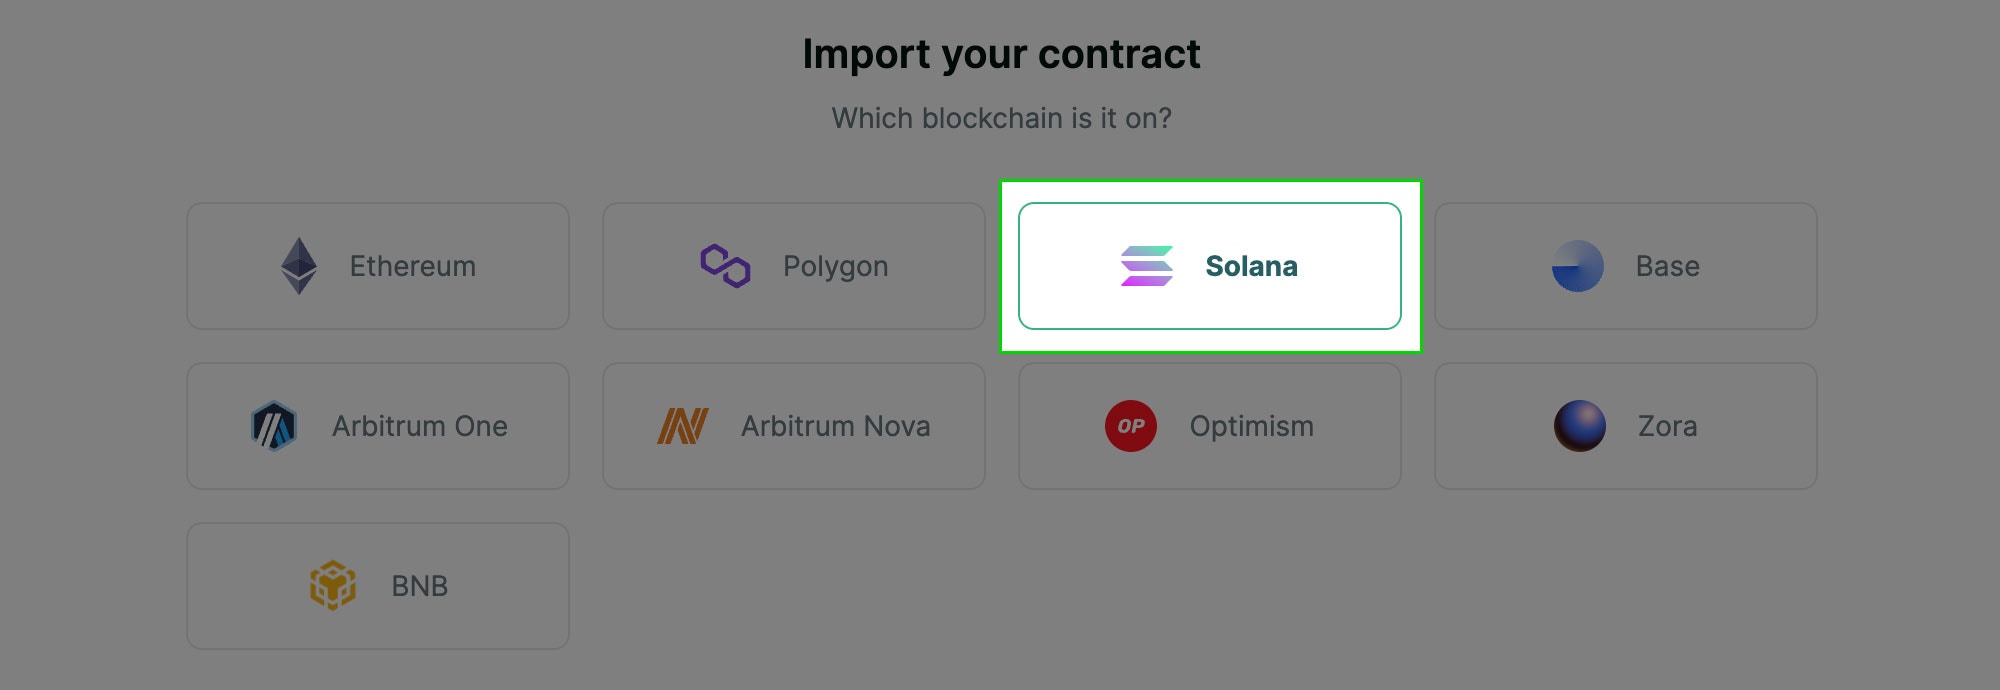
Select the Blockchain your contract is deployed on
EVM-Specific Steps
Complete the Common Steps above first, then continue with these EVM-specific steps:Pre-requisites
- Your contract must be ERC-721, ERC-721A, or ERC-1155 compliant.
- The minting function must allow minting directly to an address that is different from the one that invoked the contract. And it must contain at least one parameter that specifies that recipient address.
- A single address must be able to call the mint function unlimited times but does not need to be able to hold unlimited NFTs.
Contract Registration
You may register contracts manually from the console or via .My ABI wasn't automatically imported
My ABI wasn't automatically imported
.abi or .json extension.Inside this file, you’ll see JSON property named abi, which describes the functions in your smart contract. Here’s an example of a very simple abi file. Yours will likely have more function descriptions.abi and paste it into the Contract ABI text box in the developer console. The content you paste in should begin with [ and end with ].Specifying the remaining parameters
Specifying the remaining parameters
- Mint function
- Recipient address parameter name
- [Optional] Quantity of NFTs to mint parameter name
Using proxy contracts
Using proxy contracts
EVM Contract Import Steps
Step 5: Select `Import my own contract` option

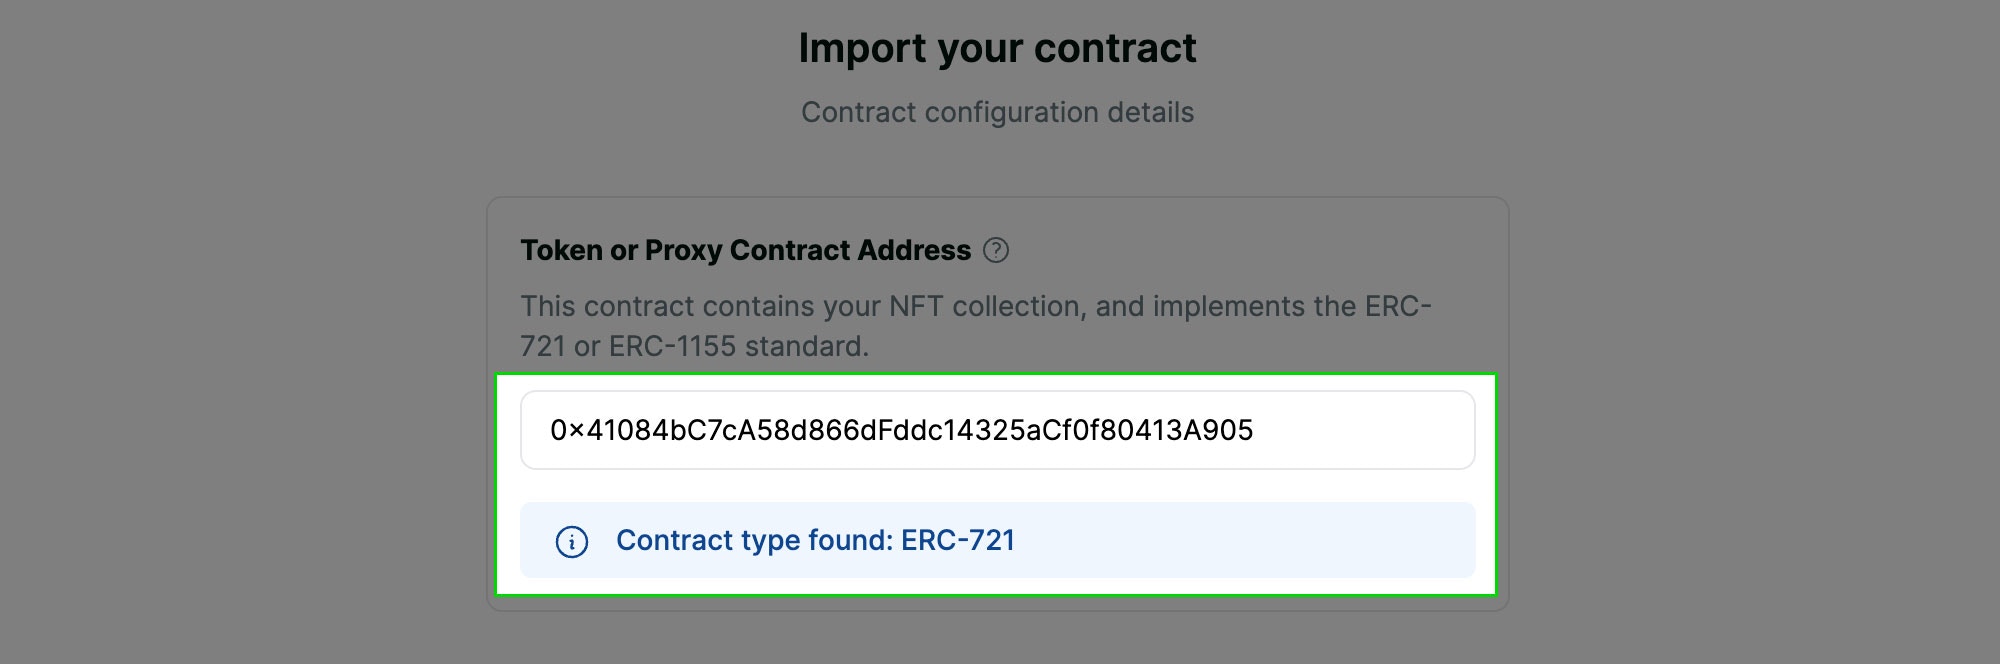
Step 6: Contract Address
Step 7: Proxy or Sales Contract (optional)

Step 8: Contract ABI

Step 9: Mint Function Currency

Step 10: Select Mint Function
payable. Change the currency selector to USDC to populate the mint function list with valid options.
Step 11: Parameter for recipient address
address. If you have multiple options here, ensure that you select the correct one. Doing this incorrectly will result in the purchased NFTs being sent to the wrong address and they likely will not be recoverable.
Step 12: Parameter for quantity
uint256. If you have multiple options here, ensure that you select the correct one. Doing this incorrectly will result in the NFT checkout tools not being able to properly mint the correct quantity of NFTs.
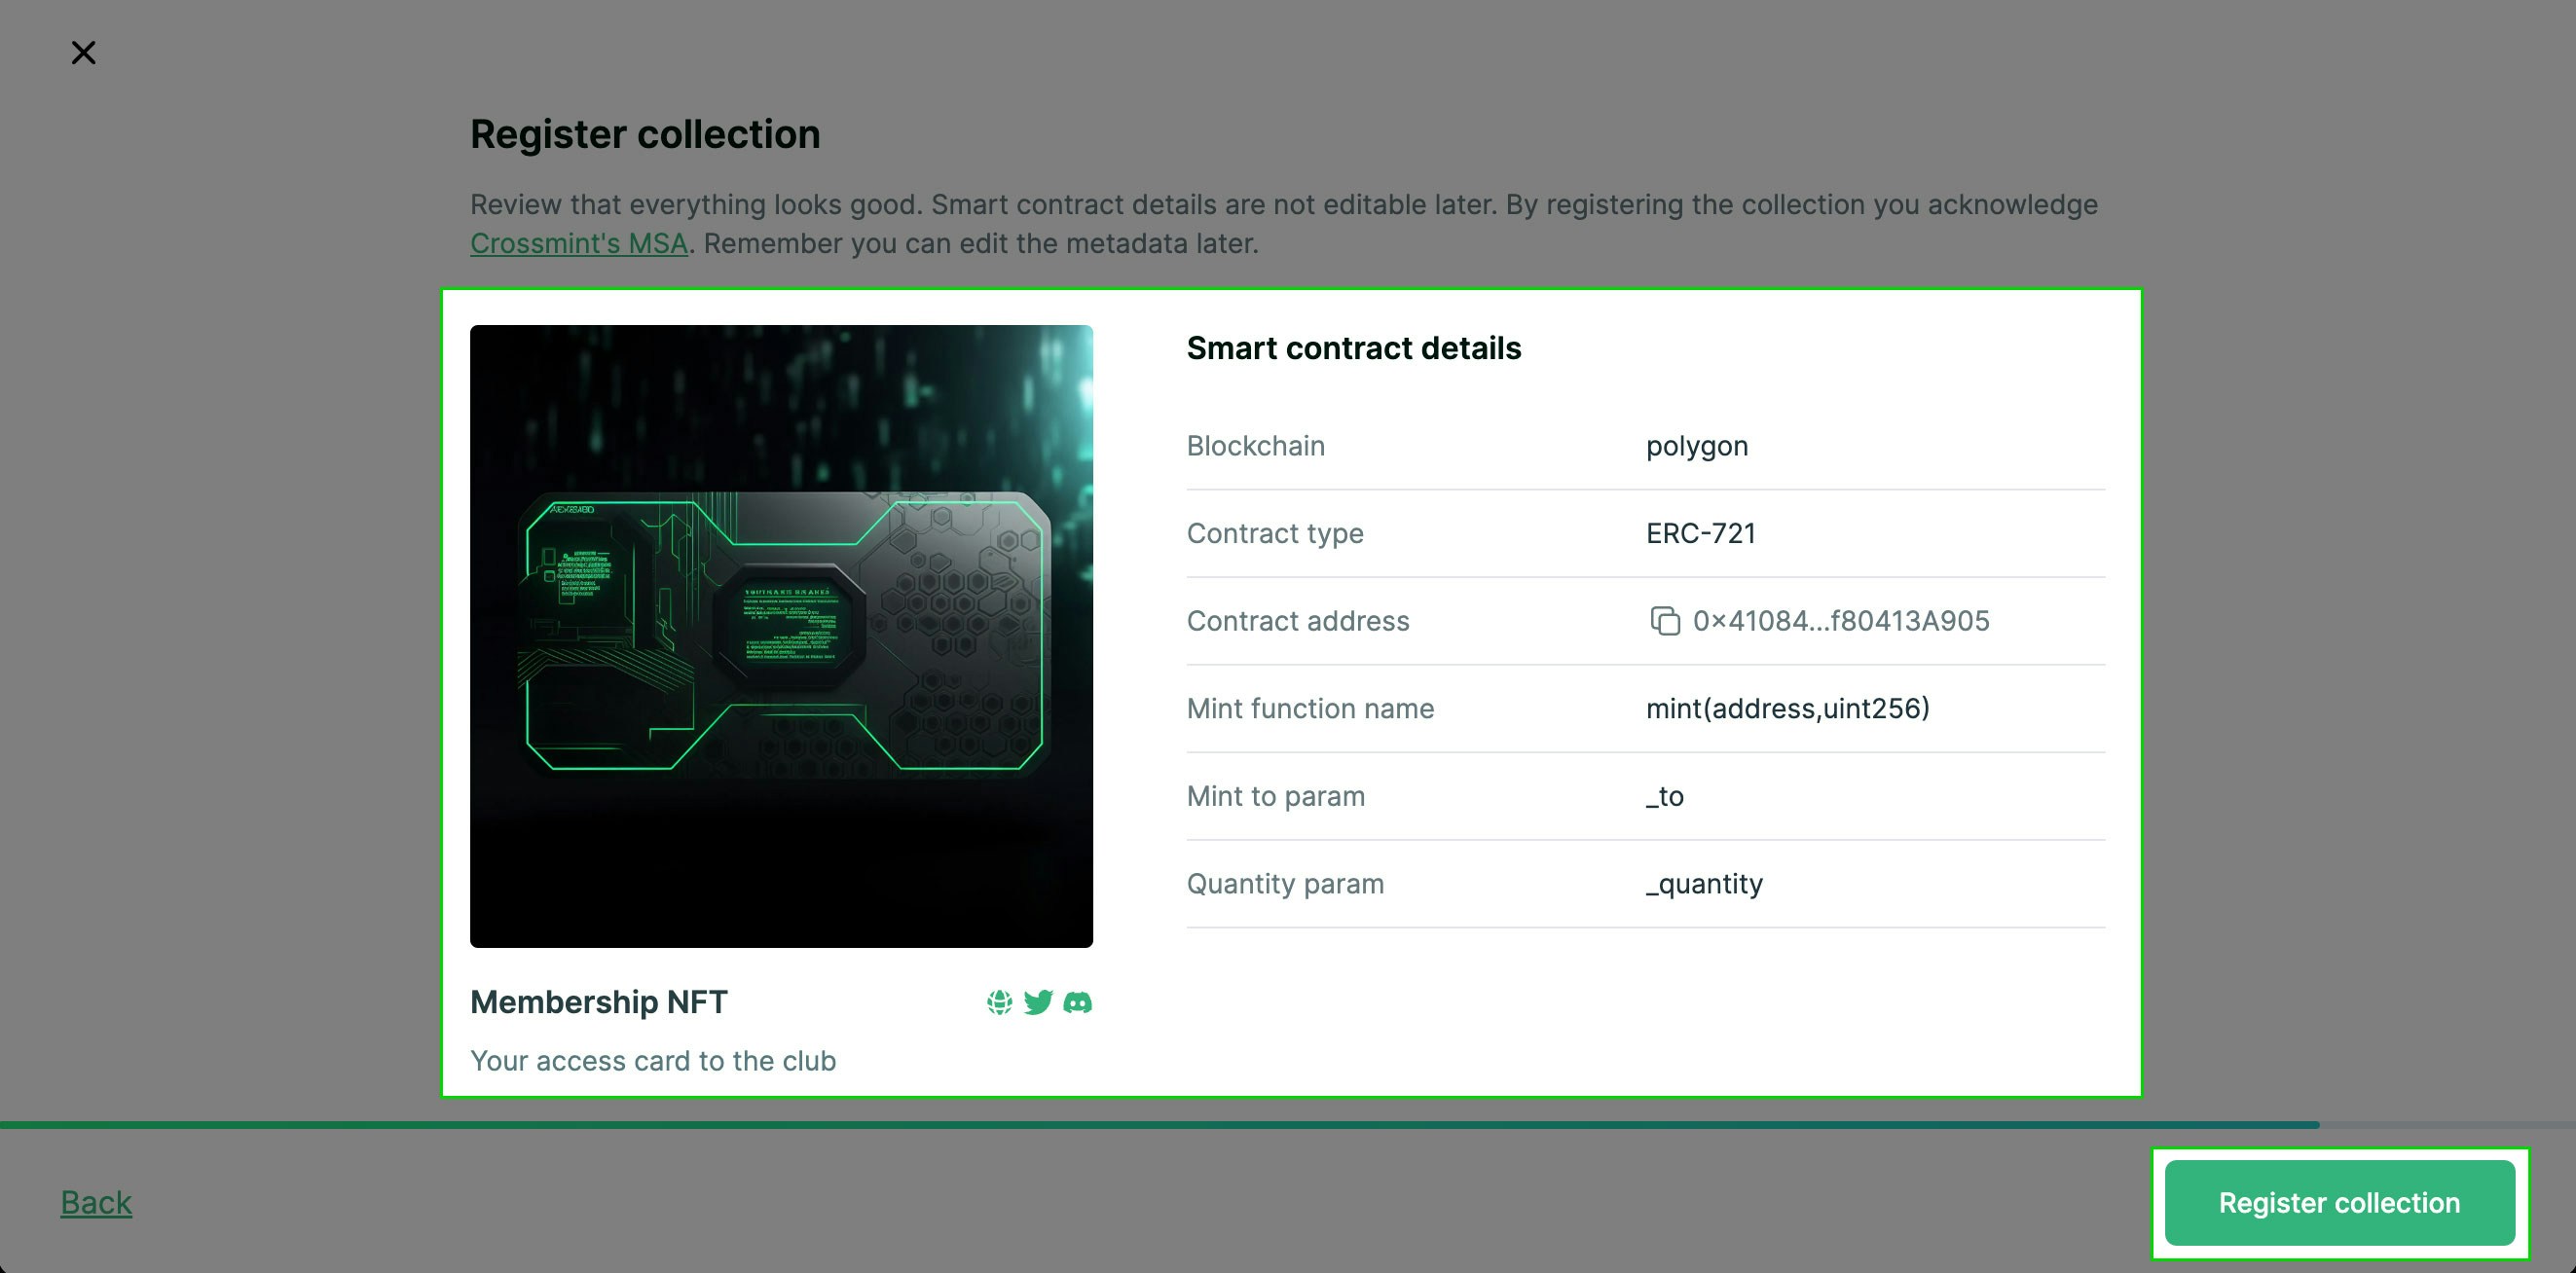
Step 13: Review details and click `Register collection` to complete
Solana-Specific Steps
Complete the Common Steps above first, then continue with these Solana-specific steps: Instant support for:- Primaries: Candy Machine v3, Metaplex Instant Sales, Magic Eden’s Launchpad
- Secondaries: Auction House, Tensor, Magic Eden API, Hyperspace
Solana Candy Machine Import
Crossmint supports Candy Machine v3. After completing the common steps above, continue with these Solana-specific steps:Step 5: Select Solana for the blockchain
Step 6: Choose candy machine version and enter candy machine ID
cache.json file in the folder where you deployed your Candy Machine.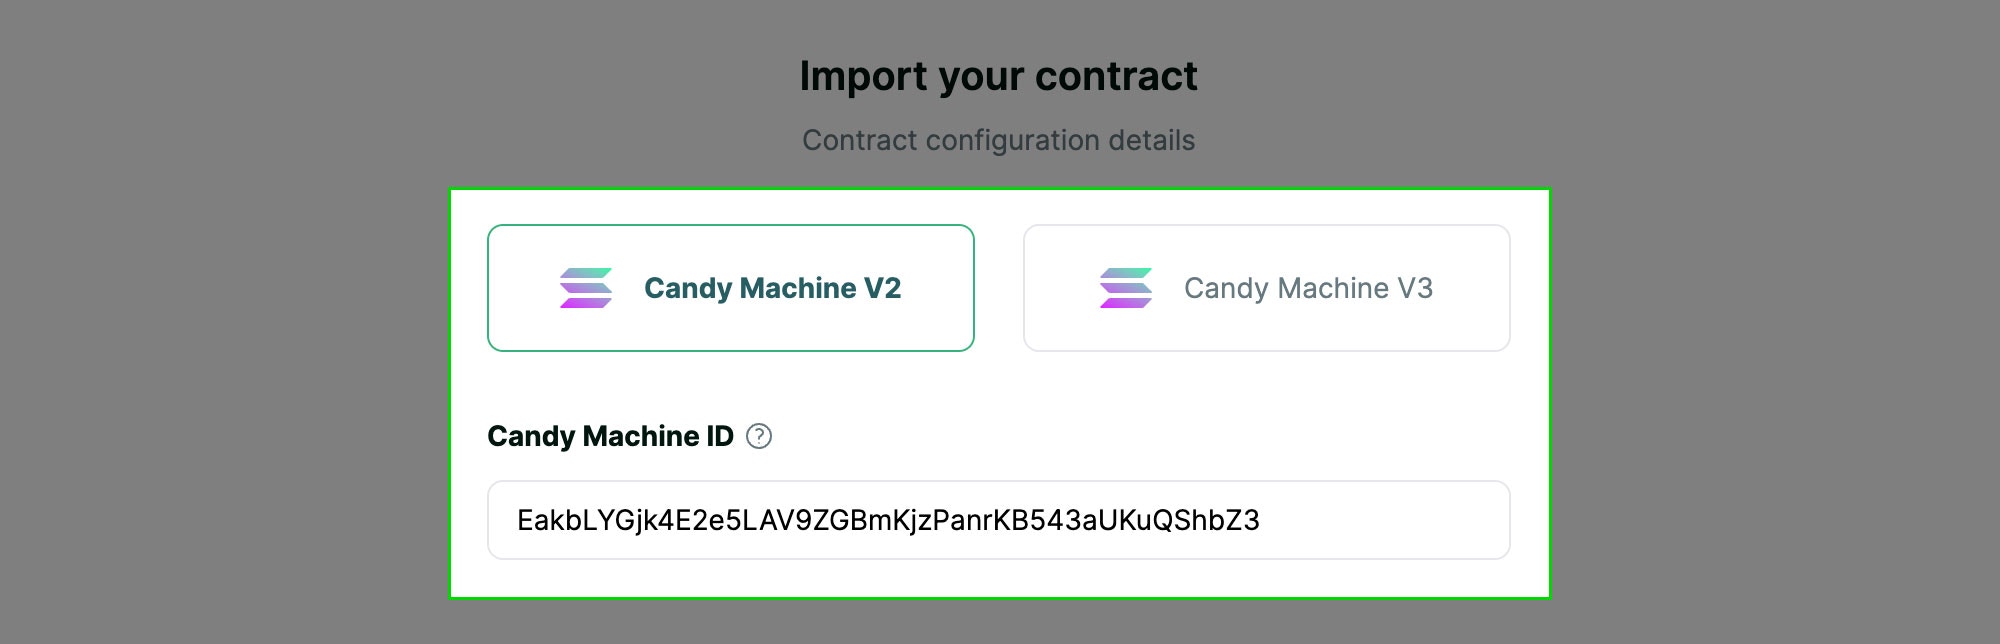
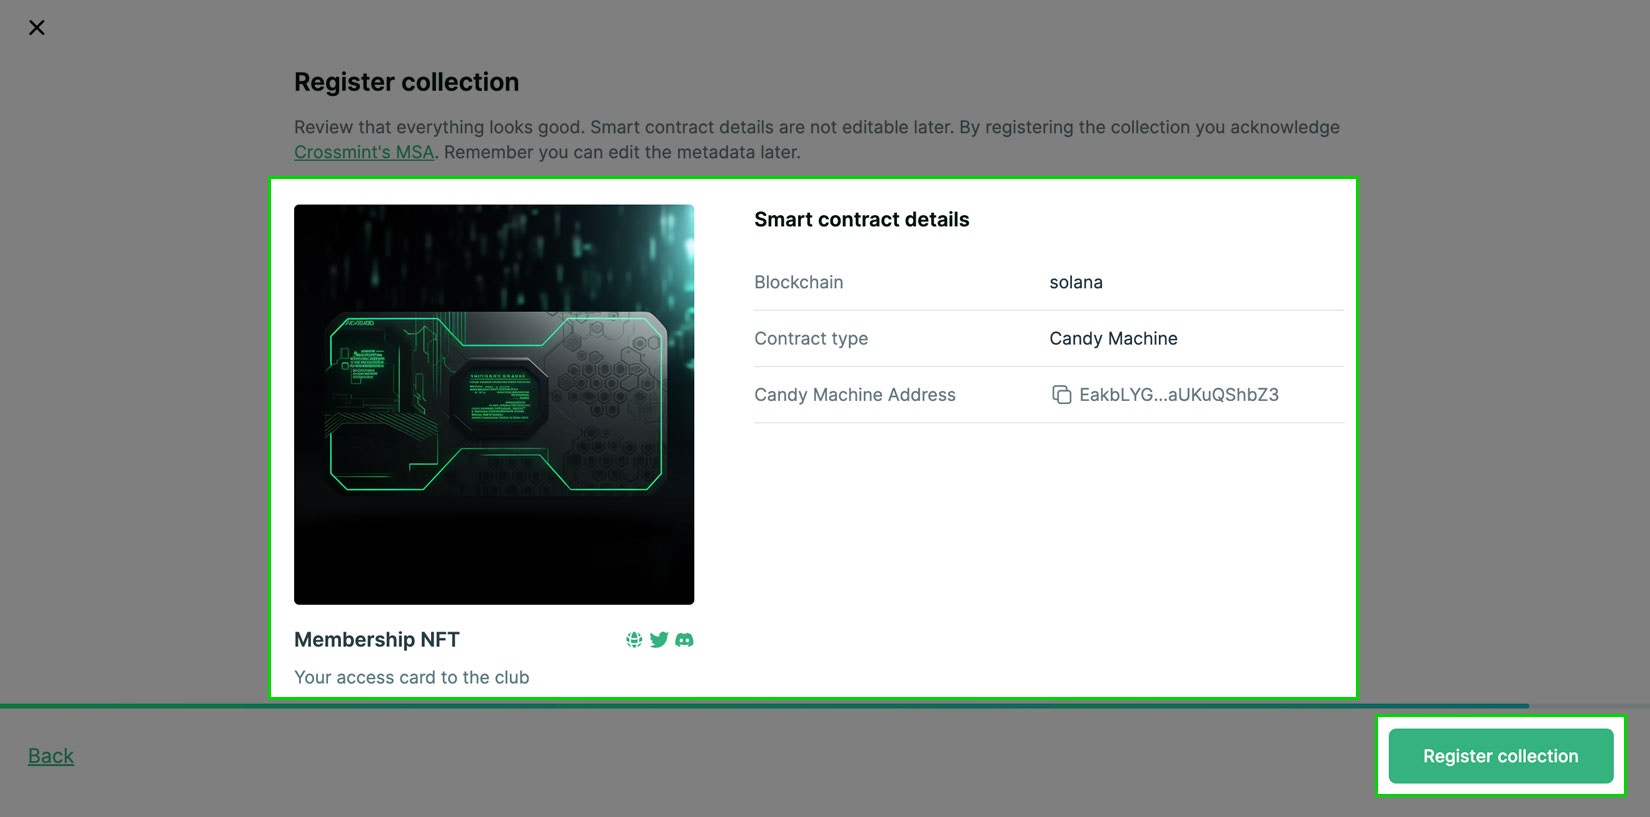
Step 7: Review details and click `Register collection` to complete
Next steps
Integrate the Crossmint SDK to start selling from your website. You can do this in three ways:- EASY: Use the Storefront to start accepting payments without writing any code.
- MID: Add a Hosted Checkout into your existing site or app, which opens a Crossmint branded checkout flow in a pop-up or new tab.
- ADVANCED: Craft an Embedded Checkout with custom UI into your website or app.
FAQs
What about Xion blockchain contracts?
What about Xion blockchain contracts?
What about other blockchains? (Aptos, Sui, etc.)
What about other blockchains? (Aptos, Sui, etc.)
Can I register my collection via API?
Can I register my collection via API?
POST https://staging.crossmint.com/api/v1-alpha1/collectionsRequired Headers:Content-Type: application/jsonx-api-key: <your-api-key>(requirescollections.createscope)
- chain:
"solana","ethereum","polygon","bsc" - contractType:
"candy-machine","erc-721","erc-1155","thirdweb-drop" - args: Contract-specific arguments (see examples above)
- For EVM:
contractAddress,abi,mintFunctionName,toParamName,contractType(required);quantityParamName,tokenContractAddress(optional)
In EVM, if you use a separate contract for minting than for token metadata, set the minting contract address ascontractAddress, and the token contract address astokenContractAddress.- For Solana:
candyMachineId(required)
- For EVM:
- metadata: Object with
title,description,imageUrl(all required), and optionalsocialobject withtwitter/discordlinks - ownership:
["self", "external"]. Set to"external"for imported contracts - category:
"art","gaming","music","loyalty","ticketing","charity","other" - scopes:
["payments:credit-card", "payments:cross-chain"]. Scopes are required whenownershipis"external"
collectionId and clientId are typically the same value and can be used interchangeably for checkout integration.