The headless checkout supports both server-side and client-side API keys. It’s important that you select the right key for your implementation.

When to use a server-side API key

  • Testing in the API Playground of the documentation
  • Testing with cURL requests or running scripts from your command line
  • Building applications that make API calls to your own backend, which then make the actual API call to Crossmint
The key consideration here is if the API request is coming from a server environment.

Server Side Example Code

The sample code below is from a NextJS application. The component.tsx file is simplified to only show the relevant logic. The client-side component sends an API request to the application’s backend, which then proxies the request to Crossmint. This is because the example is using a server-side API key, which requires making requests from a server environment.
const createOrder = async (orderInput: any) => {
    try {
        const res = await fetch(`/orders`, {
            method: "POST",
            headers: {
                "Content-Type": "application/json",
            },
            body: JSON.stringify(orderInput),
        });

        const order = await res.json();

        setOrder(order.order);
    } catch (e) {
        console.error(e);
        throw new Error("Failed to create order");
    }
};

When to use a client-side API key

  • Your application will be making API requests to Crossmint directly from a broswer
When you create client-side API keys you must add the authorized origins that can use the key. For example, in testing you’ll need to indicate http://localhost:3000 (or similar local dev URLs) as authorized origins, or the request will be denied.
There is one additional step when using a client-side API key in your application with headless checkout. The first call will be to create the order. The response will include a 
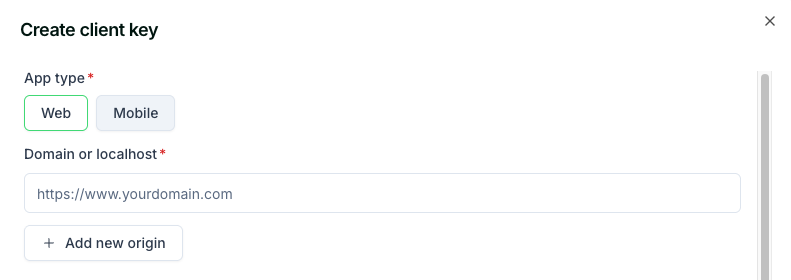
clientSecret property that you must persist in state and then pass as an additional header in subsequent API requests to the update-order or get-order routes.

Client Side Example Code

// note the end of try block where the clientSecret is saved to local state

const createOrder = async (orderInput: any) => {
    try {
        const res = await fetch(`https://staging.crossmint.com/api/2022-06-09/orders`, {
            method: "POST",
            headers: {
                "Content-Type": "application/json",
                "x-api-key": process.env.NEXT_PUBLIC_CLIENT_SIDE_KEY,
            },
            body: JSON.stringify(orderInput),
        });

        const order = await res.json();

        setOrder(order.order);
        setClientSecret(order.clientSecret);
    } catch (e) {
        console.error(e);
        throw new Error("Failed to create order");
    }
};

Mobile Applications

When using client-side API keys in mobile applications, you must include an additional x-app-identifier header in your requests. This header should contain the bundle identifier (iOS) or package name (Android) that you whitelisted when creating your API key.
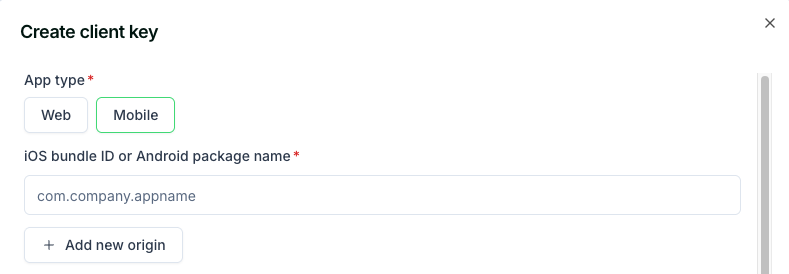
let headers = [
    "Content-Type": "application/json",
    "x-api-key": "your-client-side-api-key",
    "x-app-identifier": "com.yourcompany.yourapp", // iOS Bundle ID
    "authorization": clientSecret // When updating/reading orders
]
The x-app-identifier must match one of the mobile app identifiers you whitelisted when creating your client-side API key. For more information on setting up mobile app identifiers, see the Client-side API Keys documentation.