Introduction
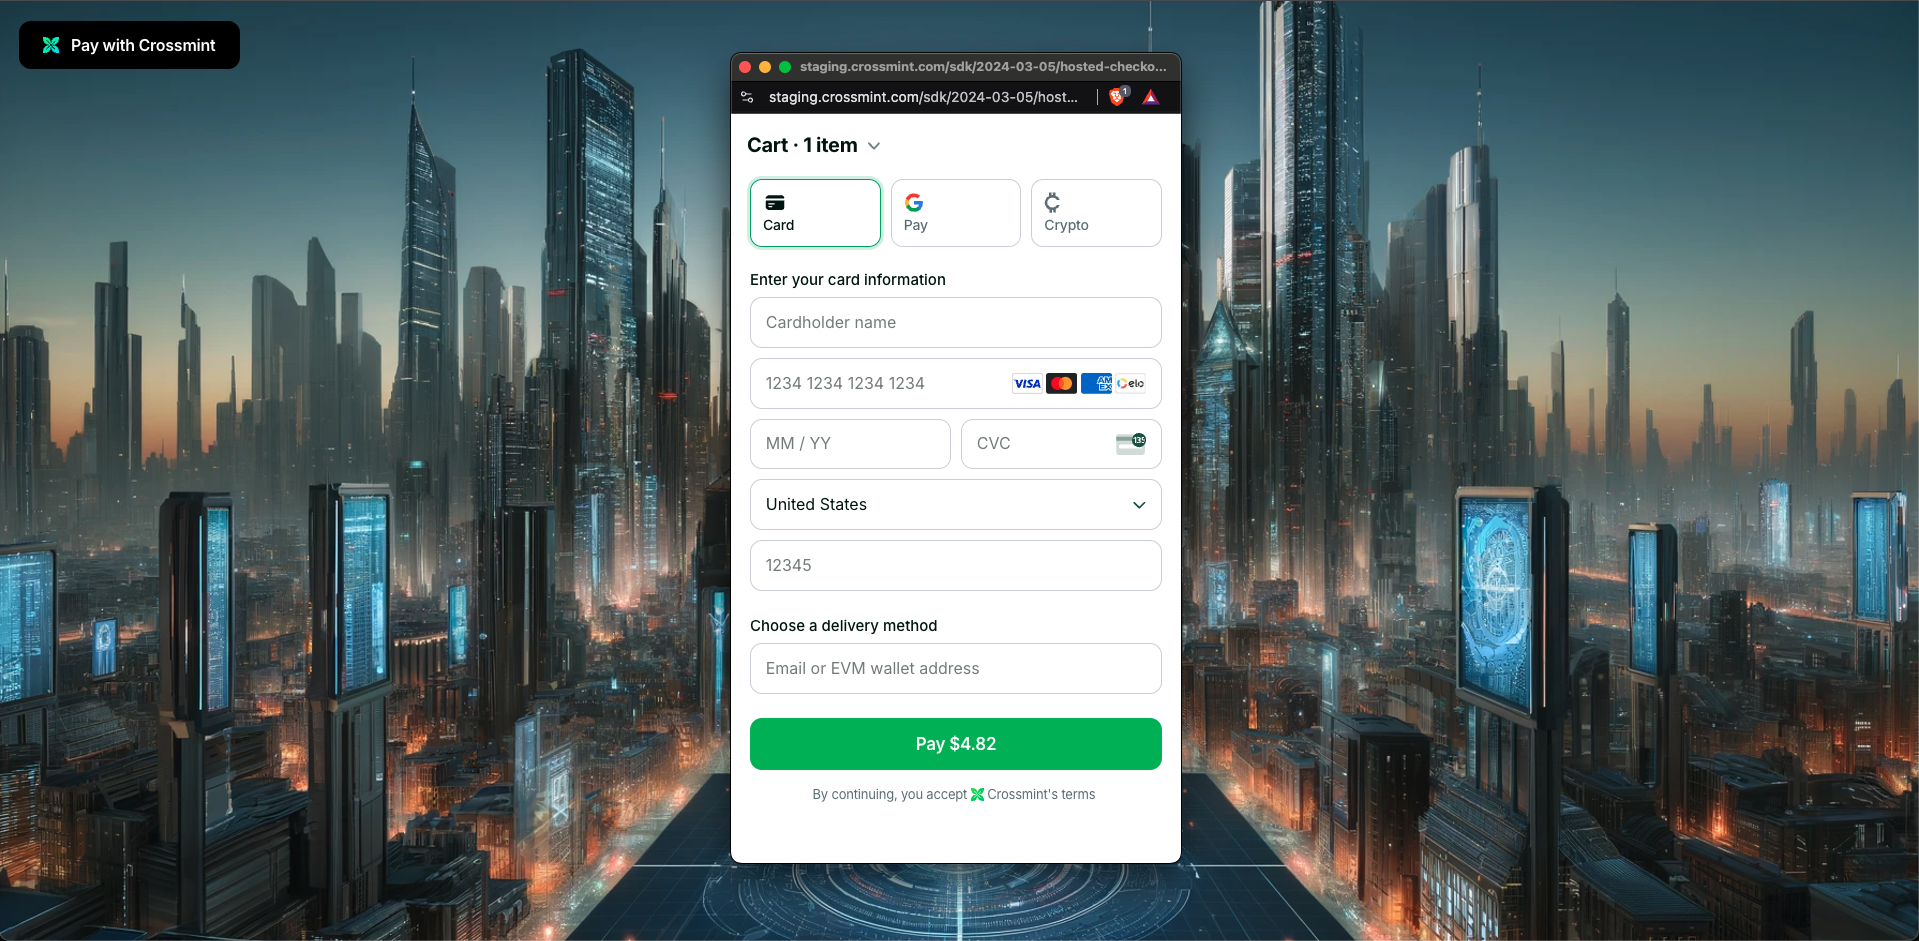
In this guide, you will create a web app with Next.js which allows customers to buy digital assets with credit card and crypto payments using Crossmint’s hosted checkout. We will add a button that opens a checkout hosted in a pop-up or new tab.From Crossmint
- Create a developer account in the Staging Console.
- Create a new collection or import yours into the console, and have your
collectionIdready.- Make sure you follow the maximum prices for collections set in staging outlined here.
- Create a client-side API key with the
orders.createscope enabled. More info on creating API keys here.
To integrate in production/mainnet, you'll also need to complete account and collection verification. More
information in the production launch guide.
For Marketplaces and Launchpads: You do not need to create a collection (skip Step 2).Simply use
tokenLocator instead of collectionLocator in the examples.
It is recommended to test tokenlocator in the production environment.See Marketplaces & Launchpads guide for more secondary-sale specific details.Integration Steps
This guide will start from scratch with an empty Next.js application. You'll install the required@crossmint/client-sdk-react-ui dependency and add the embedded checkout component. To get started:
Set up the Project
1
Create a new Next.js application
y and press Enter to proceed:2
Name your app `crossmint-embedded-checkout-demo` and accept the default options
3
Change into the directory created in previous steps
4
Install @crossmint/client-sdk-react-ui
5
Open the project in your preferred code editor
Basic Integration
This quickstart guide focuses on NFT Collections/Drops (primary sales), but Crossmint also supports marketplace integrations.1
Add environment variables
Create
.env.local in your project root:2
Create the checkout page
Create
/src/app/page.tsx with:3
Run your app
Navigate to the directory your package.json is to run the appVisit website (e.g
http://localhost:3000) to see your checkout!(Optional) Advanced Integration
Need purchase tracking, multiple line items, or more customization? Here’s a complete setup with additional features:- For NFT Collections/Drops
- For Marketplaces
This advanced example showcases: - Multiple NFTs in one checkout - Purchase status tracking - Preferred payment
methods and currencies - Email-based digital asset delivery - Language settings Learn more in our guides: - Payment
Methods - Multi-purchases
Testing Your Integration
This demo uses the staging environment:- Use test credit cards for payments
- Get test USDC from our faucet
- Check price limits for staging
All Set!
You’ve successfully integrated a hosted checkout with credit card and crypto payment methods!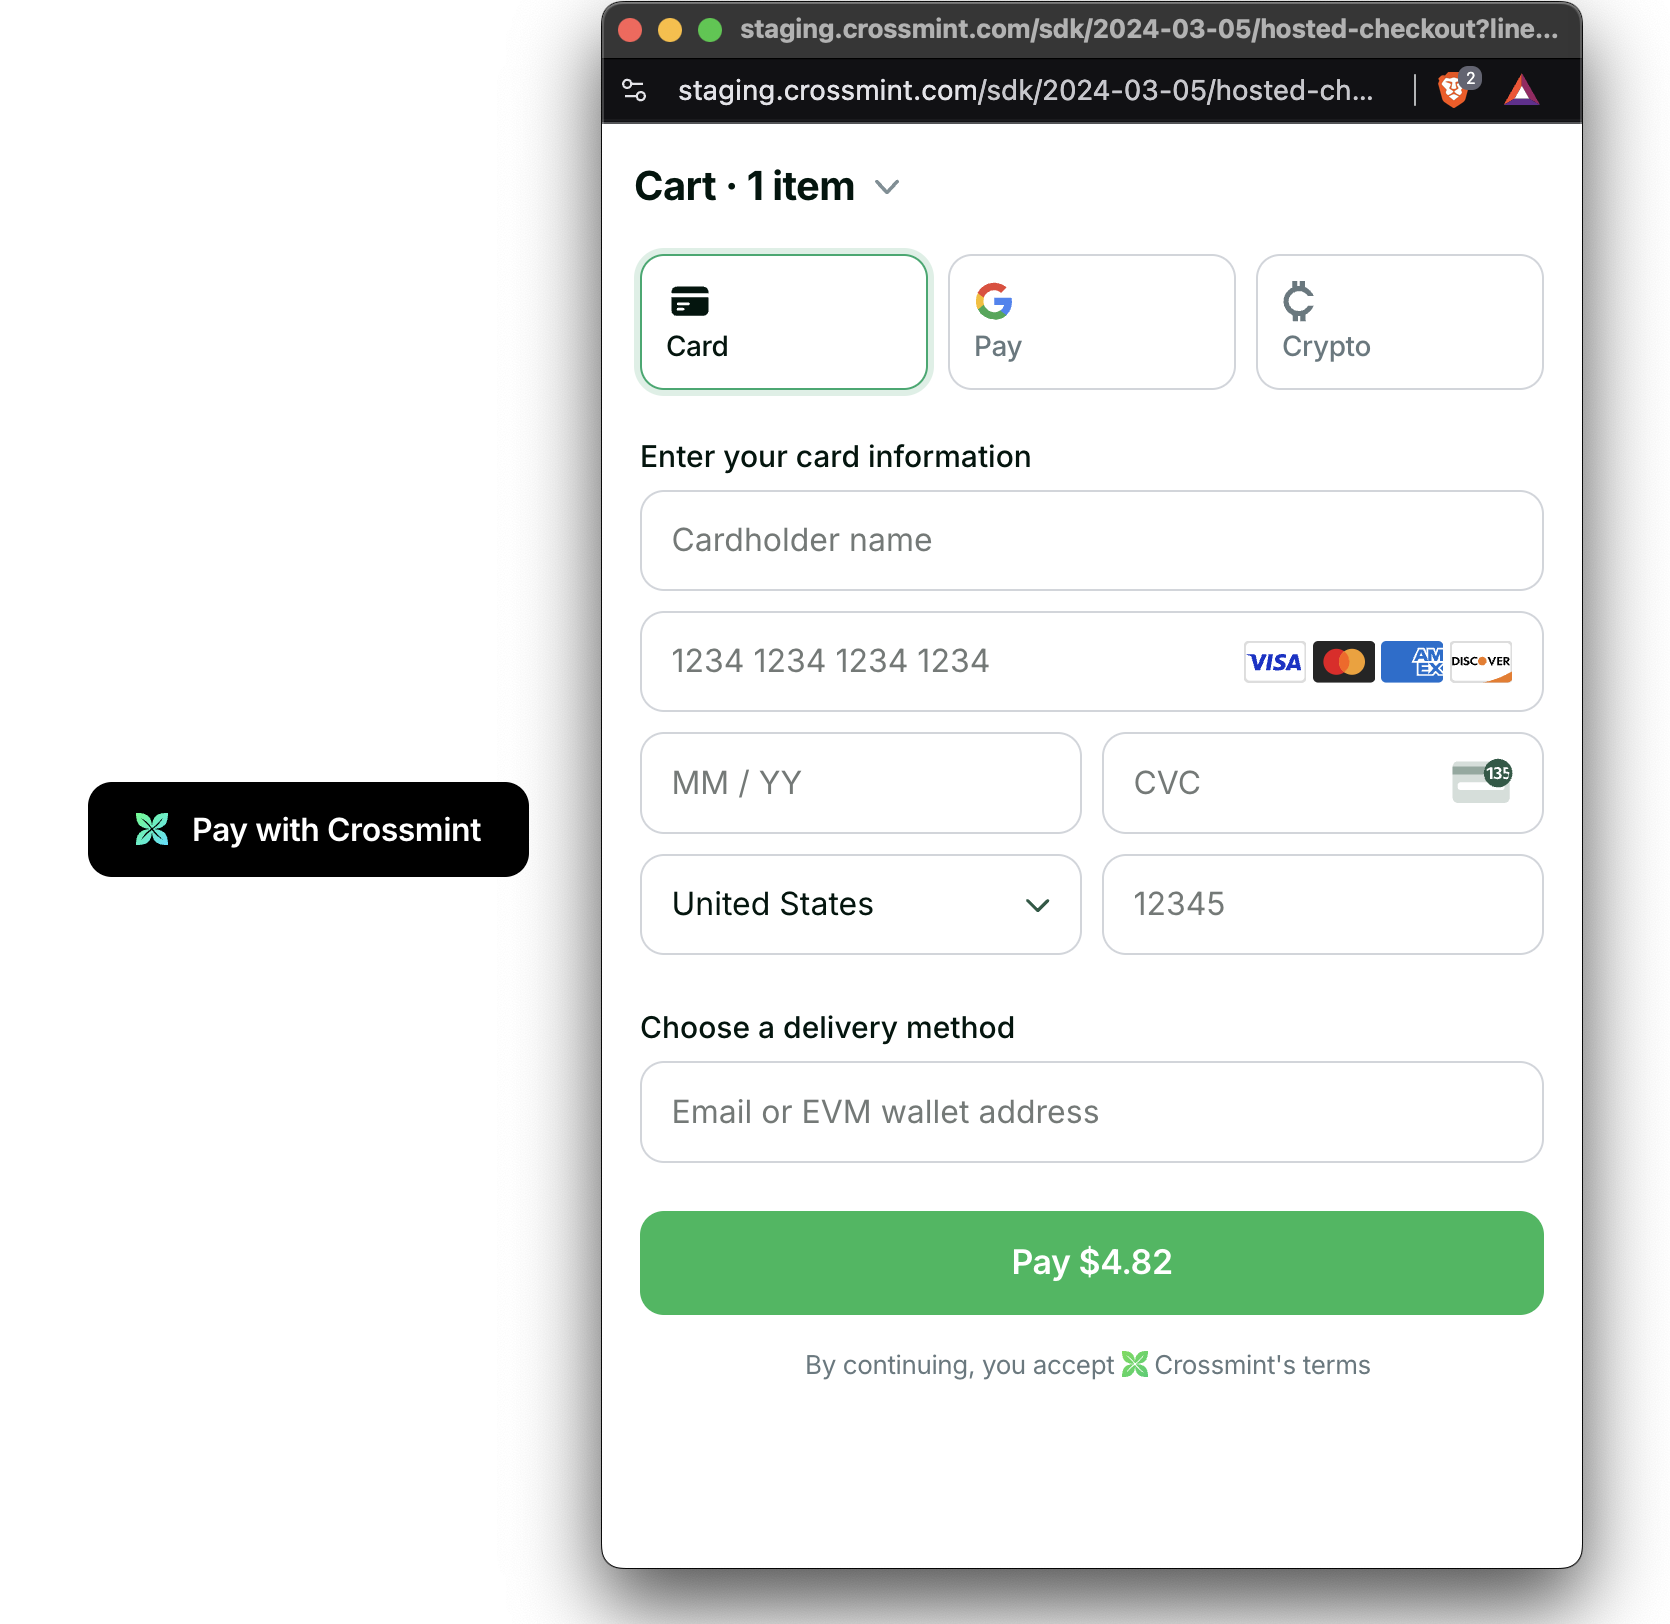
Remember this demo is built on staging, so the digital assets will show up on the testnets. To launch on production,
check the production launch checklist. You will need to contact
Sales to enable the embedded checkout on production.
Next Steps
Customize the UI and Behavior Further
UI Customization
Learn how to customize the look and feel of the checkout button
Payment Methods
Configure available payment options for your users
React Hooks
Use React hooks to build custom checkout experiences