Before you start Set up your project and get an API key.
Onramp Embedded Quickstart See a full working example.
You can start testing Onramp in staging. Once you are ready to go live, reach out to
sales to enable the feature in production Crossmint’s Checkout API lets you build a seamless onramp so users can buy crypto with a credit card.
In this guide, you’ll learn how to:
Create a Crossmint order using a server action
Use Crossmint’s embedded checkout component to handle KYC, payment, and delivery automatically
1. Prerequisites
Install the SDK
Install the Crossmint client SDK: npm i @crossmint/client-sdk-react-ui
Add environment variables
Add environment variables to your .env.local: NEXT_PUBLIC_CROSSMINT_CLIENT_SIDE_API_KEY = "_YOUR_CLIENT_API_KEY_" CROSSMINT_SERVER_SIDE_API_KEY = "_YOUR_SERVER_API_KEY_"
2. Create the Server Action If you want to enable onramp orders to external wallets (EOAs or third-party smart wallets) instead of Crossmint wallets, see the Onramp to External Wallets guide before proceeding. Create a server action that will create orders via the Crossmint API:
app/actions/createOrder.ts
"use server" ; const USDC_TOKEN_LOCATORS = { solanaDevnet: "solana:4zMMC9srt5Ri5X14GAgXhaHii3GnPAEERYPJgZJDncDU" , baseSepolia: "base-sepolia:0x036CbD53842c5426634e7929541eC2318f3dCF7e" , stellarTestnet: "stellar:CBIELTK6YBZJU5UP2WWQEUCYKLPU6AUNZ2BQ4WWFEIE3USCIHMXQDAMA" , }; interface CreateOrderParams { walletAddress : string ; receiptEmail : string ; amount : string ; chain : "solanaDevnet" | "baseSepolia" | "stellarTestnet" ; } export async function createOrder ({ walletAddress , receiptEmail , amount , chain } : CreateOrderParams ) { const serverApiKey = process . env . CROSSMINT_SERVER_SIDE_API_KEY ; if ( serverApiKey == null ) { throw new Error ( "CROSSMINT_SERVER_SIDE_API_KEY is not set" ); } const response = await fetch ( "https://staging.crossmint.com/api/2022-06-09/orders" , { method: "POST" , headers: { "Content-Type" : "application/json" , "x-api-key" : serverApiKey , }, body: JSON . stringify ({ lineItems: [ { tokenLocator: USDC_TOKEN_LOCATORS [ chain ], executionParameters: { mode: "exact-in" , amount , }, }, ], payment: { method: "card" , receiptEmail , }, recipient: { walletAddress , }, }), }); if ( ! response . ok ) { const error = await response . json (); throw new Error ( error . message || "Failed to create order" ); } return response . json (); }
3. Build the Onramp Component Create a client component that handles the order creation and displays the embedded checkout:
app/components/OnrampCheckout.tsx
"use client" ; import { useState } from "react" ; import { CrossmintProvider , CrossmintEmbeddedCheckout } from "@crossmint/client-sdk-react-ui" ; import { createOrder } from "../actions/createOrder" ; const CLIENT_API_KEY = process . env . NEXT_PUBLIC_CROSSMINT_CLIENT_SIDE_API_KEY || "" ; // Destination wallets for testing transfers on each network const TEST_WALLETS = { solanaDevnet: "<destination_wallet_address>" , baseSepolia: "<destination_wallet_address>" , stellarTestnet: "<destination_wallet_address>" , }; export default function OnrampCheckout () { const [ order , setOrder ] = useState <{ orderId : string ; clientSecret : string } | null >( null ); const [ chain , setChain ] = useState < "solanaDevnet" | "baseSepolia" | "stellarTestnet" >( "solanaDevnet" ); const [ email , setEmail ] = useState ( "user@example.com" ); const [ wallet , setWallet ] = useState ( TEST_WALLETS . solanaDevnet ); const [ amount , setAmount ] = useState ( "5" ); const [ isLoading , setIsLoading ] = useState ( false ); function handleChainChange ( newChain : "solanaDevnet" | "baseSepolia" | "stellarTestnet" ) { setChain ( newChain ); setWallet ( TEST_WALLETS [ newChain ]); } async function handleSubmit () { setIsLoading ( true ); try { const result = await createOrder ({ walletAddress: wallet , receiptEmail: email , amount , chain }); setOrder ({ orderId: result . order . orderId , clientSecret: result . clientSecret }); } catch ( error ) { console . error ( "Failed to create order:" , error ); } finally { setIsLoading ( false ); } } if ( order != null ) { return ( < CrossmintProvider apiKey = { CLIENT_API_KEY } > < div className = "max-w-[450px] w-full mx-auto p-6 rounded-xl bg-white" > < CrossmintEmbeddedCheckout orderId = { order . orderId } clientSecret = { order . clientSecret } payment = { { receiptEmail: email , crypto: { enabled: false }, fiat: { enabled: true }, defaultMethod: "fiat" , } } /> </ div > </ CrossmintProvider > ); } return ( < div className = "max-w-md mx-auto p-8 rounded-xl border border-gray-300 bg-white shadow-sm space-y-6" > < h2 className = "text-2xl font-semibold text-gray-900" > Buy USDC </ h2 > < div className = "space-y-2" > < label className = "text-sm font-medium text-gray-900" > Network </ label > < div className = "grid grid-cols-3 gap-2" > < button type = "button" onClick = { () => handleChainChange ( "solanaDevnet" ) } className = { `p-3 rounded-lg border text-sm font-medium transition-colors ${ chain === "solanaDevnet" ? "bg-green-600 text-white border-green-600" : "bg-white text-gray-900 border-gray-300 hover:bg-gray-100" } ` } > Solana Devnet </ button > < button type = "button" onClick = { () => handleChainChange ( "baseSepolia" ) } className = { `p-3 rounded-lg border text-sm font-medium transition-colors ${ chain === "baseSepolia" ? "bg-blue-600 text-white border-blue-600" : "bg-white text-gray-900 border-gray-300 hover:bg-gray-100" } ` } > Base Sepolia </ button > < button type = "button" onClick = { () => handleChainChange ( "stellarTestnet" ) } className = { `p-3 rounded-lg border text-sm font-medium transition-colors ${ chain === "stellarTestnet" ? "bg-purple-600 text-white border-purple-600" : "bg-white text-gray-900 border-gray-300 hover:bg-gray-100" } ` } > Stellar Testnet </ button > </ div > </ div > < div className = "space-y-2" > < label className = "text-sm font-medium text-gray-900" > Email </ label > < input type = "email" value = { email } onChange = { ( e ) => setEmail ( e . target . value ) } className = "w-full px-3 py-2 rounded-lg border border-gray-300 bg-white text-gray-900 text-sm" /> </ div > < div className = "space-y-2" > < label className = "text-sm font-medium text-gray-900" > Recipient Wallet </ label > < input type = "text" value = { wallet } onChange = { ( e ) => setWallet ( e . target . value ) } className = "w-full px-3 py-2 rounded-lg border border-gray-300 bg-white text-gray-900 text-sm font-mono" /> </ div > < div className = "space-y-2" > < label className = "text-sm font-medium text-gray-900" > Amount (USD) </ label > < input type = "number" value = { amount } onChange = { ( e ) => setAmount ( e . target . value ) } className = "w-full px-3 py-2 rounded-lg border border-gray-300 bg-white text-gray-900 text-sm" /> </ div > < button onClick = { handleSubmit } disabled = { isLoading || ! email || ! wallet } className = "w-full py-3 rounded-lg bg-black text-white font-medium hover:bg-gray-800 disabled:opacity-50 transition-colors" > { isLoading ? "Creating Order..." : "Continue to Checkout" } </ button > </ div > ); }
4. Add the Component to Your Page Import and render the OnrampCheckout component in your page:
import OnrampCheckout from "./components/OnrampCheckout" ; export default function Home () { return ( < main className = "min-h-screen flex items-center justify-center" > < OnrampCheckout /> </ main > ); }
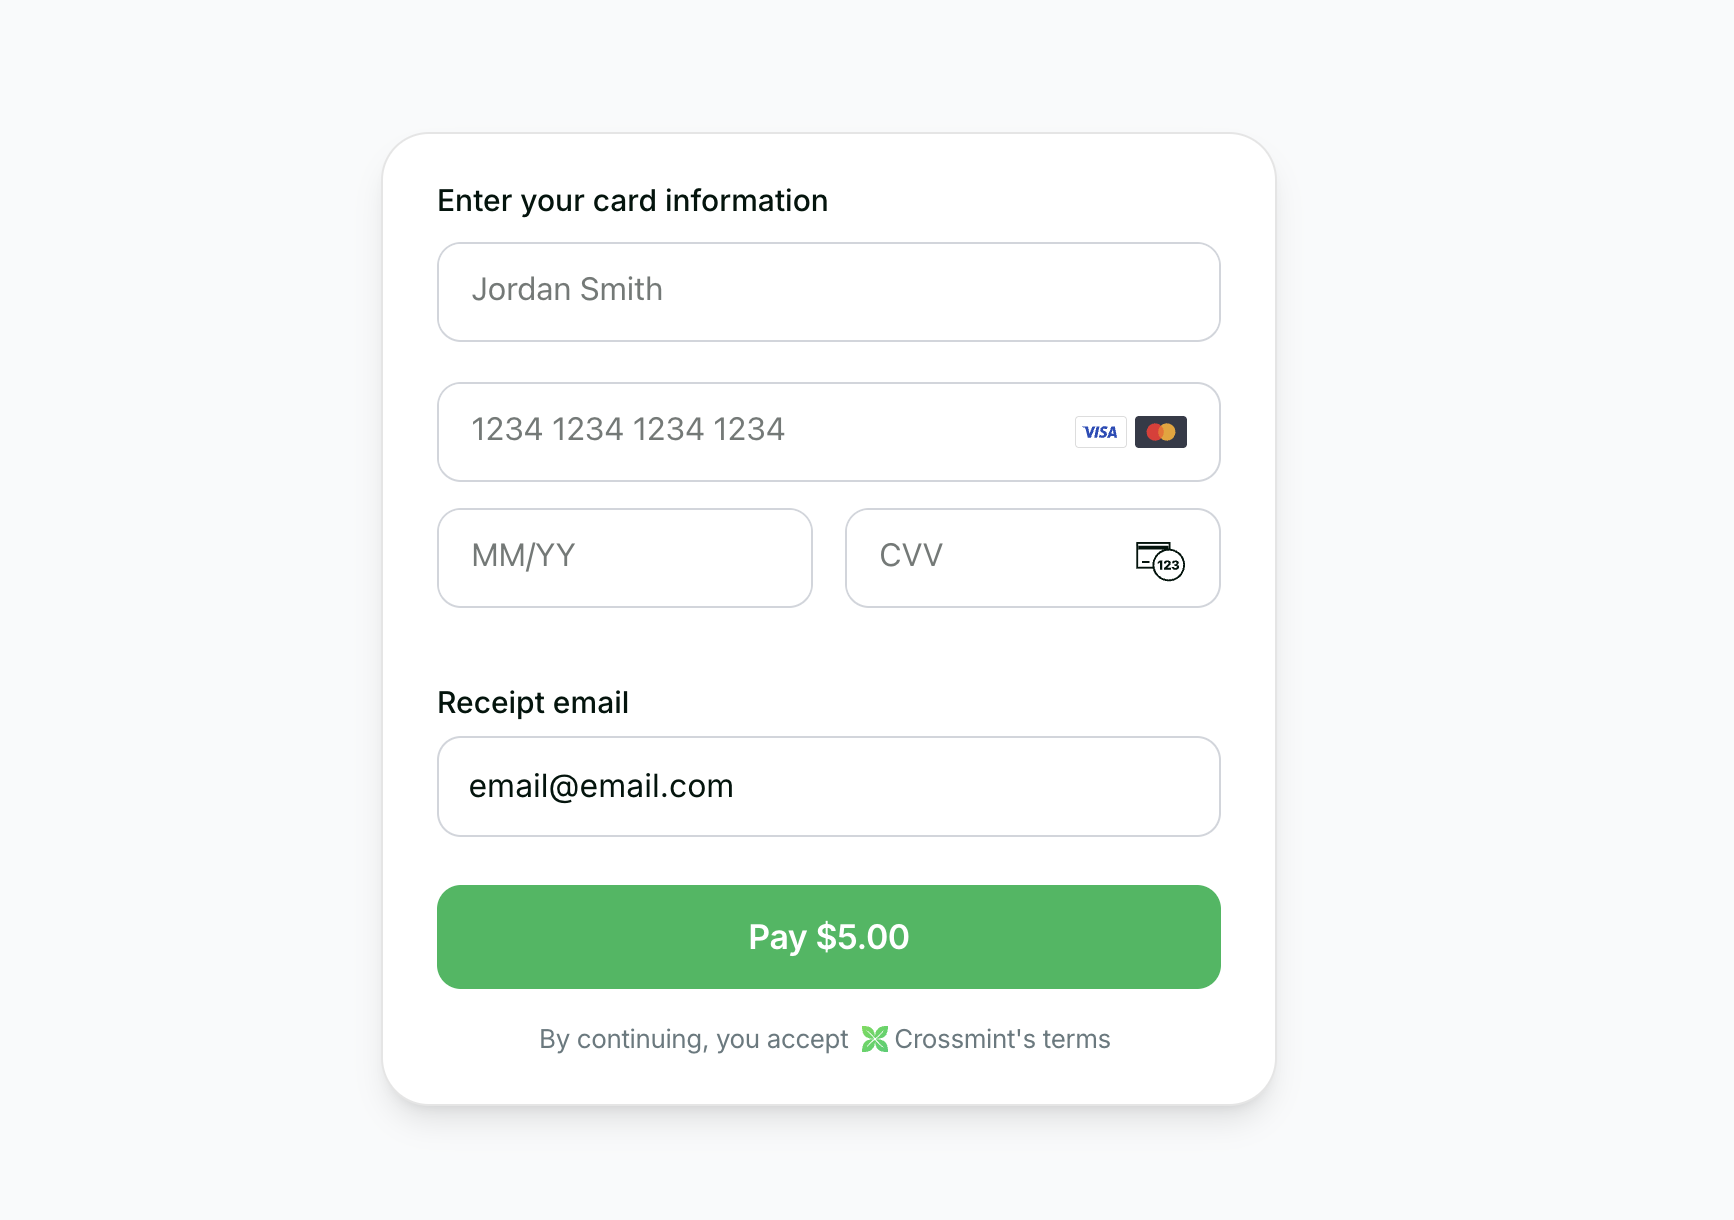
That’s it! When users fill in their details and click “Continue to Checkout”, the server action creates an order and the embedded checkout component handles KYC, payment, and delivery automatically.
Testing: Use the test credit card number 4242 4242 4242 4242 with any future expiration date and any 3-digit CVC.
5. Transaction Completion Upon successful payment:
KYC Verification
The embedded checkout component handles all the complexity of KYC verification automatically.
Token Delivery
The purchased tokens (minus fees) are sent directly to the user's wallet.
6. Next Steps